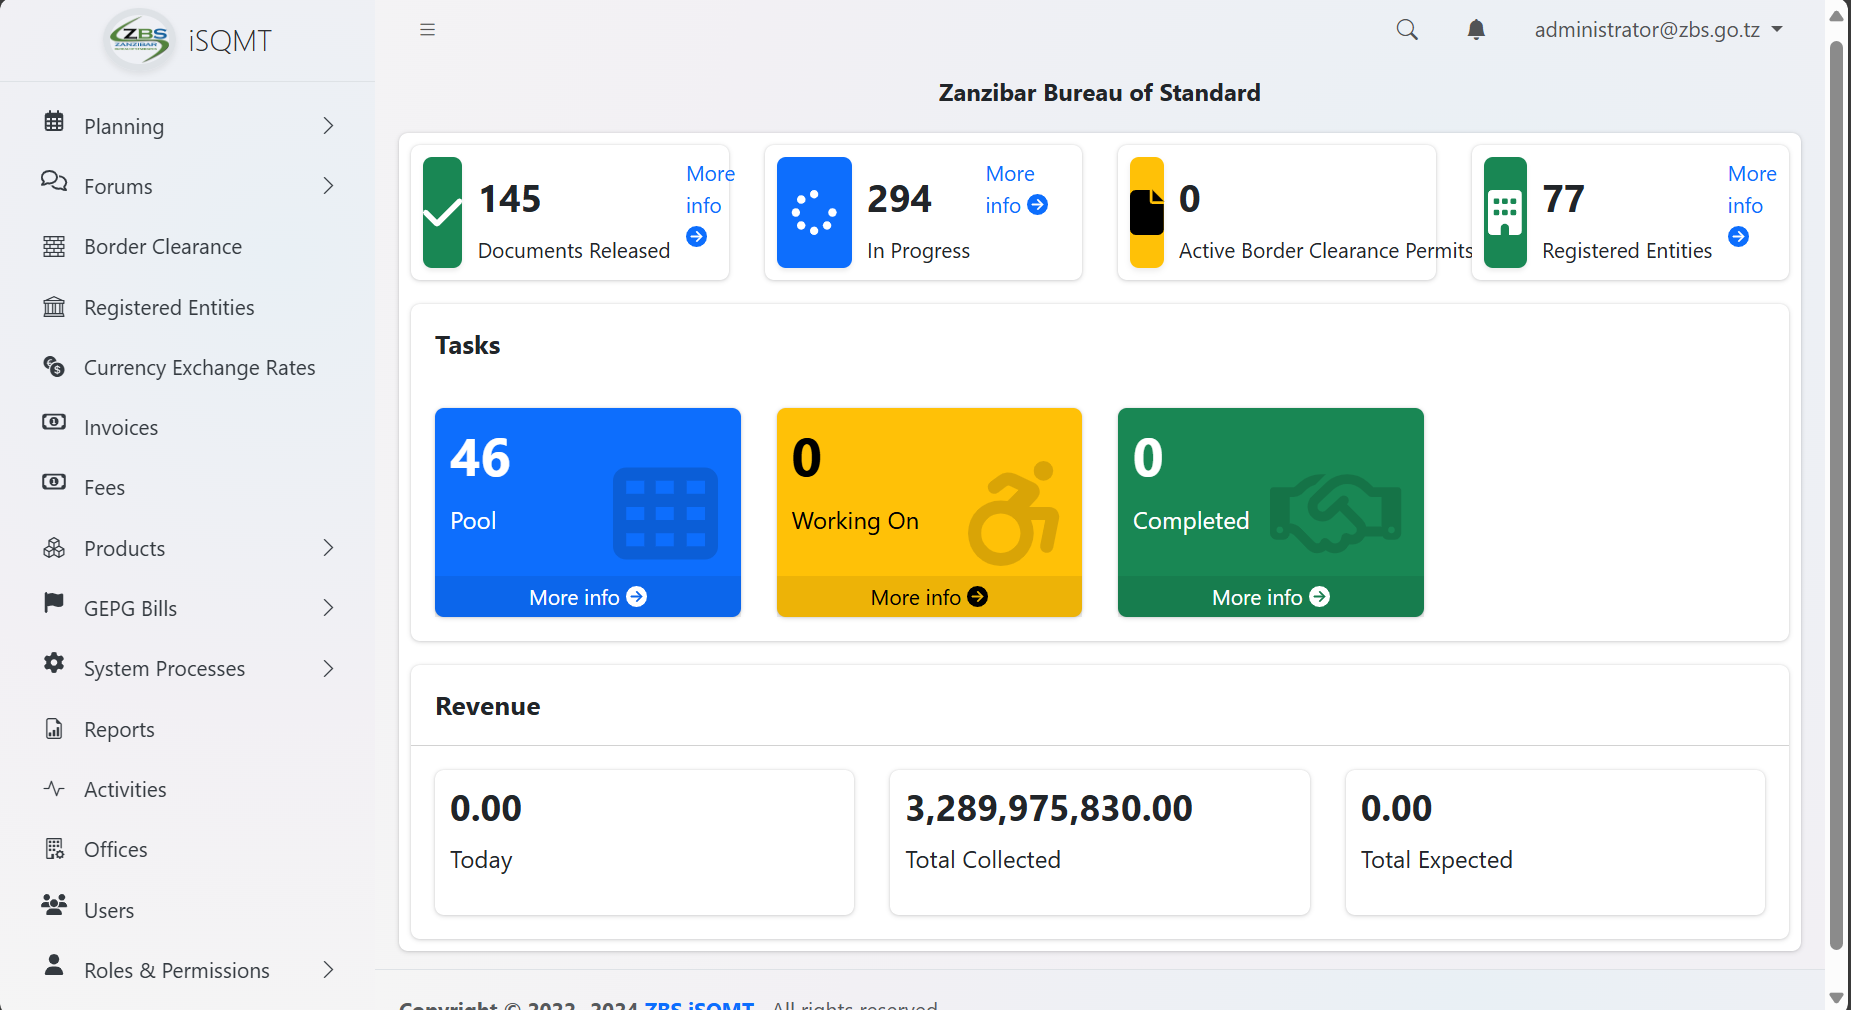
To perform system configuration, user suppose to have administrator role. Upon the login user will be landed to this page.
1. Office Management
1.1 Office
1.1.1 Accessing Offices
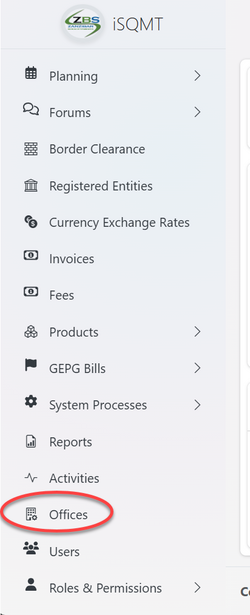
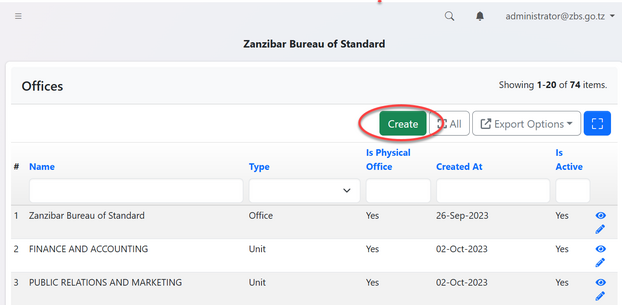
From the list of menu on the left click "Office" as shown on the figure 1. 2 below. On the list of offices click "Create" to create a new office.
 |
 |
1.1.2 Creating Office
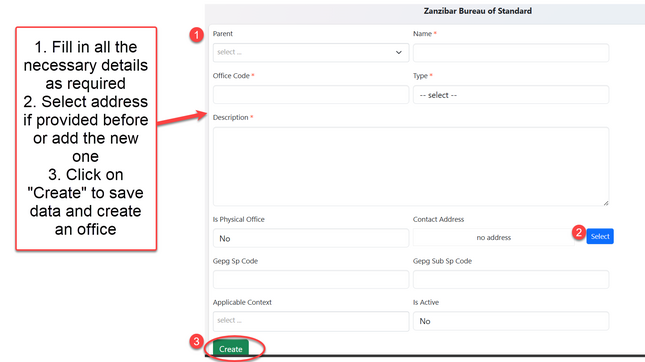
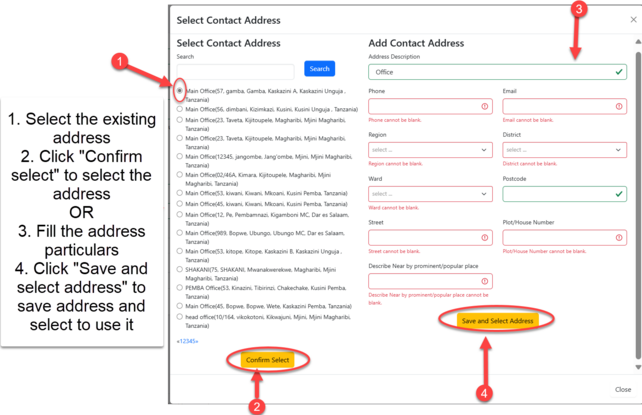
You will be provided with the form to fill. Fill the details as required as shown on figure 1.4. On the filed of address you can select the existing address and click "Confirm Select" or add the address by filling all the particulars and click "Save and Select Address" to save as shown on figure 1.5.
1.1.3 Editing Office
After saving the details user will be landed on the page shown on the figure 1.6, where can access buttons for "update details", "adding servicing area" and "Upload Branding Items"
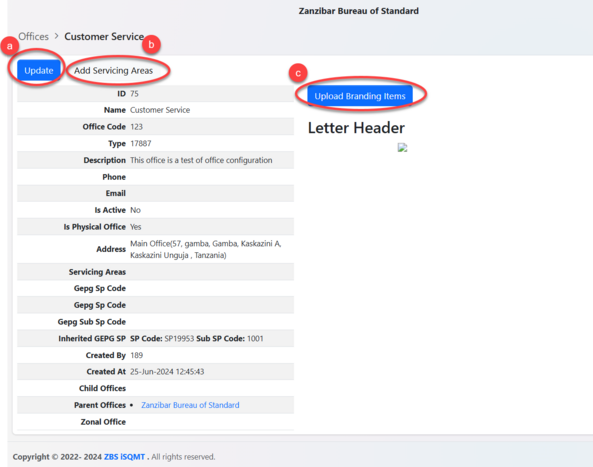
a) User can update details of office by editing and save
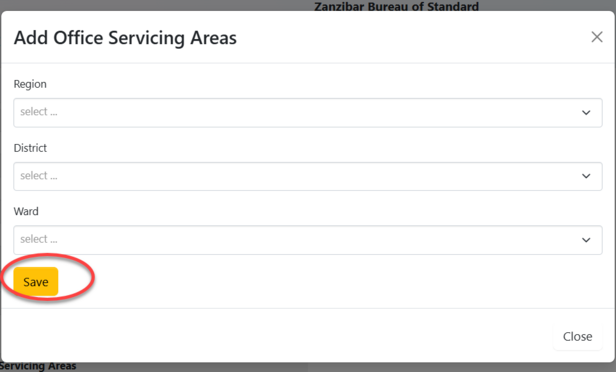
b) User can add other areas that office is suppose to service apart from the main office. Here user can put details of the area as required and save.
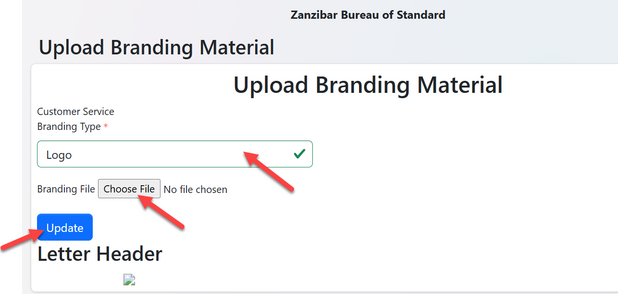
c) User can upload branding materials
1.2 Roles and Permission Registration
1.2.1 Accessing Roles and Permission
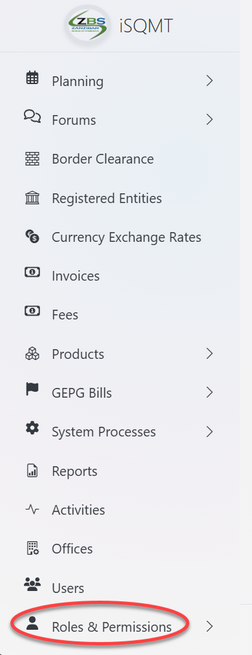
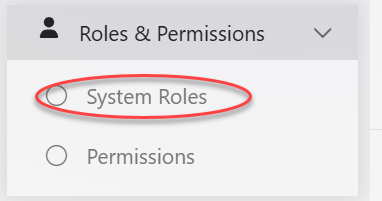
From the list of the menu click "Roles and Permission" as shown on figure 2.1. Then click on "System Roles" to access roles as shown on the figure 2.2 below.
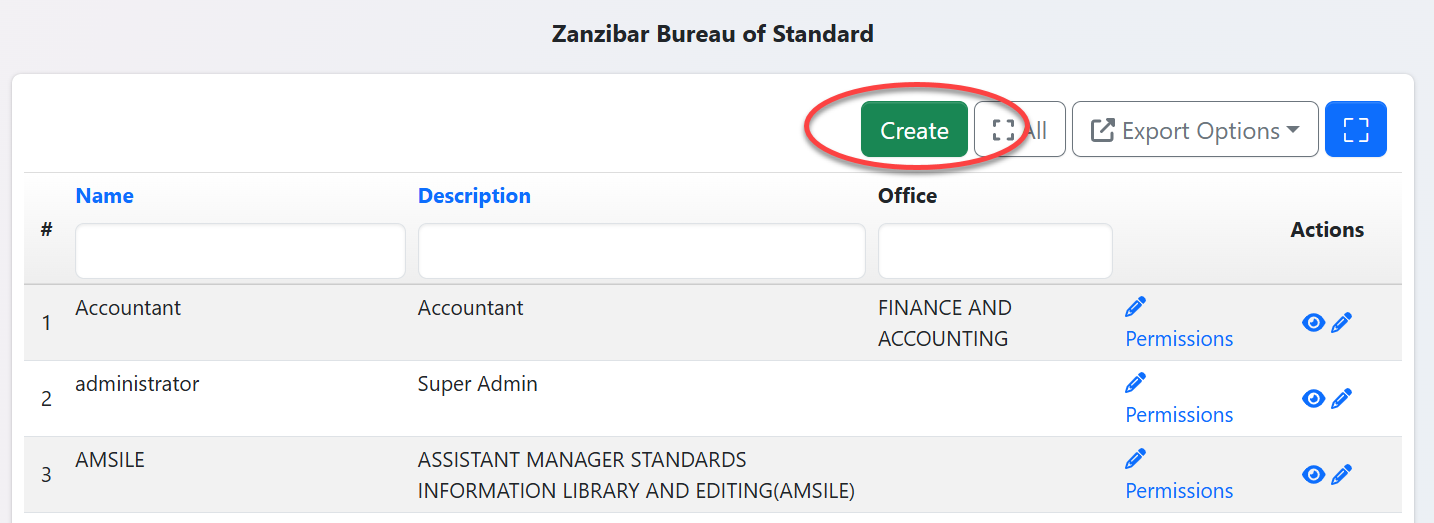
User will be landed on the list of existing roles (if any) and have an option to create a new role by clicking "Create" as shown on the figure 2.3 below.
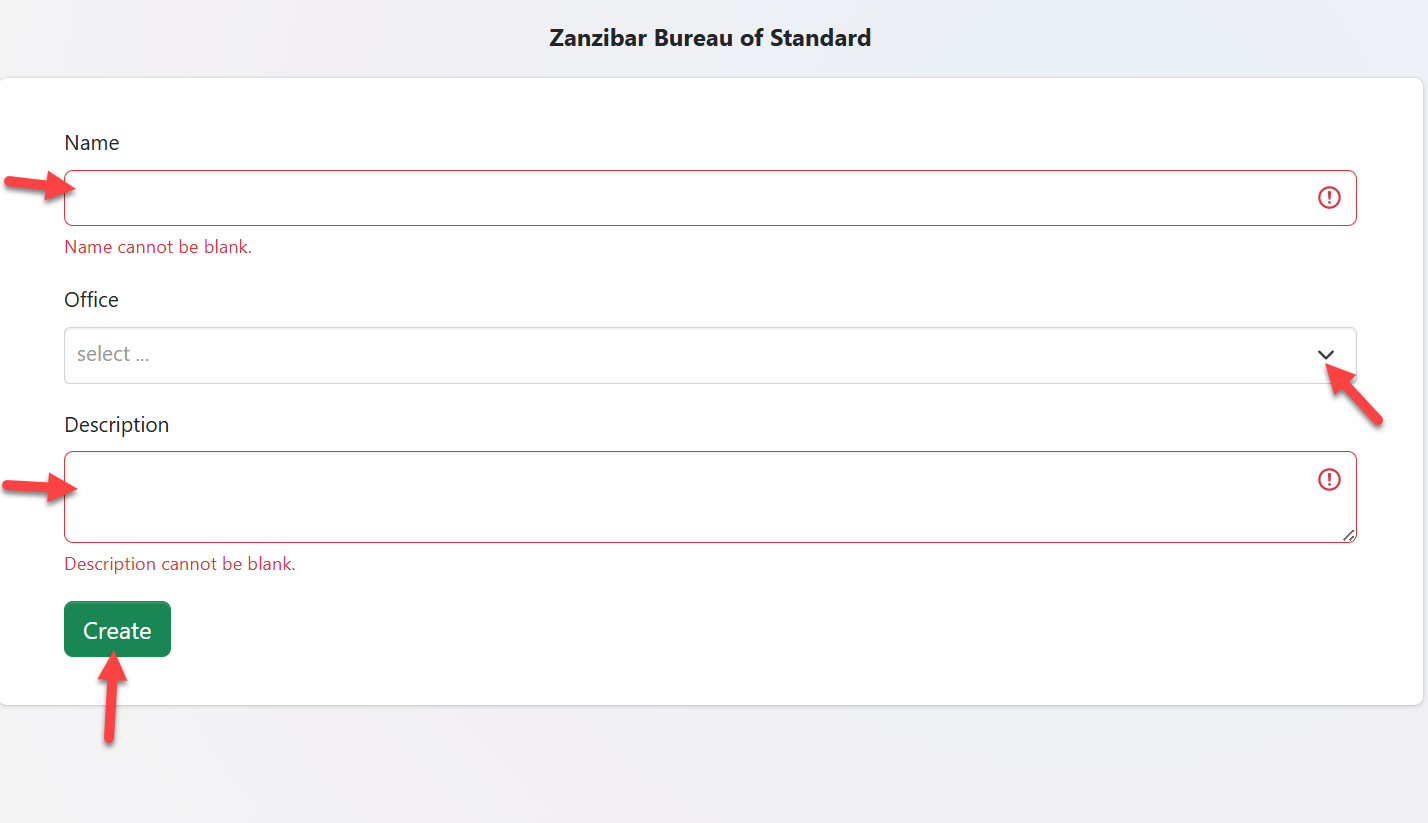
User will required to fill the name of the role, its description, and associate a role by selecting the pre-created office from the dropdown menu.Then click "Create" to save the details.( see figure 2.4)
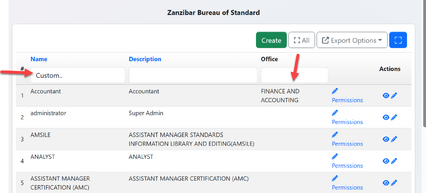
1.2.2 Permissions
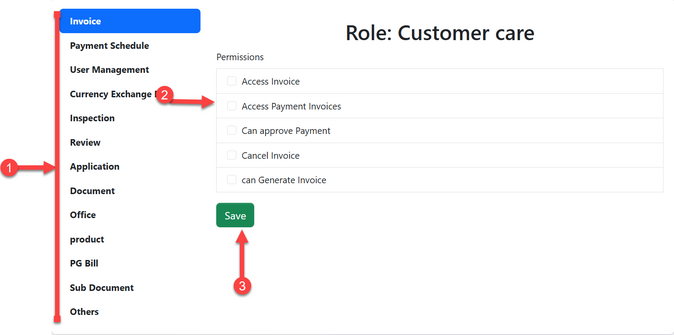
From the menu click "" to access all the system permission

1.3 User Management
1.3.1 Creating User
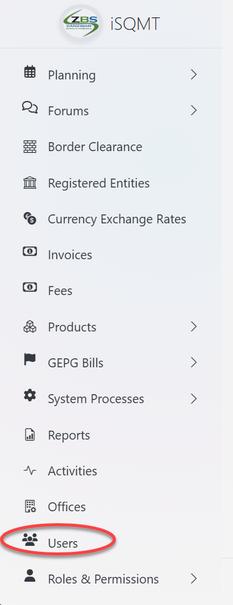
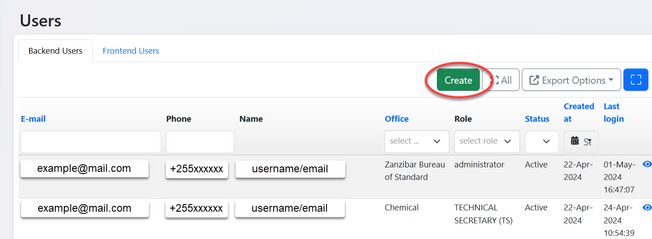
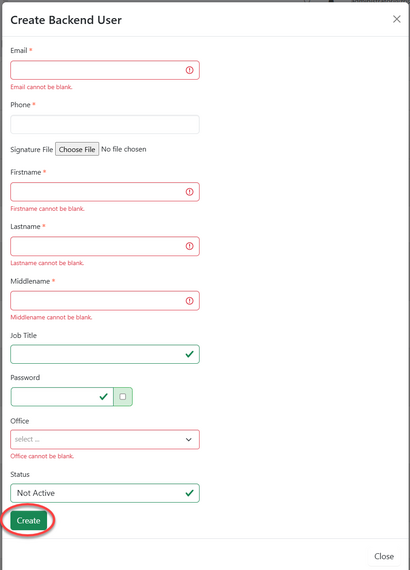
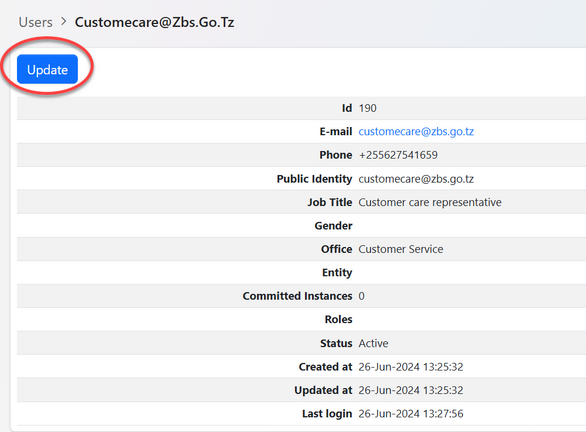
1.3.2 Update User
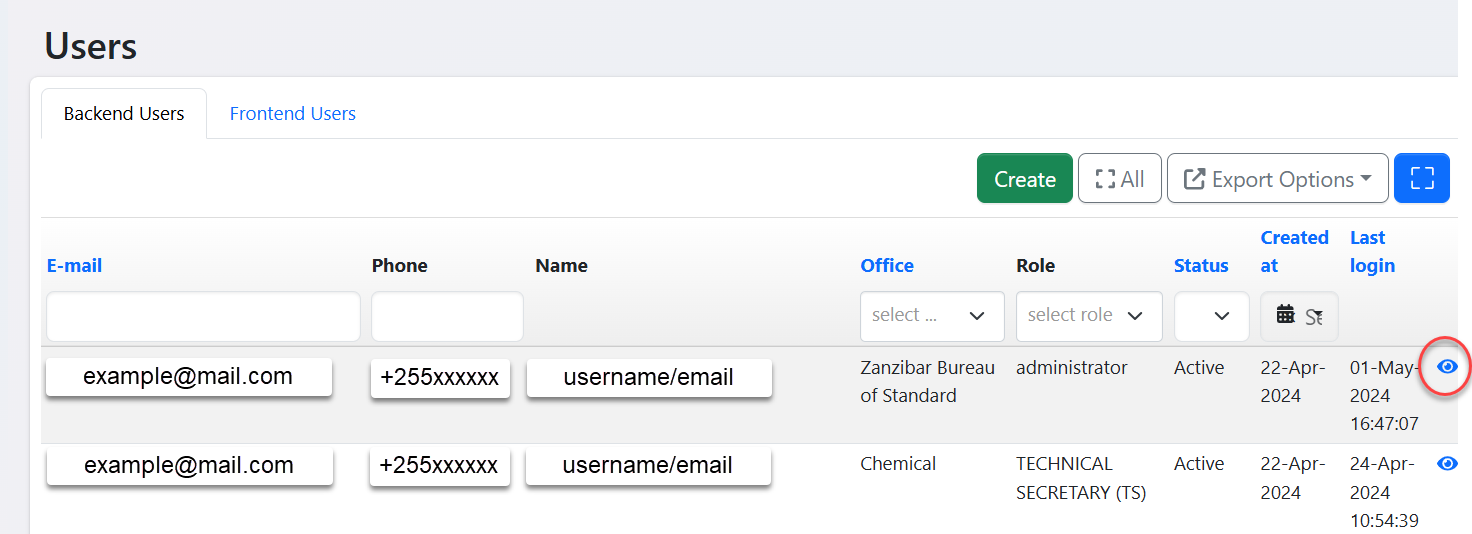
2. System Management
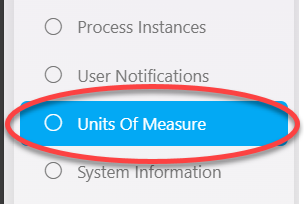
2.1. Unit of Measure

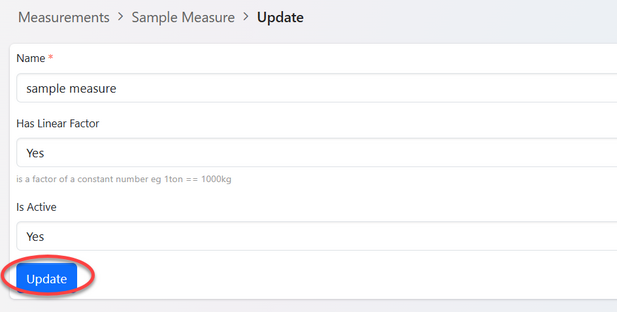
xxxxxxxxxxxxxxxxxxxxxxxxxxx
XXXXXXXXXXXXXXXXXXXXXXXXX

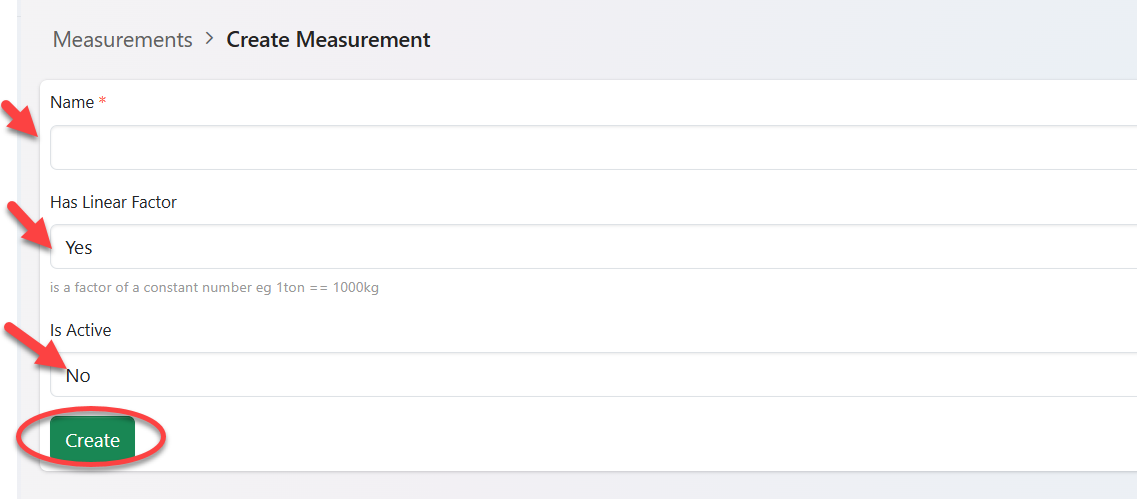
xxxxxxxxxxxxxxxxxxxxxxxxxxxx
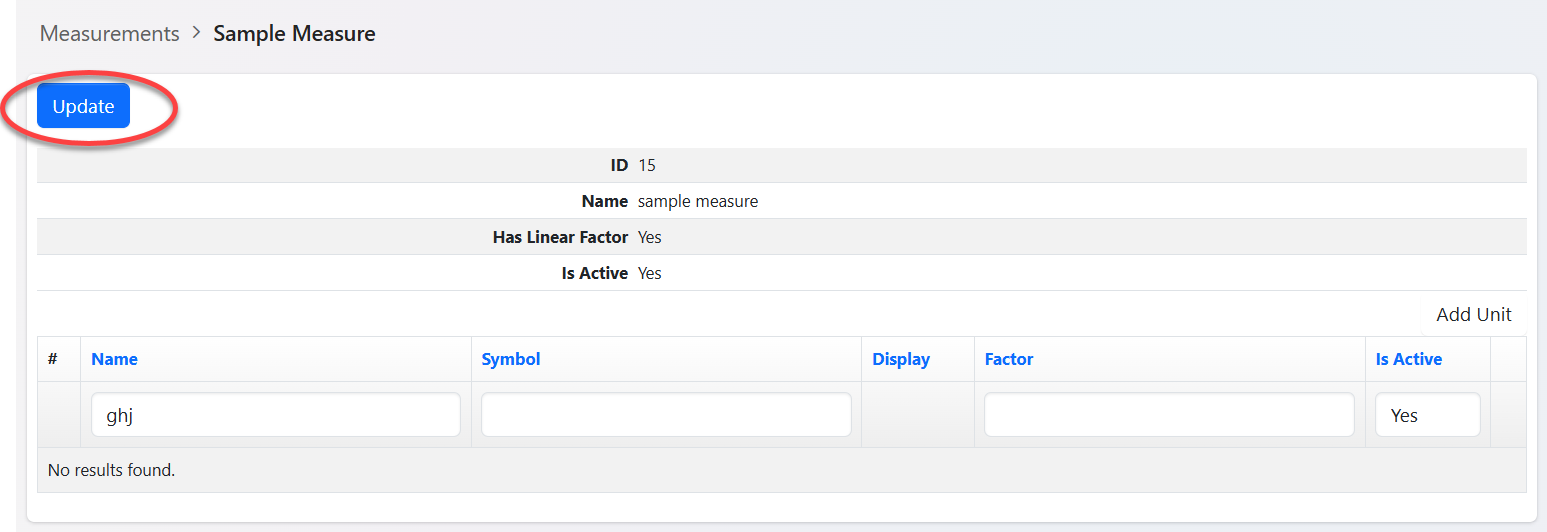
xxxxxxxxxxxxxxxxxxxxxx
xxxxxxxxxxxxxxxxxxxxxxxxxxxxxxxxx
2. Product Management
2.1 Product
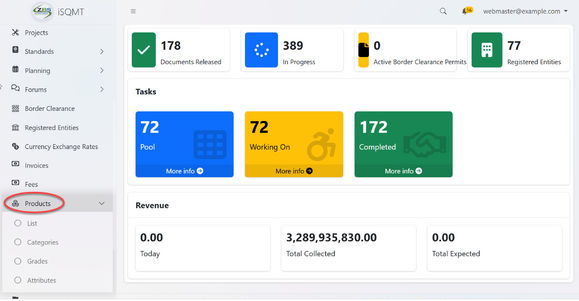
From the list of menus, user should click on the product to access all the list of product options.
2.1.1 Creating Product
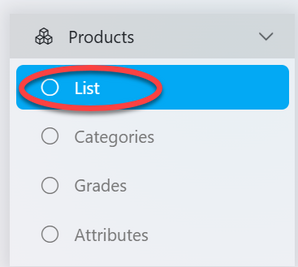
From the menus of product click on "List" to access the list of products and its options.
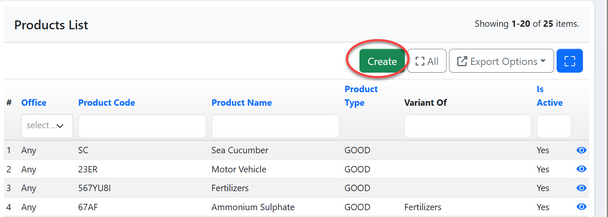
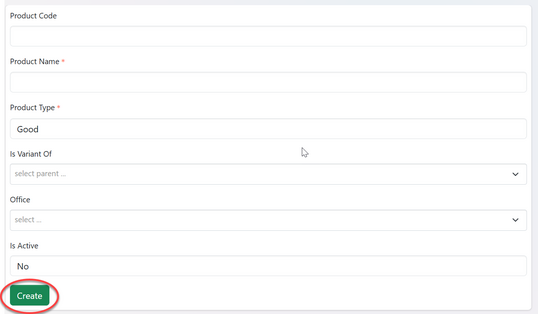
From the list of product click "Create" to create a new product.
Fill in the required details and click "Save"
2.1.2 Updating & Deleting Product
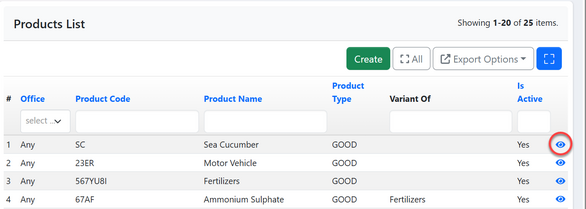
From the list of product click a product you want to update or click on the "eye" like symbol as shown in the figure below.
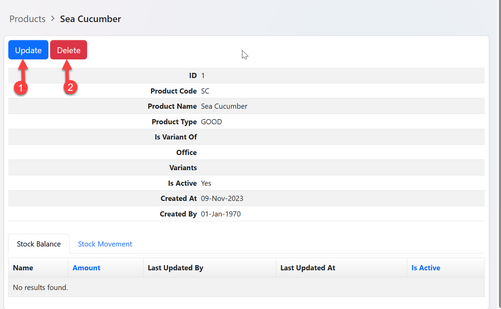
1)Updating Product - User will click "Update " to edit product details.
2) Deleting Product - User will click on "Delete" to delete product (Currently the functionality to delete product has been disabled for administrational purposes) (see figure below)
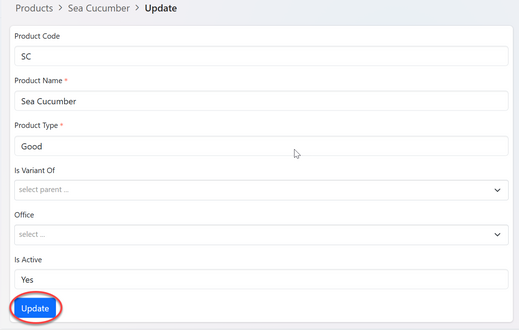
Upon successful clicking Update user will be directed to the window with product details to be altered, edit as intended and click "Save" ( See figure below).
2.2 Product Category
2.2.1 Creating Category
From the list of product menu, click on "Category" to access product category
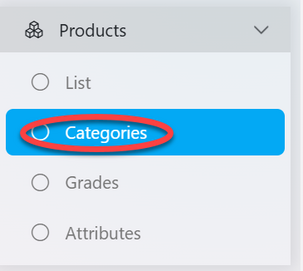
From the list of product category click on the button "Create" to create new category (see figure below)

Fill in all the required details and click "Save"

2.2.2 Updating and Deleting Category
From the list of product categories click on the category intended or click on the "eye" like symbol to open it (See figure below)

User will be landed on the page with options regarding category (See Figure below)
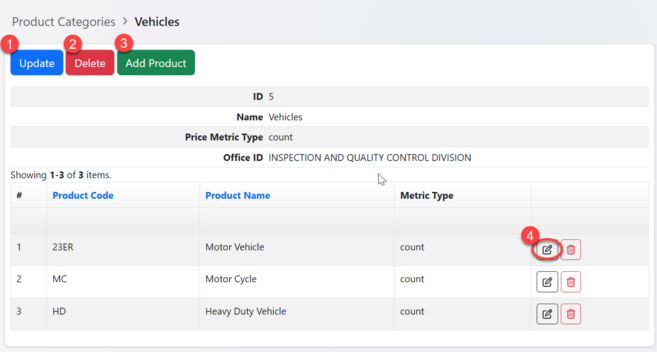
1) Update Category - Click on the button "Update" as shown on the figure above.
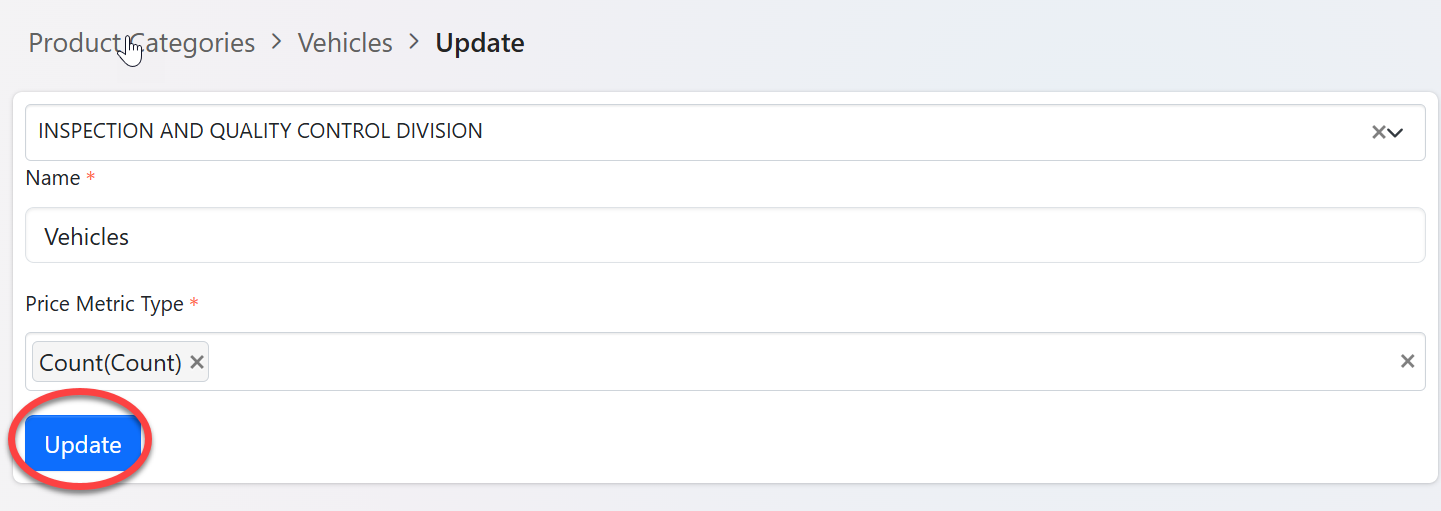
2)Deleting Category - Click on the button "Delete" as shown on he figure above.
3) Add product - Click on the button "Add Product" as shown on the figure above.
Fill in the required details;
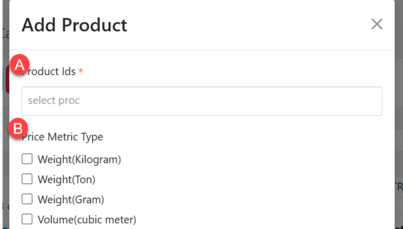
A) Select a product to add from the list
B) Tick the box of the metric for a selected product then save.
4) Add Metric Type - Click on editing symbol as shown on the figure * above.
Then tick the box of the metric as shown on the figure ** above.
2.3 Product Grade
2.3.2. Creating Grade
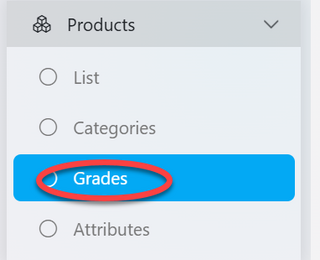
From the list of menus of product click on "Grades" to access product grades.
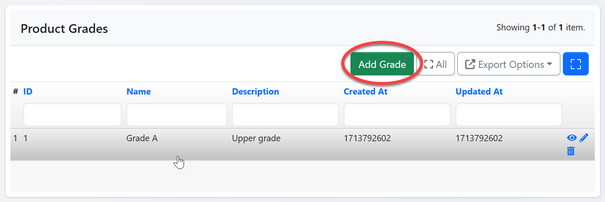
From the list of grades click on "Create" to create new grade as shown on the figure below.
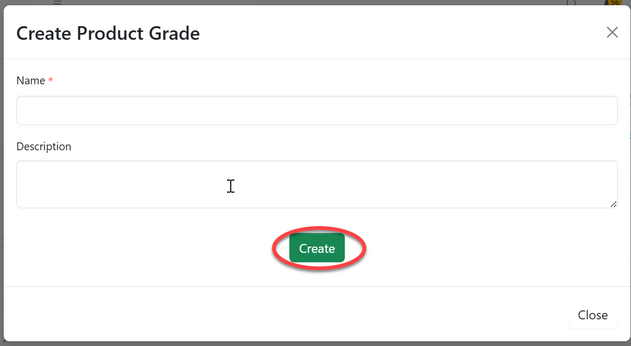
Fill in the required details of grades and click "Save".
2.3.2. Updating & Deleting Grades
From the list of product grades click on the intended one
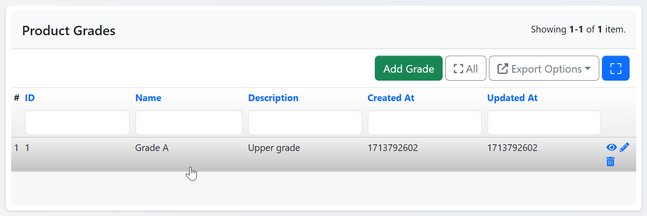
Upon successful click on the grades user will be directed to the page with options as seen on the figure below.
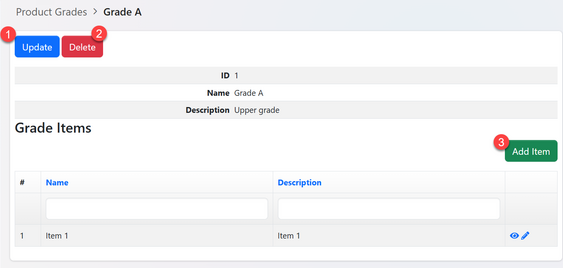
1) Updating Grades - Click on "Update" (as shown on the figure above) to edit grades information.
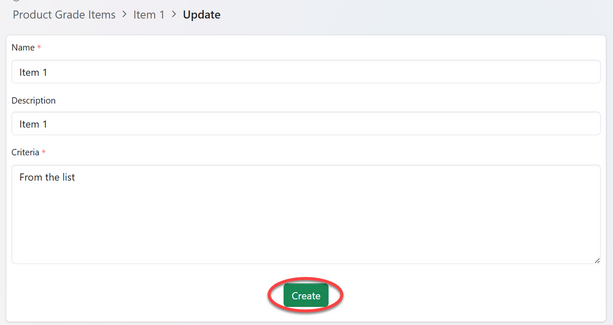
Edit the required details and save.
2)Deleting Grades - Click on "Delete" (as shown on the figure above) to delete grades details.
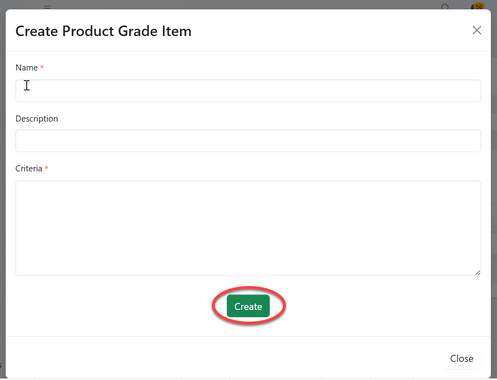
3)Add Items - Click on "Add Item" to add product grade item (as shown on the figure above)
Fill in the required details and click save as shown on the figure below
2.4 Product Attribute
2.4.1 Creating attribute
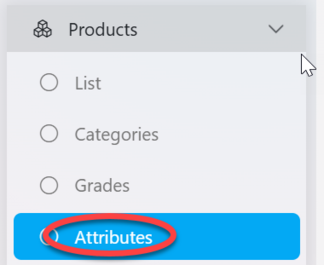
From the list of attributes click on "Create" to create new attributes
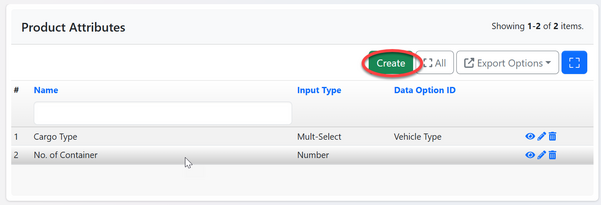
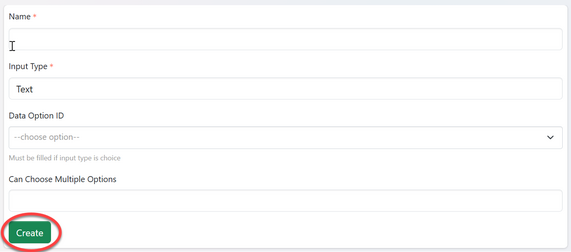
Fill in the required details for product attribute and click save.
2.4.2 Updating & deleting attribute
From the list of attributes you can find the options to:
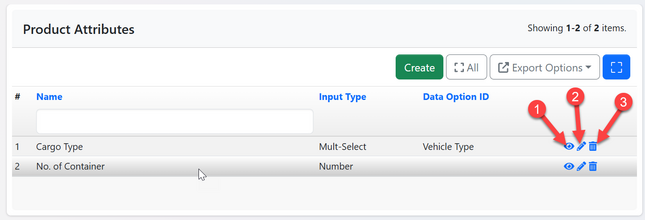
1) View - Click on the "eye" like symbol to view attribute details
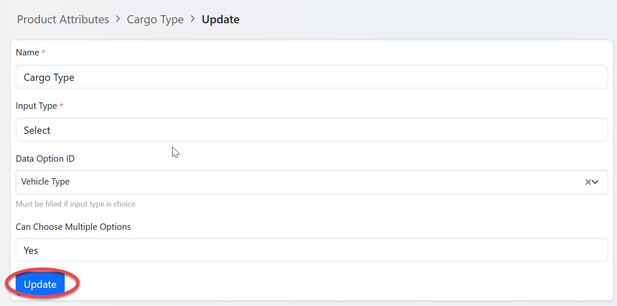
2)Update - Click on the "pen" like symbol to update the attribute details.
Edit the required details and click "Update" to save as shown in the figure below.
3)Delete - Click on the "bin" like symbol to delete the attribute.
3. Process Management
3.1 Forms
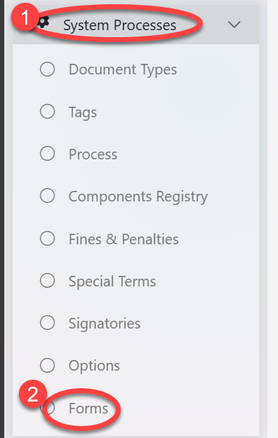
1) From the list of menus click on "System Process" to access different processes.
2) From the list of processes click "Form" as shown on the figure below.
3.1.1 Creating Forms
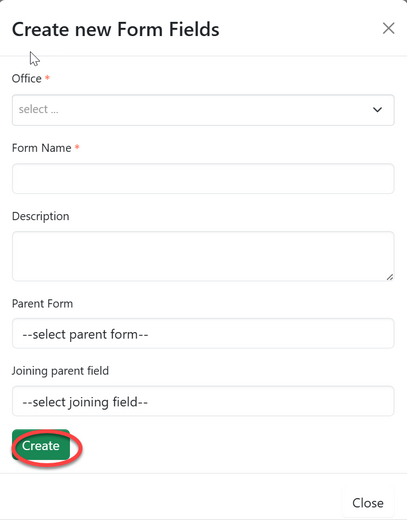
Upon successful clicking on the menu "Form" user will be landed on the page with the list of forms and a button to create new. Click on "Create" to create new form (See figure below)

Fill in the required details as selecting office, name, parent form if any and click "Create" then close.
3.1.2 Creating Page and Field
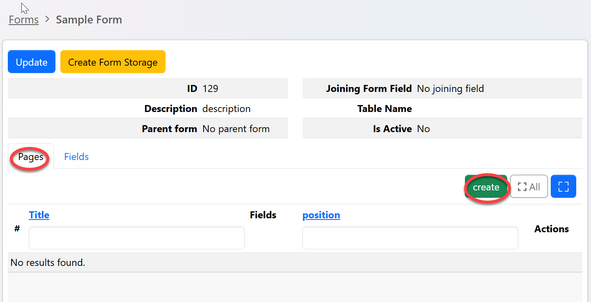
From the list of forms click on the intended one (or click the "eye" like symbol) to open the form as shown on the figure below.

User will be directed to the page shown on the figure below where they can access pages and fields.
a) Click on "Create" to create a new page
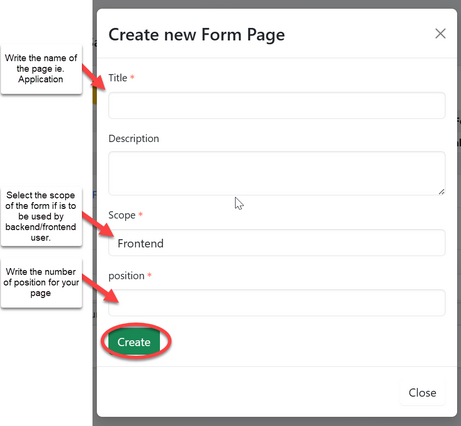
Fill in the required details and click "Create" to save then close. (See figure below)
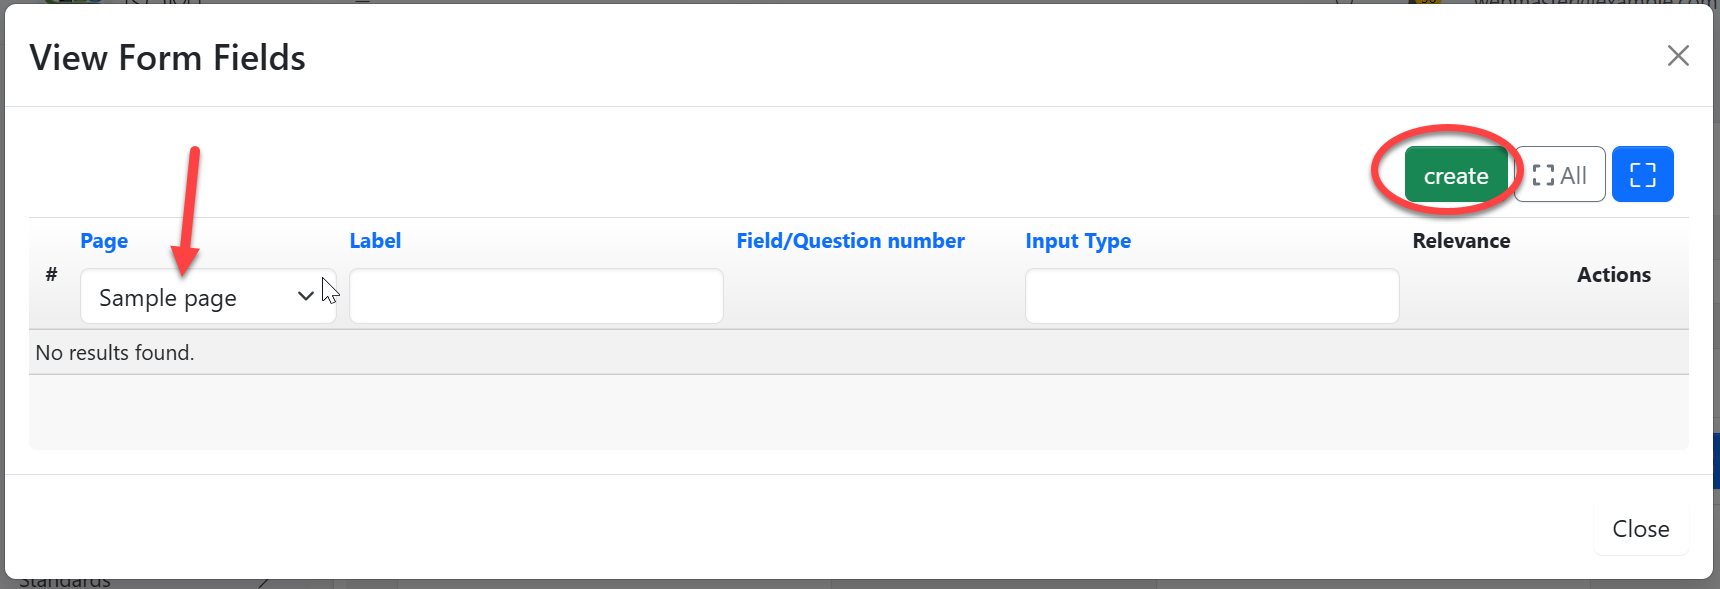
b) To create a field in the page, select the page name as shown with arrow and click "Create" to create a new field.
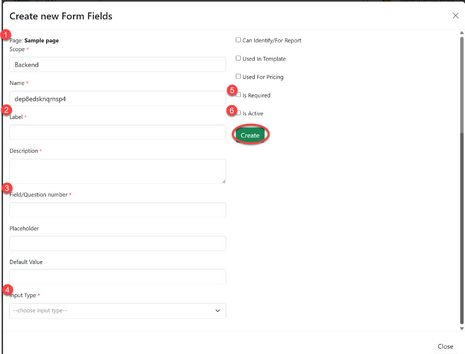
Fill in the required details as
- Scope - Field to appear on frontend / backend user 2) Label 3) Field number (as they appear), 4)Select input type (data type) 5)Check "Required" if the field is mandatory 6)Check "Is Active" to activate the field. Then click "Create" to save as shown on the figure below.
3.1.3 Activating Forms
From the list of forms, the created form will appear with the red x (see figure below) To activate click on the form or "eye" like symbol to open the form.

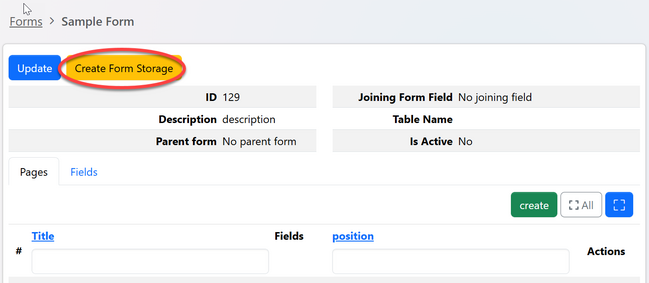
Click on the "Create form storage" to activate the form
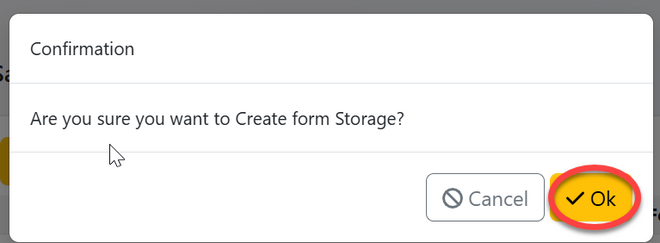
Click "Ok" to confirm.
4. Component Management
4.1 Creating Process Component
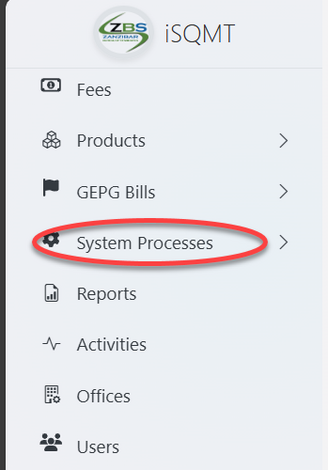
From the list of menus on the left click on "System Process"
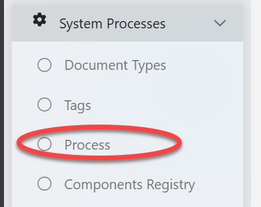
Then click on "Process"


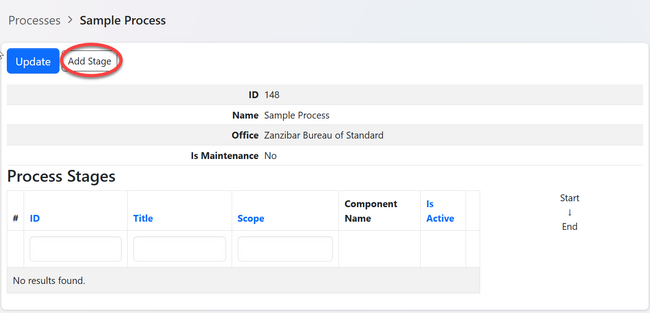
Upon successful creation of the process, user will be landed to the page below, where will be supposed to create stages
