System Management: Difference between revisions
Chanceness (talk | contribs) No edit summary |
Chanceness (talk | contribs) No edit summary |
||
| Line 1: | Line 1: | ||
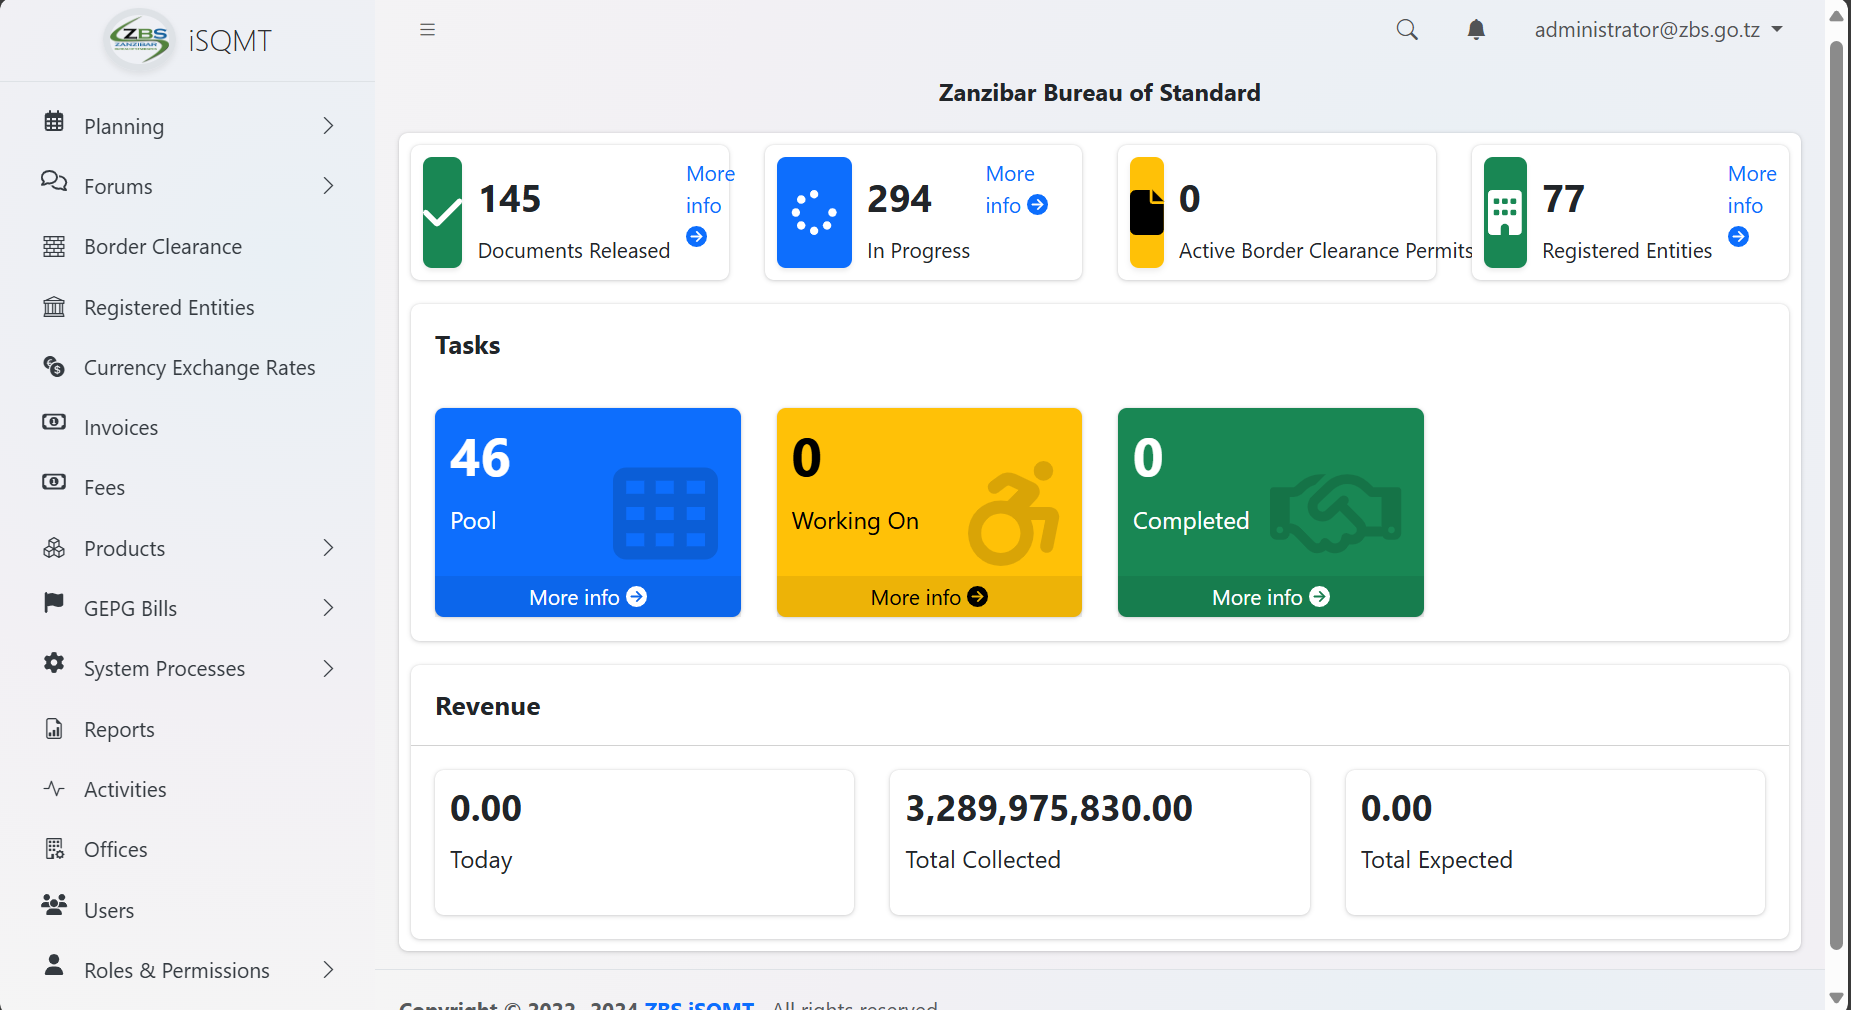
To perform system configuration, user suppose to have administrator role. Upon the login user will be landed to this page. | To perform system configuration, user suppose to have administrator role. Upon the login user will be landed to this page. | ||
[[File:Admin dashboard.png|center|frame|Figure 1.5: Admin homepage]] | [[File:Admin dashboard.png|center|frame|''Figure 1.5: Admin homepage'']] | ||
== 1.1 Office Registration == | == 1.1 Office Registration == | ||
| Line 7: | Line 7: | ||
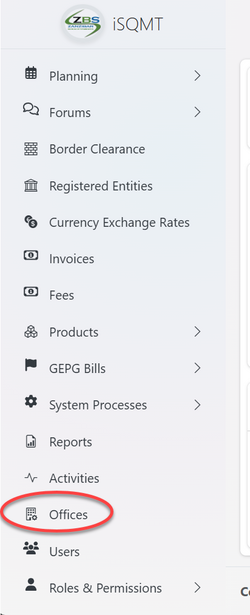
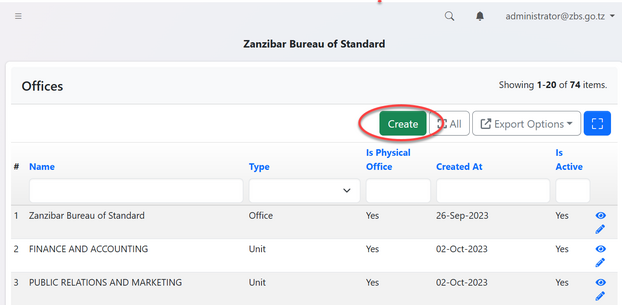
From the list of menu on the left click "Office" as shown on the figure 1. 2 below. On the list of offices click "Create" to create a new office. | From the list of menu on the left click "Office" as shown on the figure 1. 2 below. On the list of offices click "Create" to create a new office. | ||
{| | {| | ||
|[[File:Figure 1.2- Accessing office menu.png|left|thumb|615x615px|Figure 1.2: Accessing office menu]] | |[[File:Figure 1.2- Accessing office menu.png|left|thumb|615x615px|''Figure 1.2: Accessing office menu'']] | ||
|[[File:Crating new office.png|center|thumb|622x622px|Figure 1.3: Creating new office]] | |[[File:Crating new office.png|center|thumb|622x622px|''Figure 1.3: Creating new office'']] | ||
|} | |} | ||
| Line 18: | Line 18: | ||
==== 1.1.3 Editing Office ==== | ==== 1.1.3 Editing Office ==== | ||
After saving the details user will be landed on the page shown on the figure 1.6, where can access buttons for "update details", "adding servicing area" and "Upload Branding Items" | After saving the details user will be landed on the page shown on the figure 1.6, where can access buttons for "update details", "adding servicing area" and "Upload Branding Items" | ||
[[File:Figure 1.6.png|center|thumb|593x593px|''Figure 1.6: Update office details'']] | [[File:Figure 1.6.png|center|thumb|593x593px|''Figure 1.6: Update office details'']]a) User can update details of office by editing and save | ||
b) User can add other areas that office is suppose to service apart from the main office. Here user can put details of the area as required and save. | |||
[[File:Add servicing area.png|center|thumb|616x616px|''Figure 1.6 (a) Add servicing area'']] | |||
c) User can upload branding materials | |||
=== 2. Roles and Permission Registration === | === 2. Roles and Permission Registration === | ||
Revision as of 06:48, 26 June 2024
To perform system configuration, user suppose to have administrator role. Upon the login user will be landed to this page.
1.1 Office Registration
1.1.1 Accessing Offices
From the list of menu on the left click "Office" as shown on the figure 1. 2 below. On the list of offices click "Create" to create a new office.
 |
 |
1.1.2 Creating Office
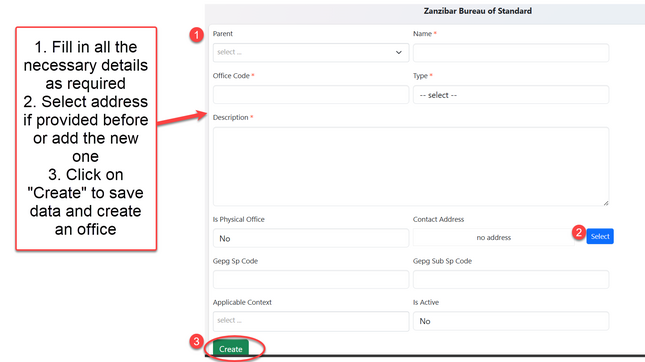
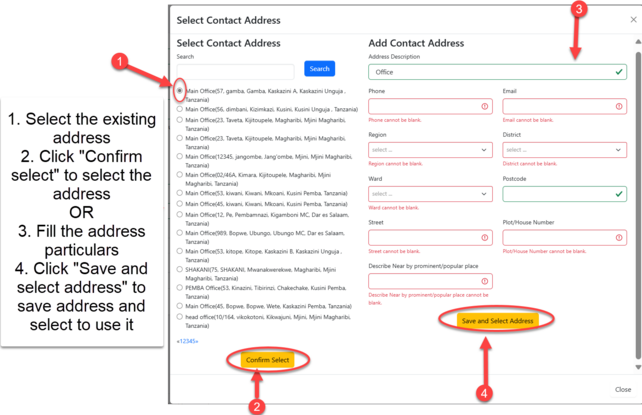
You will be provided with the form to fill. Fill the details as required as shown on figure 1.4. On the filed of address you can select the existing address and click "Confirm Select" or add the address by filling all the particulars and click "Save and Select Address" to save as shown on figure 1.5.
1.1.3 Editing Office
After saving the details user will be landed on the page shown on the figure 1.6, where can access buttons for "update details", "adding servicing area" and "Upload Branding Items"
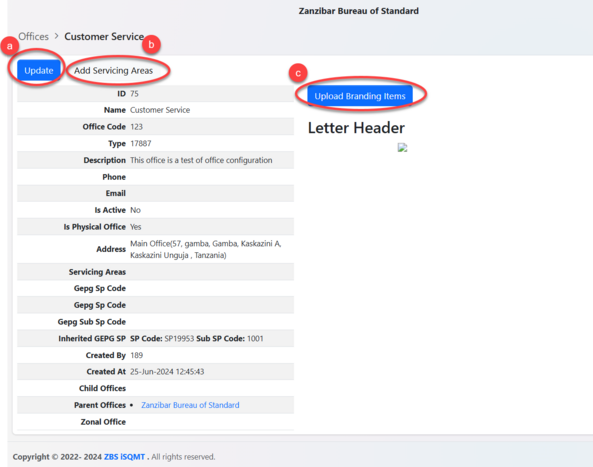
a) User can update details of office by editing and save
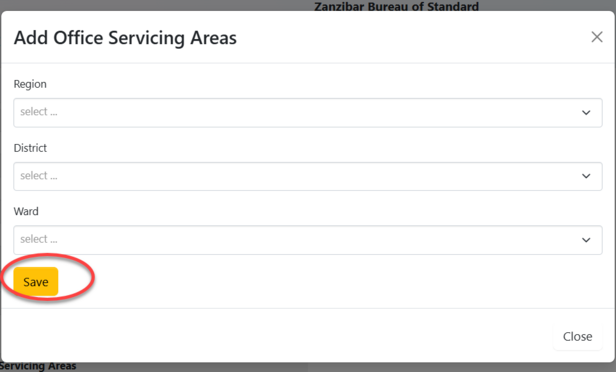
b) User can add other areas that office is suppose to service apart from the main office. Here user can put details of the area as required and save.
c) User can upload branding materials
2. Roles and Permission Registration
2.1 Accessing Roles and Permission
