Testing: Difference between revisions
Chanceness (talk | contribs) No edit summary |
Chanceness (talk | contribs) No edit summary |
||
| (20 intermediate revisions by the same user not shown) | |||
| Line 1: | Line 1: | ||
== 1. Internal Testing == | == 1. Internal Testing == | ||
| Line 32: | Line 31: | ||
Place a comment (If any) and click "Confirm" | Place a comment (If any) and click "Confirm" | ||
[[File:IT8.png|center|thumb|556x556px|''Figure :Confirm approval'']] | [[File:IT8.png|center|thumb|556x556px|''Figure :Confirm approval''|border]] | ||
=== 1.2 Testing === | === 1.2 Testing === | ||
| Line 38: | Line 37: | ||
==== 1.2.1 Initialization and sample registration - Custodian ==== | ==== 1.2.1 Initialization and sample registration - Custodian ==== | ||
Initialization of testing is done by custodian | Initialization of testing is done by custodian | ||
[[File:IT9.png|left|thumb|462x462px|''Figure : Initialize working on testing'']] | [[File:IT9.png|left|thumb|462x462px|''Figure : Initialize working on testing''|border]] | ||
Click "Ok" to confirm to work on testing | Click "Ok" to confirm to work on testing | ||
[[File:IT01.png|thumb|469x469px|''Figure :Confirm working on testing'']] | [[File:IT01.png|thumb|469x469px|''Figure :Confirm working on testing'']] | ||
| Line 48: | Line 47: | ||
Click on "Process" to access the | Click on "Process" to access the | ||
[[File:IT02.png|center|frame|''Figure : Accessing'' ]] | [[File:IT02.png|center|frame|''Figure : Accessing'' |border]] | ||
Then click "Initiate Testing" to start a testing process as shown on the figure below | Then click "Initiate Testing" to start a testing process as shown on the figure below | ||
[[File:IT04.png|center|thumb|615x615px|''Figure : Initiate testing'']] | [[File:IT04.png|center|thumb|615x615px|''Figure : Initiate testing'']] | ||
| Line 56: | Line 55: | ||
[[File:IT06.png|center|thumb|616x616px|''Figure : Start process of testing'']] | [[File:IT06.png|center|thumb|616x616px|''Figure : Start process of testing'']] | ||
User will be landed on the page where will suppose to fill sample registration form according to sample submitted by the applicant. Fill in the required information as shown on the figure below. | User will be landed on the page where will suppose to fill sample registration form according to sample submitted by the applicant. Fill in the required information as shown on the figure below. | ||
[[File:IT23.png|center|thumb|619x619px|''Figure : Sample register form'']] | [[File:IT23.png|center|thumb|619x619px|''Figure : Sample register form''|border]] | ||
Click "Submit Sample Registration" to submit or click "Edit Form" to edit information then save and submit as shown on the figure below. | Click "Submit Sample Registration" to submit or click "Edit Form" to edit information then save and submit as shown on the figure below. | ||
[[File:IT08.png|center|frame|''Figure :Submit Sample Registration'']] | [[File:IT08.png|center|frame|''Figure :Submit Sample Registration'']] | ||
| Line 79: | Line 78: | ||
[[File:IT14.png|center|thumb|525x525px|''Figure :Confirm working on sample review'']] | [[File:IT14.png|center|thumb|525x525px|''Figure :Confirm working on sample review'']] | ||
User will access a page with the sample information with the review options. User will compare the (1)details of sample in the system and actual submitted sample, then (2) approve if satisfied or (3) Return sample for rectification as shown on the figure below. | User will access a page with the sample information with the review options. User will compare the (1)details of sample in the system and actual submitted sample, then (2) approve if satisfied or (3) Return sample for rectification as shown on the figure below. | ||
[[File:IT15.png|center|thumb|618x618px|''Figure :Reviewing Sample'']] | [[File:IT15.png|center|thumb|618x618px|''Figure :Reviewing Sample''|border]] | ||
| Line 88: | Line 87: | ||
'''a)Testing assignment (Head of Lab)''' | '''a)Testing assignment (Head of Lab)''' | ||
For approved sample, head of laboratory will assign task to analyst to perform the testing of samples | For approved sample, head of laboratory will assign task to analyst to perform the testing of samples. | ||
[[File:IT17.png|center|thumb|650x650px|''Figure :Assigning task'']] | [[File:IT17.png|center|thumb|650x650px|''Figure :Assigning task''|border]] | ||
To assign a work head of lab will: | To assign a work head of lab will: | ||
| Line 116: | Line 115: | ||
1.Summary - Containing all details about the request. | 1.Summary - Containing all details about the request. | ||
[[File:IT24.png|center|thumb|615x615px|''Figure :Testing'']] | [[File:IT24.png|center|thumb|615x615px|''Figure :Testing''|border]] | ||
2. Parameter to be tested - Click on the "pen" like symbol to fill in the results of testing. On the popup window, fill in the results against measured parameters as required and click "Save" as shown on the figure below. | 2. Parameter to be tested - Click on the "pen" like symbol to fill in the results of testing. On the popup window, fill in the results against measured parameters as required and click "Save" as shown on the figure below. | ||
[[File:IT27.png|left|thumb|491x491px|''Figure :Documenting test result'']] | [[File:IT27.png|left|thumb|491x491px|''Figure :Documenting test result'']] | ||
| Line 164: | Line 163: | ||
[[File:IT40.png|center|thumb|444x444px|''Figure :Test report'']] | [[File:IT40.png|center|thumb|444x444px|''Figure :Test report'']] | ||
=== 1.3 Sending Test Report - Custodian === | |||
The authorized report will automatically posted to custodian so that to be sent to the recipient office. | |||
1) Custodian can view test report | |||
[[File:TR1.png|center|thumb|578x578px|''Figure : Test repost'']] | |||
2)Custodian will click on "proceed" to provide remarks as shown on the figure above. | |||
[[File:TR2.png|center|thumb|437x437px|''Figure : Remarks on test report'']] | |||
Fill in the comment then click "Proceed" to save and automatically sent them to the recipient office. | |||
== 2. Type Testing == | == 2. Type Testing == | ||
=== 2.1 Review Request (Custodian) === | |||
Once the client submits a testing request, it will be received by the custodian, who is responsible for directing it to the appropriate laboratory. | |||
To access tasks, select 'Task' from the menu on the left, then click 'Pool' to view tasks that have not yet been worked on. | |||
[[File:DI1.png|left|thumb|278x278px|''Figure :accessing tasks'']] | |||
From the list of task click on the intended one or click on the "Eye" like symbol to open it. | |||
[[File:TT1.png|center|thumb|616x616px|''Figure :List of tasts'']] | |||
Click on "Work on Review Samples" To review the application. | |||
[[File:TT2.png|center|thumb|637x637px|''Figure :Work on review''|border]] | |||
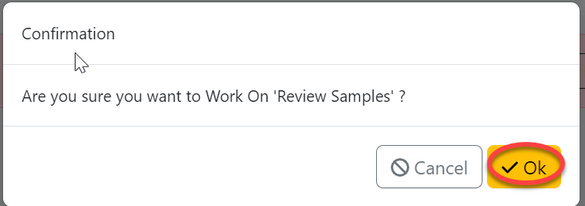
Click "Ok" To confirm reviewing samples. | |||
[[File:TT3.png|center|thumb|585x585px|''Figure :Confirm working on review.'']] | |||
Click "Approve" to approve, or "Return " | |||
[[File:PRC1.png|border|center|thumb|612x612px|''Figure : Reviewing sample'']] | |||
==== 2.1.2 Payment ==== | |||
'''Approve fee''' | |||
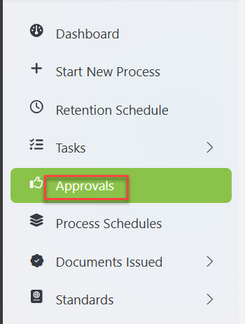
From the list of menus click "Approvals" | |||
[[File:PYM3.png|left|thumb|324x324px|''Figure : Accessing Tasks for Approval'']] | |||
From the list of tasks click on the intended one or click the "eye" like symbol. | |||
[[File:PYM4.png|center|frame|''Figure : List of tasks'']] | |||
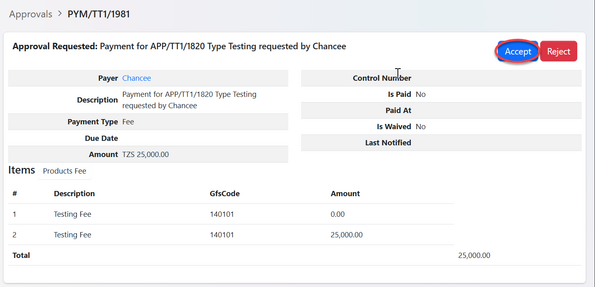
User will be landed on the page with details of payment | |||
[[File:PYM5.png|center|thumb|595x595px|''Figure : Fee details'' ]] | |||
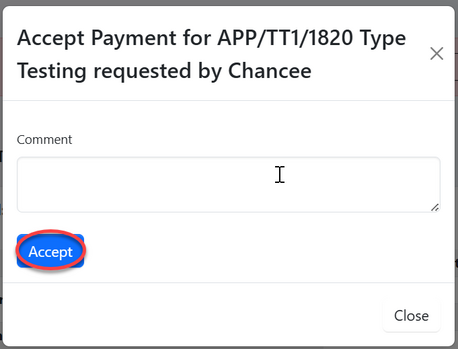
Add comment if any then click "Accept". See figure below. | |||
[[File:PYM6.png|center|thumb|458x458px|''Figure : Accepting fee'']]'''[https://wiki-zbs.ictpack.net//index.php?title=Payments&oldid=0&veaction=edit 2.2.2 Work on Payment by Accounting office. Click here to access user guide.]''' | |||
=== 2.2 Testing === | |||
After payment is successfully being made, testing will be initiated | |||
==== 2.2.1 Initialize Testing (Custodian) ==== | |||
On the stage click "Working on Testing" as shown on the figure below. | |||
[[File:TT20.png|border|left|frame|''Figure : Initializing testing'']] | |||
Click "Ok" to confirm working on testing | |||
[[File:TT21.png|center|thumb|539x539px|''Figure : Confirm working on testing'']] | |||
Click "Start Testing" to access the process initiation. | |||
[[File:TT22A.png|border|left|thumb|303x303px|''Figure :Start testing'']] | |||
Click on "Testing" as shown below. | |||
[[File:TTR1.png|border|center|thumb|448x448px|''Figure : Initiate testing'']] | |||
Click "Confirm" to confirm initiation of the process. | |||
[[File:TTR2.png|left|thumb|507x507px|''Figure :Confirm to initiate process'']] | |||
Click "Go To New Process" to access process of testing | |||
[[File:TTR3.png|center|thumb|426x426px|''Figure :Go to new process'']] | |||
On the window appeared with the form, fill in all the required details for sample registration and click "save" to save it. See figure below. | |||
[[File:TTR4.png|center|thumb|756x756px|''Figure :Sample register form'']] | |||
Click "Submit Sample Registration" to submit form or "Edit Form" to edit details, save then submit. | |||
[[File:TTR5.png|center|frame|''Figure :Submit form'']] | |||
Click "Ok" to confirm submitting the form. | |||
[[File:TTR6.png|center|thumb|594x594px|''Figure :Confirm submitting'']] | |||
Click on "Proceed" to | |||
[[File:TT25.png|center|thumb|660x660px|''Figure :Proceed with the process'']] | |||
Fill comment if any then click "Proceed" to proceed. | |||
[[File:TT26.png|center|thumb|500x500px|Figure :Proceed]] | |||
==== 2.2.2 Sample Review (Head of Lab) ==== | |||
From the list of tasks in the pool click on the intended one or click on "eye" like symbol to open it. | |||
[[File:TT11.png|center|thumb|650x650px|''Figure :List of tasks'']] | |||
Click on "Work on Review" | |||
[[File:TT12.png|left|frame|''Figure : Work on review'']] | |||
Click "Ok" to confirm working on it | |||
[[File:TT13.png|center|thumb|531x531px|''Figure : Confirm to work on review'']] | |||
User will be landed on the page as shown below | |||
[[File:TT14.png|center|frame|''Figure :Review sample'']] | |||
Here user can: | |||
1)View sample details as shown on the sample register tab | |||
2)Return sample if there is and fault found with them or improvement needed. | |||
3)Approve sample if are meet testing requirement. | |||
Upon clicking on "Approve Review" the window below will popup where user will click "Confirm" to confirm approving samples.( See figure below) | |||
[[File:TT15.png|center|thumb|632x632px|''Figure :Confirm approval of sample'']]2.2.3 Testing assignment (Head of Lab) | |||
On the stage testing user will click on the button "Assign" to assign the testing task to w specific analyst. See figure below. | |||
[[File:TT16.png|left|thumb|357x357px|''Figure :Task assignment'']] | |||
On the popup window select the analyst to assign task to, write instruction if any then click "Assign User" as shown on the figure below. | |||
[[File:TT17.png|center|thumb|380x380px|''Figure : Task assignment'']] | |||
==== 2.2.4 Testing (Analyst) ==== | |||
Analyst will see the assigned task from the "My Task" and work on it. | |||
[[Testing#2.2.3 Testing assignment (Head of Lab)|'''Click here to access the User guide'''.]] | |||
==== 2.2.5 Review Testing (Test Reviewer - analyst/ head of lab/ technical signatory) ==== | |||
The results of testing will be reviewed by other analyst. | |||
[[Testing#1.2.4 Review Testing (Test Reviwer - analyst/ head of lab/ technical signatory)|'''Click here to access user guide'''.]] | |||
==== 2.2.6 Authorize Test Report ==== | |||
AMI will view test report and authorize it by signing it. | |||
[[Testing#1.2.5. Authorize Test Report (AMT)|'''Click here to access user guide''']] | |||
=== 2.3 Sending Test Report - Custodian === | |||
The authorized report will automatically posted to custodian so that to be sent to the recipient office. | |||
[[Testing#1.3 Sending Test Report - Custodian|'''Click here to access user guide'''.]] | |||
== 3. Proficiency Testing == | == 3. Proficiency Testing == | ||
== 4. Device Calibration == | === 3.1 Review Application (PT Coordinator) === | ||
After login in successfully, user will click "Task" on the list of menus on left then click "Pool" to access all the tasks that are not yet worked on. See figure below. | |||
[[File:DIS3.png|left|thumb|289x289px|''Figure :Accessing tasks'']] | |||
From the list of tasks user will click the intended one or click "Eye" like symbol to open it. | |||
[[File:PT1.png|center|thumb|605x605px|''Figure :List of tasks in a pool'']] | |||
User will click "" to work on Review | |||
[[File:PT2.png|left|thumb|397x397px|''Figure :Working on Review'']] | |||
Click "Ok" to confirm working on review. | |||
[[File:PT3.png|center|thumb|482x482px|''Figure :Confirm working on review'']] | |||
User can; | |||
1)Review the application details | |||
2)Return application for improvement if any. | |||
3)Approve application for proceedings. | |||
See figure ebelow. | |||
[[File:PT5.png|center|thumb|606x606px|''Figure :Reviewing Application'']] | |||
After clicking approve review, on the popup window click on "Confirm Approval" | |||
[[File:PT6.png|center|thumb|602x602px|''Figure :Confirm approving application'']] | |||
[[Paymen|'''Payment''']] | |||
Upon successfully payment made, PT coordinator will proceed with the "Specifying Testing" stage. | |||
=== 3.3 Testing === | |||
==== 3.3.1 Specify testing ==== | |||
On the stage, click on "Work on Specify Testing" as shown on the figure below. | |||
[[File:PTR1.png|border|left|frame|''Figure: Work on Specify'']] | |||
Click "Ok" to confirm | |||
[[File:PT7.png|center|thumb|422x422px|''Figure :Confirm working on testing specifying'']] | |||
Fill in the details by adding a product and click on "Parameter to Test" to add parameters, Then click "Save" to continue. | |||
[[File:PTR2.png|center|frame|''Figure :specify testing'']] | |||
After saving the testing specification, click "Submit " | |||
[[File:PT9.png|thumb|390x390px|''Figure :Submit specify testing''|border|left]]Then confirm as shown on the figure below.[[File:PT01.png|center|thumb|526x526px|''Figure :Confirm submitting'' specify testing]] | |||
=== 3.4 Results === | |||
Click on "Work on Results" as shown on the figure below. | |||
[[File:PTR3.png|left|frame|''Figure :Working on Results'']] | |||
Then click on the "pen" like symbol to add resullts. | |||
[[File:PTR4.png|center|thumb|580x580px|''Figure : Add the results'']] | |||
Fill in the required details and click "Save" as shown on the figure below. | |||
[[File:PTR5.png|center|thumb|626x626px|''Figure : Results form'']] | |||
Click "Submit" to submit the results. | |||
[[File:PTR6.png|border|left|frame|''Figure :Submit results'']] | |||
Click "Confirm" to submit. | |||
[[File:PTR7.png|center|thumb|396x396px|''Figure :Confirm'' ''submitting'']] | |||
=== 3.5 Review Testing Results === | |||
Click "Work on Review Results" to start working on review as shown on the figure below. | |||
[[File:PTR8.png|border|center|frame|''Figure : Work on Review'']] | |||
User will be landed on the page as shown below. | |||
[[File:PTR9.png|center|thumb|600x600px|''Figure :Review results'']] | |||
# Here user can view the details of all the stages of the application. | |||
# Click "Seen" to approve the results. | |||
== 4. Device Calibration == | |||
=== 4.1 Receiving Application === | === 4.1 Receiving Application === | ||
==== 4.1.1 Application Review ==== | |||
==== 4.1.2 Payment & Review ==== | |||
=== 4.2 Calibrating Device === | === 4.2 Calibrating Device === | ||
==== 4.2.1 Initiate Calibration ==== | |||
Click "Initiate Calibration" to start the calibration of device as shown on the figure below. | |||
[[File:DC1.png|center|thumb|611x611px|''Figure :Initiate calibration'']] | |||
Click "Ok" to confirm initiating calibration. | |||
[[File:DC2.png|center|thumb|596x596px|''Figure :Confirm initiating calibration.'']] | |||
==== 4.2.2 Calibrating Device ==== | |||
==== 4.2.3 Review Calibration Review ==== | |||
== 5. Parameters Management == | |||
=== 5.1 Creating parameters === | |||
From the list of menus on the left click "Standard" then click "Office parameter" as shown on the figure below. | |||
[[File:SPM1.png|left|thumb|243x243px|''Figure:Accessing parameters'']] | |||
From the page with the list of parameter click the button "Create" to add a new parameter. See the figure below. | |||
[[File:SPM2.png|center|thumb|641x641px|''Figure :List of office parameters'']] | |||
User will be landed on the popup window of the form to be filled with parameters details, fill them as required then click "Create" | |||
[[File:SPM3.png|center|thumb|532x532px|''Figure :Office parameter form'']] | |||
It is important that user check the box of "Is Testable" and "Active" for parameter to be active used in the lab. | |||
Upon successfully following those steps parameter will be created. | |||
=== 5.2 Editing & Activating Parameter === | |||
From the list of parameters, click the intended one to open it. On the page opened click "Update" as shown on the figure below. | |||
[[File:SPM4.png|center|thumb|630x630px|''Figure :Updating parameter'']] | |||
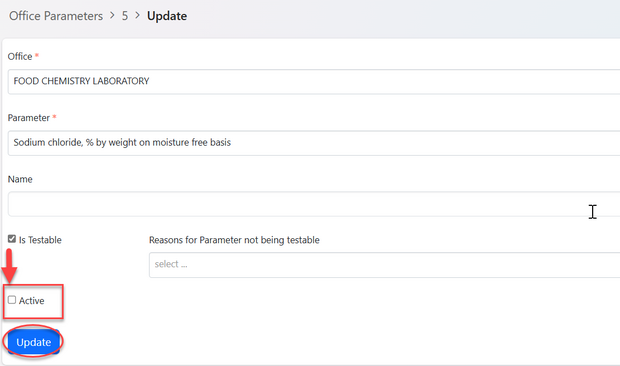
Edit the details as required, check the box "active" and click "Update" to save. See figure below. | |||
[[File:SPM5.png|center|thumb|620x620px|''Figure: Activating parameter'']] | |||
Latest revision as of 06:04, 28 August 2024
1. Internal Testing
1.1 Reviewing Test Request (Custodian)
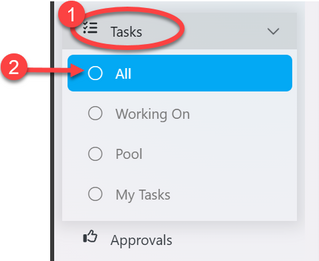
User will receive request for testing sent from other division. To access them go to the list of menus on the left and click "Task" then all tasks.
as shown on the figure below.
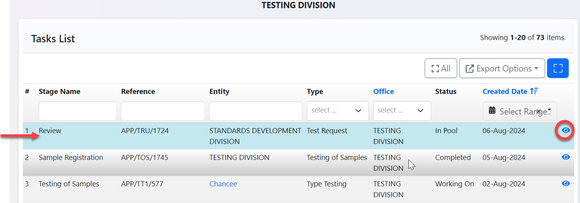
From the list click the intended one or click on the "eye" like symbol to open it as shown on the figure below.
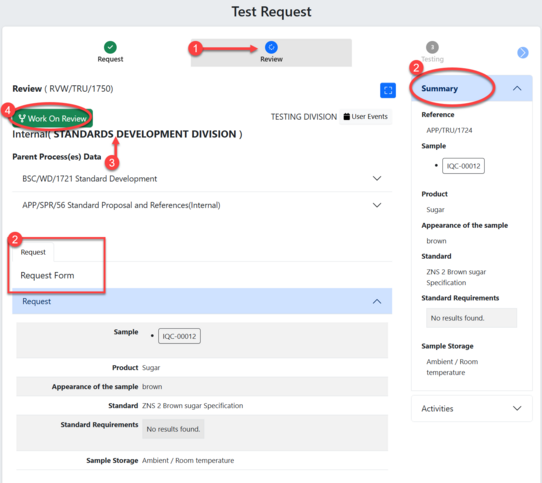
Upon successfully opening the request user will see the stage to work on as shown on the arrow 1 on the figure below. Also will see the details of request on summary or request form shown by number 2, as well as office requested for testing (see arrow 3). Then user will click on (4) "Work on Review" to start working on reviewing test request.
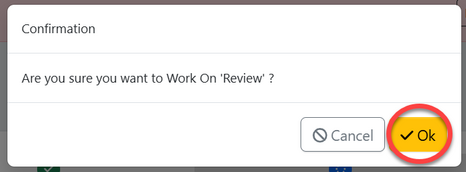
Click "Ok" to confirm working on review as shown below.
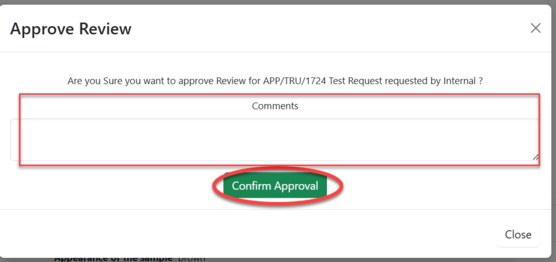
Click on "Approve Review" to approve or "Return" for improvements (See figure below)

Place a comment (If any) and click "Confirm"
1.2 Testing
1.2.1 Initialization and sample registration - Custodian
Initialization of testing is done by custodian

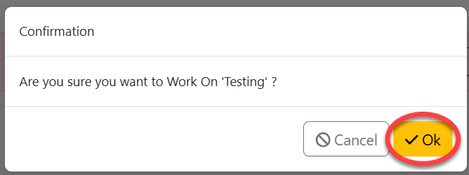
Click "Ok" to confirm to work on testing
Click on "Process" to access the

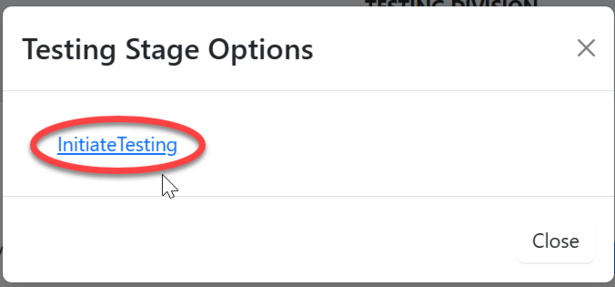
Then click "Initiate Testing" to start a testing process as shown on the figure below
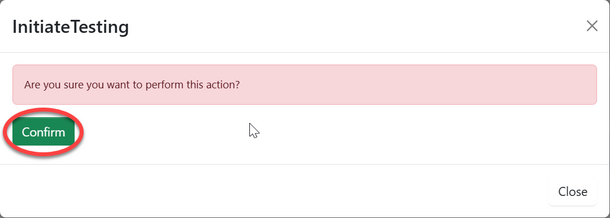
Click "Confirm" to confirm initiating testing
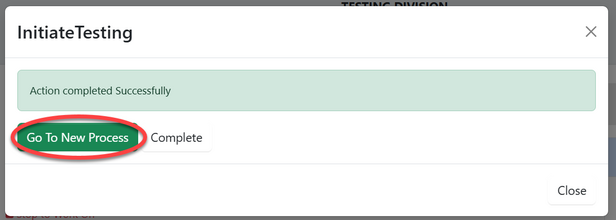
Click "Go To New Process"
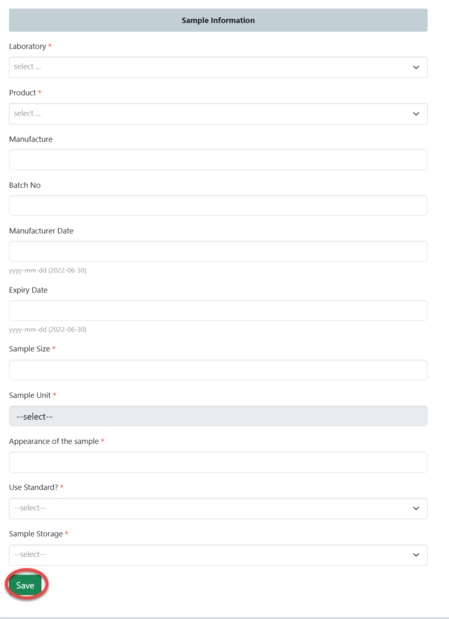
User will be landed on the page where will suppose to fill sample registration form according to sample submitted by the applicant. Fill in the required information as shown on the figure below.
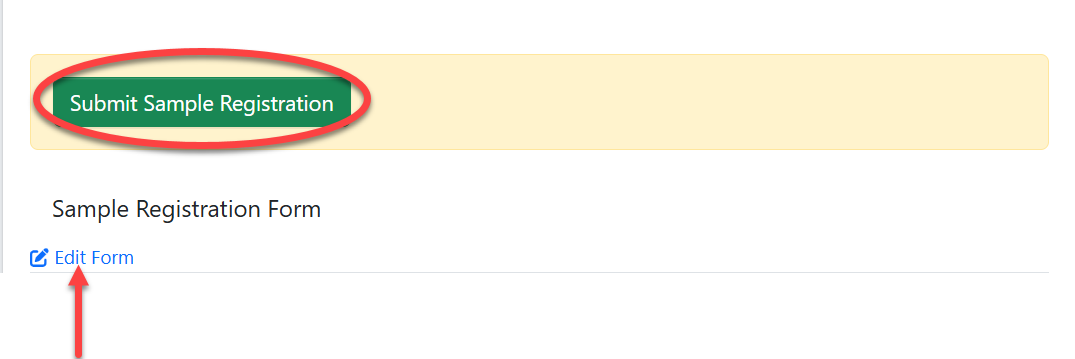
Click "Submit Sample Registration" to submit or click "Edit Form" to edit information then save and submit as shown on the figure below.
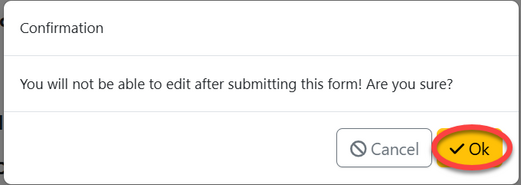
Click "Ok" to confirm submitting sample register as shown on the figure below.
1.2.2 Reviewing Sample (Head of Lab)
On the list of menus at left click on "Task" then click "Pool" to access new request.
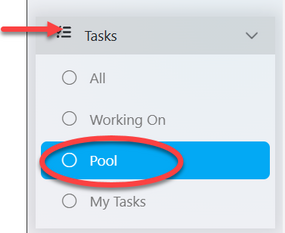
On the list of task click on the intended one or click on "eye" like symbol to open it.

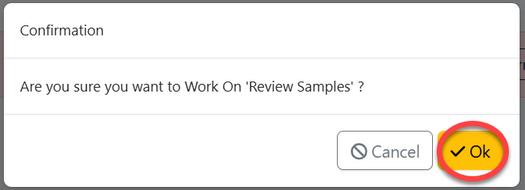
Click "Work On Review Sample" to start working on sample review as shown on the figure below.

Click "Ok" to confirm working on sample review
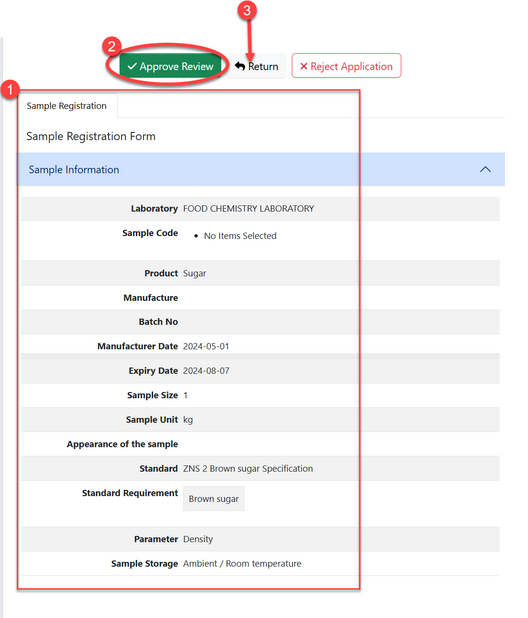
User will access a page with the sample information with the review options. User will compare the (1)details of sample in the system and actual submitted sample, then (2) approve if satisfied or (3) Return sample for rectification as shown on the figure below.
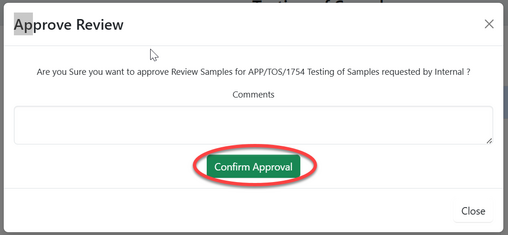
For approving sample put in comment (if any) then click "Confirm Approval" to confirm.
1.2.3 Testing
a)Testing assignment (Head of Lab)
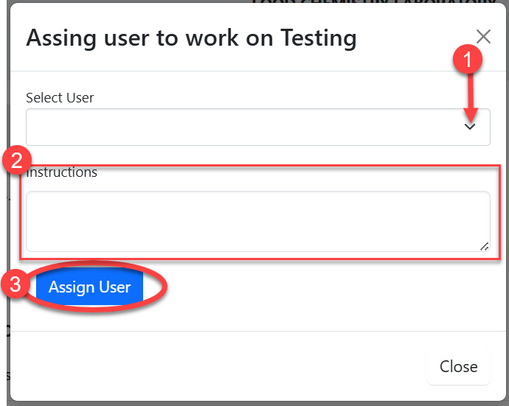
For approved sample, head of laboratory will assign task to analyst to perform the testing of samples.

To assign a work head of lab will:
1)Select user from the list accessed through dropdown menu as shown with arrow.
2) Write instruction or details regarding task assigned (if any)
3) Click "Assign User"
b) Laboratory Testing (Analyst)
On the list of menu click "Task" then click "Working on" to access list of tasks.
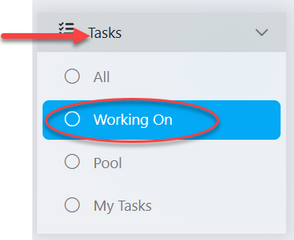
From the list of tasks click on the intended one or click on "eye" like symbol to open the application. see figure below.

Upon successfully opening the task user will be landed to the page with:
1.Summary - Containing all details about the request.
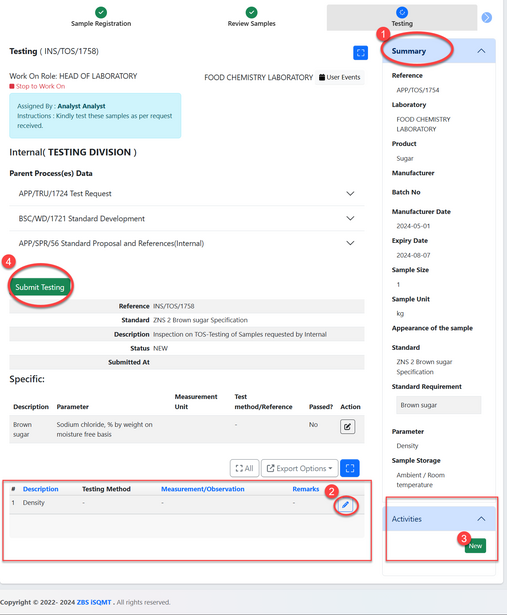
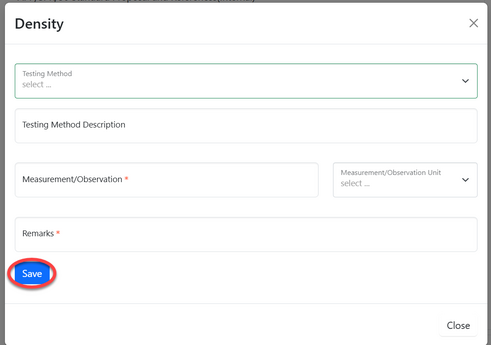
2. Parameter to be tested - Click on the "pen" like symbol to fill in the results of testing. On the popup window, fill in the results against measured parameters as required and click "Save" as shown on the figure below.
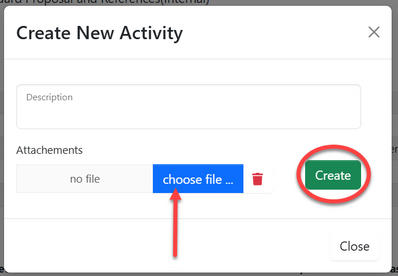
3. Activity - Documenting any other details and attachment used during testing. Click on the "New" and fill in details. Write description and attach document, then click "Create" to save, as shown on the figure below.
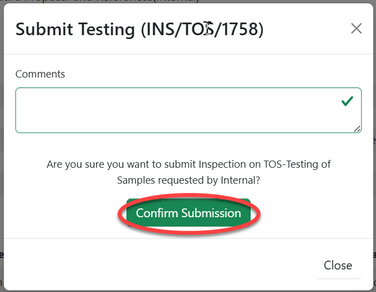
4. Click on "Submit Testing" to submit results. Then click on "Confirm Submission" to confirm submission of testing of sample.
1.2.4 Review Testing (Test Reviwer - analyst/ head of lab/ technical signatory)
After submission of testing results, the review should be done
From the list of task open the one which is in review stage as shown by the arrow, by clicking it or or click "eye" like symbol. (See figure below)

Click on "Work on Review" to start working on it.

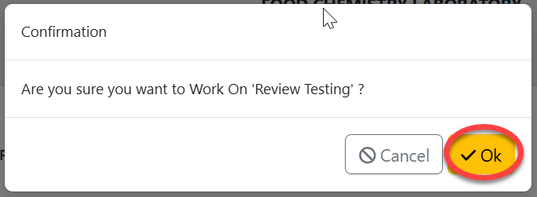
Click "Ok" to confirm working on the task.
User can see the summary of the task and results from the lab. After reading them and be satisfied can approve the results or click "Return" to return them for improvement.

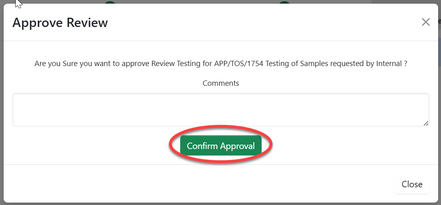
Click "Confirm" to confirm approving the results.
1.2.5. Authorize Test Report (AMT)
AMT
Click on the intended task or click on "eye" like symbol to open it. (See figure below)

| Click "" to start working on authorization | Click "Ok" to confirm working on authorization of test report. |
 |
 |
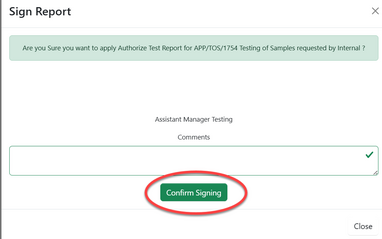
AMT can see the summary of testing and its report. If satisfied will click on "Apply Signature" to sign the test report.

Click"" to confirm signing the test report.
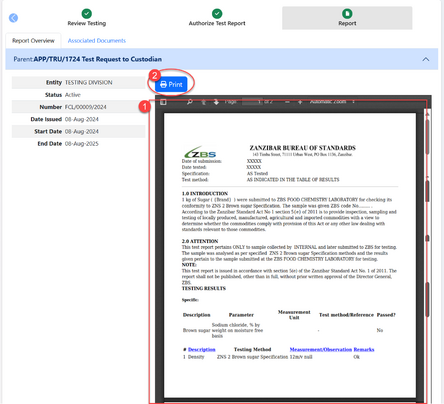
The report will appear as shown on the figure below.
1.3 Sending Test Report - Custodian
The authorized report will automatically posted to custodian so that to be sent to the recipient office.
1) Custodian can view test report
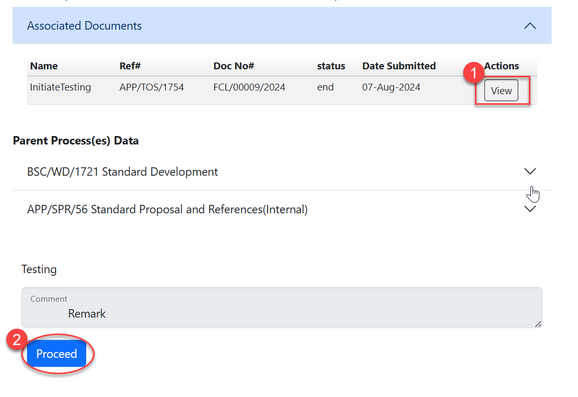
2)Custodian will click on "proceed" to provide remarks as shown on the figure above.
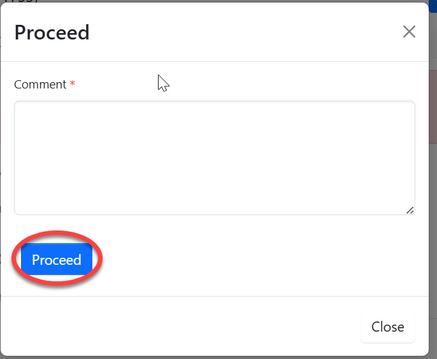
Fill in the comment then click "Proceed" to save and automatically sent them to the recipient office.
2. Type Testing
2.1 Review Request (Custodian)
Once the client submits a testing request, it will be received by the custodian, who is responsible for directing it to the appropriate laboratory.
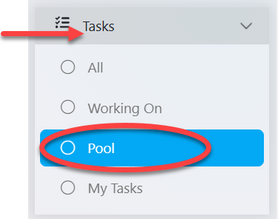
To access tasks, select 'Task' from the menu on the left, then click 'Pool' to view tasks that have not yet been worked on.
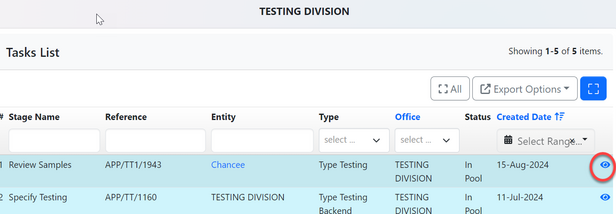
From the list of task click on the intended one or click on the "Eye" like symbol to open it.
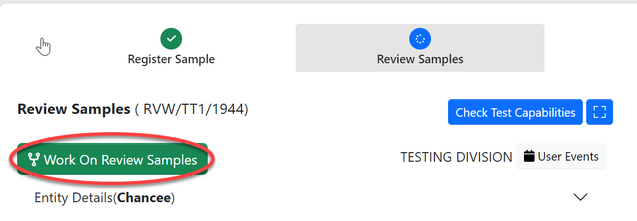
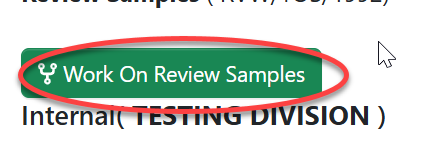
Click on "Work on Review Samples" To review the application.
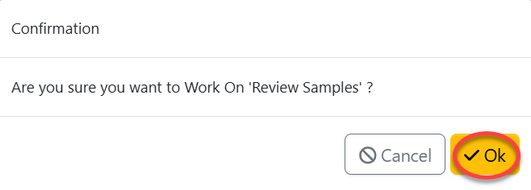
Click "Ok" To confirm reviewing samples.
Click "Approve" to approve, or "Return "

2.1.2 Payment
Approve fee
From the list of menus click "Approvals"
From the list of tasks click on the intended one or click the "eye" like symbol.

User will be landed on the page with details of payment
Add comment if any then click "Accept". See figure below.
2.2.2 Work on Payment by Accounting office. Click here to access user guide.
2.2 Testing
After payment is successfully being made, testing will be initiated
2.2.1 Initialize Testing (Custodian)
On the stage click "Working on Testing" as shown on the figure below.

Click "Ok" to confirm working on testing
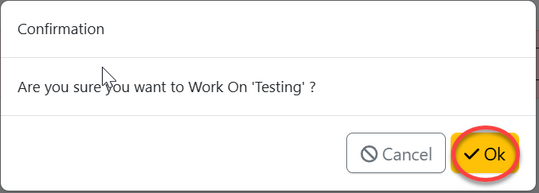
Click "Start Testing" to access the process initiation.
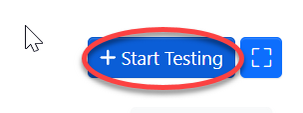
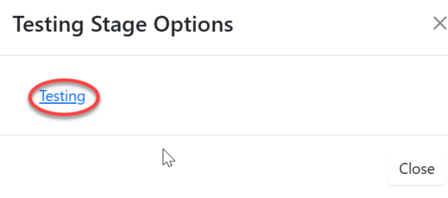
Click on "Testing" as shown below.
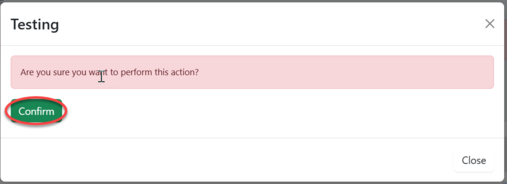
Click "Confirm" to confirm initiation of the process.
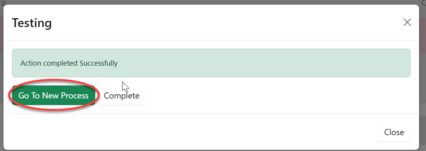
Click "Go To New Process" to access process of testing
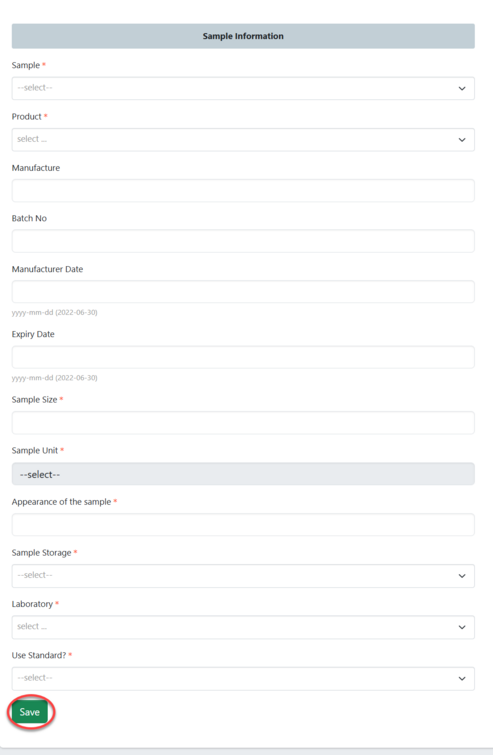
On the window appeared with the form, fill in all the required details for sample registration and click "save" to save it. See figure below.
Click "Submit Sample Registration" to submit form or "Edit Form" to edit details, save then submit.

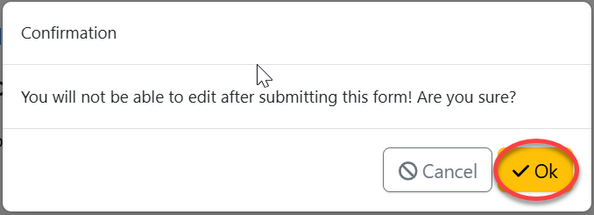
Click "Ok" to confirm submitting the form.
Click on "Proceed" to

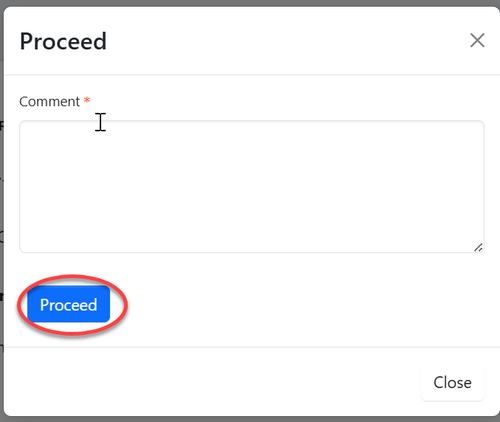
Fill comment if any then click "Proceed" to proceed.
2.2.2 Sample Review (Head of Lab)
From the list of tasks in the pool click on the intended one or click on "eye" like symbol to open it.

Click on "Work on Review"
Click "Ok" to confirm working on it
User will be landed on the page as shown below
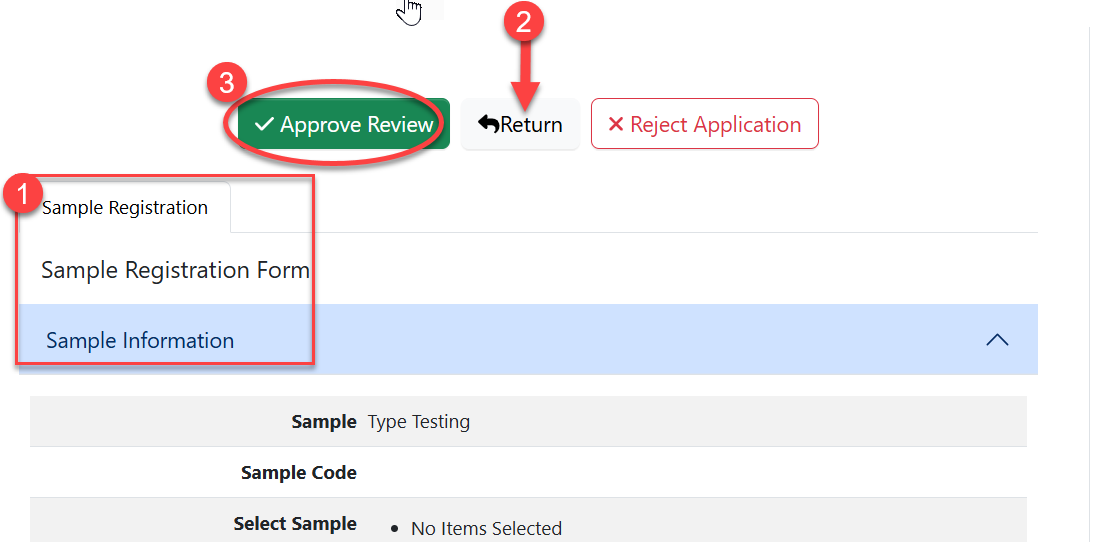
Here user can:
1)View sample details as shown on the sample register tab
2)Return sample if there is and fault found with them or improvement needed.
3)Approve sample if are meet testing requirement.
Upon clicking on "Approve Review" the window below will popup where user will click "Confirm" to confirm approving samples.( See figure below)
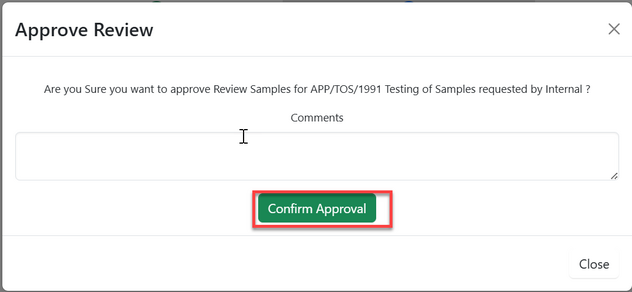
2.2.3 Testing assignment (Head of Lab)
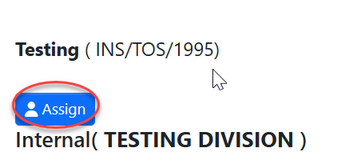
On the stage testing user will click on the button "Assign" to assign the testing task to w specific analyst. See figure below.
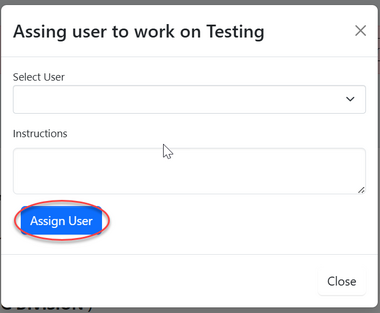
On the popup window select the analyst to assign task to, write instruction if any then click "Assign User" as shown on the figure below.
2.2.4 Testing (Analyst)
Analyst will see the assigned task from the "My Task" and work on it.
Click here to access the User guide.
2.2.5 Review Testing (Test Reviewer - analyst/ head of lab/ technical signatory)
The results of testing will be reviewed by other analyst.
Click here to access user guide.
2.2.6 Authorize Test Report
AMI will view test report and authorize it by signing it.
Click here to access user guide
2.3 Sending Test Report - Custodian
The authorized report will automatically posted to custodian so that to be sent to the recipient office.
Click here to access user guide.
3. Proficiency Testing
3.1 Review Application (PT Coordinator)
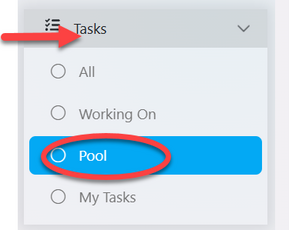
After login in successfully, user will click "Task" on the list of menus on left then click "Pool" to access all the tasks that are not yet worked on. See figure below.
From the list of tasks user will click the intended one or click "Eye" like symbol to open it.

User will click "" to work on Review

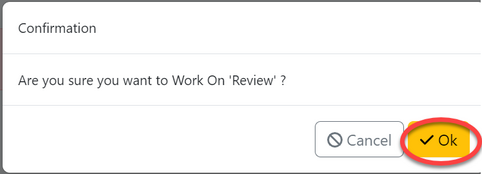
Click "Ok" to confirm working on review.
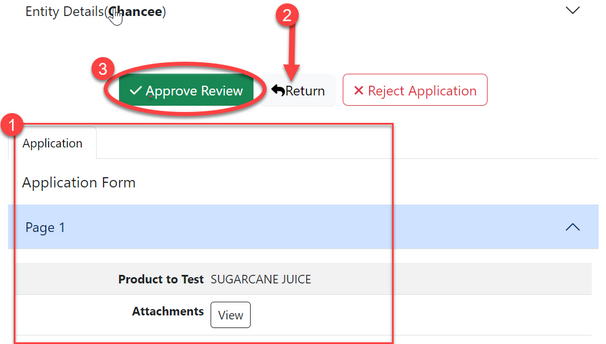
User can;
1)Review the application details
2)Return application for improvement if any.
3)Approve application for proceedings.
See figure ebelow.
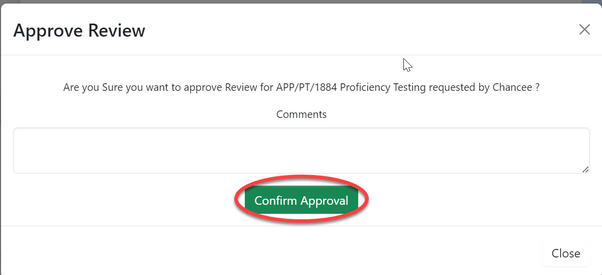
After clicking approve review, on the popup window click on "Confirm Approval"
Upon successfully payment made, PT coordinator will proceed with the "Specifying Testing" stage.
3.3 Testing
3.3.1 Specify testing
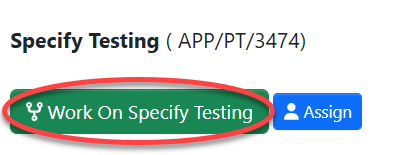
On the stage, click on "Work on Specify Testing" as shown on the figure below.
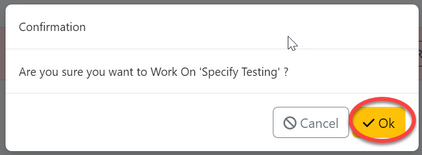
Click "Ok" to confirm
Fill in the details by adding a product and click on "Parameter to Test" to add parameters, Then click "Save" to continue.
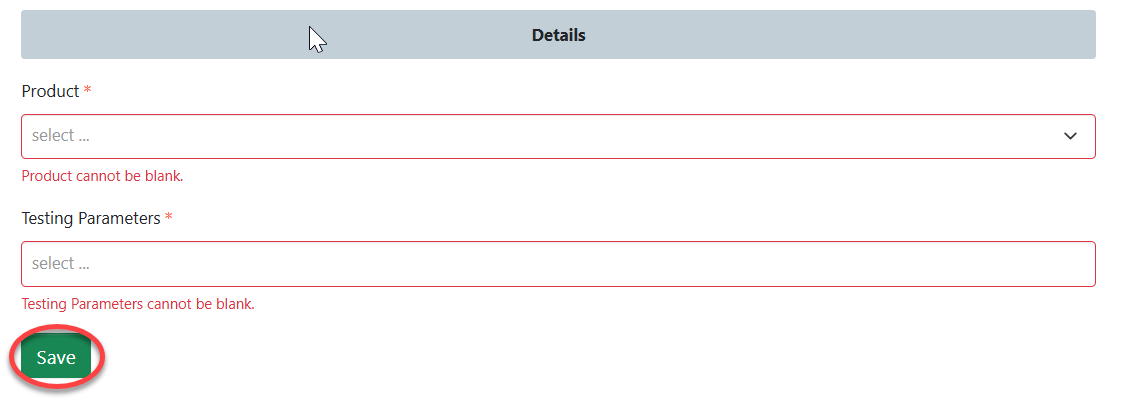
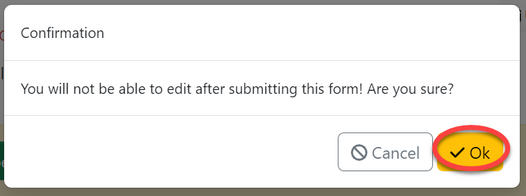
After saving the testing specification, click "Submit "

Then confirm as shown on the figure below.
3.4 Results
Click on "Work on Results" as shown on the figure below.
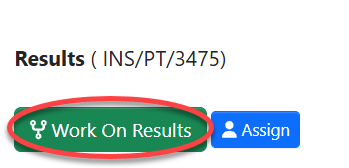
Then click on the "pen" like symbol to add resullts.

Fill in the required details and click "Save" as shown on the figure below.
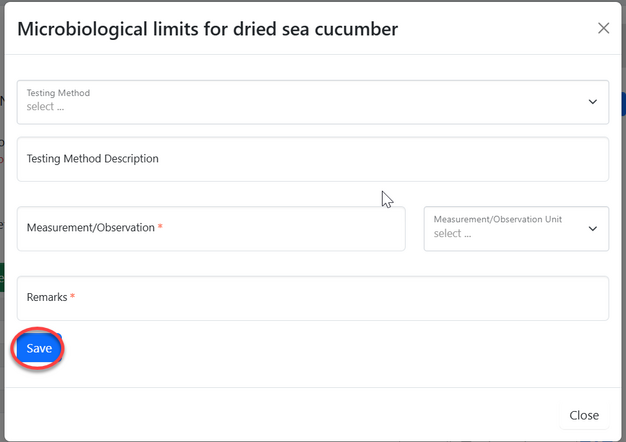
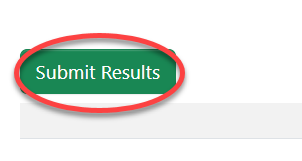
Click "Submit" to submit the results.
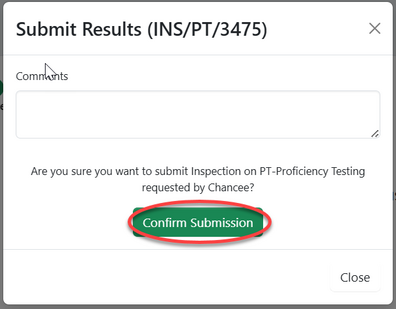
Click "Confirm" to submit.
3.5 Review Testing Results
Click "Work on Review Results" to start working on review as shown on the figure below.

User will be landed on the page as shown below.
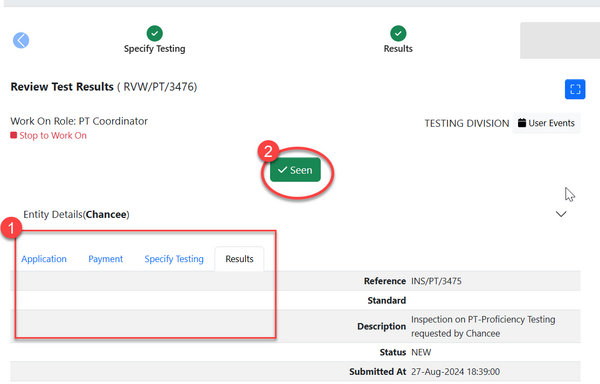
- Here user can view the details of all the stages of the application.
- Click "Seen" to approve the results.
4. Device Calibration
4.1 Receiving Application
4.1.1 Application Review
4.1.2 Payment & Review
4.2 Calibrating Device
4.2.1 Initiate Calibration
Click "Initiate Calibration" to start the calibration of device as shown on the figure below.

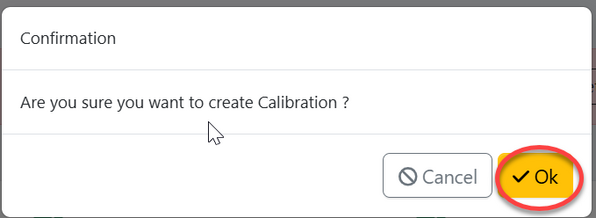
Click "Ok" to confirm initiating calibration.
4.2.2 Calibrating Device
4.2.3 Review Calibration Review
5. Parameters Management
5.1 Creating parameters
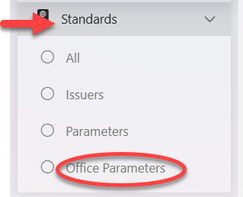
From the list of menus on the left click "Standard" then click "Office parameter" as shown on the figure below.
From the page with the list of parameter click the button "Create" to add a new parameter. See the figure below.

User will be landed on the popup window of the form to be filled with parameters details, fill them as required then click "Create"
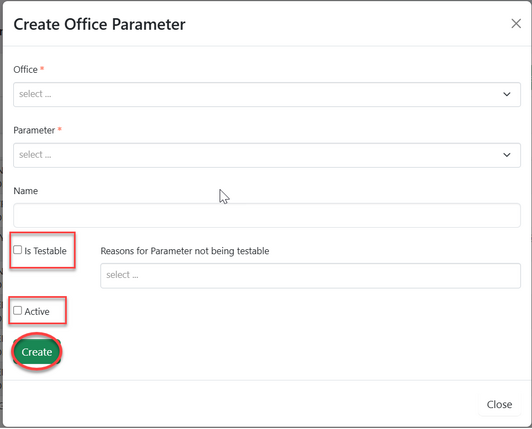
It is important that user check the box of "Is Testable" and "Active" for parameter to be active used in the lab.
Upon successfully following those steps parameter will be created.
5.2 Editing & Activating Parameter
From the list of parameters, click the intended one to open it. On the page opened click "Update" as shown on the figure below.
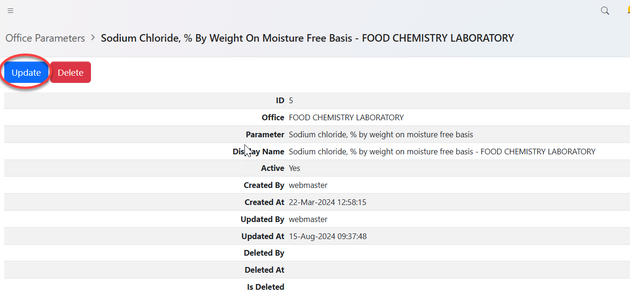
Edit the details as required, check the box "active" and click "Update" to save. See figure below.
