Inspection: Difference between revisions
Chanceness (talk | contribs) No edit summary |
Chanceness (talk | contribs) |
||
| (19 intermediate revisions by the same user not shown) | |||
| Line 1: | Line 1: | ||
== 1. Destination Inspection == | == 1. Destination Inspection == | ||
| Line 18: | Line 17: | ||
'''a) Check Standard (Signatory)''' | '''a) Checking Standard & Response''' | ||
'''i. Check Standard (Signatory)''' | |||
User will click on the "Process" button on the right, as shown on the figure above. | User will click on the "Process" button on the right, as shown on the figure above. | ||
| Line 37: | Line 37: | ||
''' | '''ii. Standard Response - AMSILE''' | ||
From the list of task user will click on the task with the type "Request Standard" | From the list of task user will click on the task with the type "Request Standard" | ||
| Line 46: | Line 46: | ||
[[File:DI01.png|center|thumb|614x614px|''Figure : Confirm working on response'']] | [[File:DI01.png|center|thumb|614x614px|''Figure : Confirm working on response'']] | ||
Fill in the required standard as per provided product and click "" to save. | Fill in the required standard as per provided product and click "" to save. | ||
[[File:DI02.png|center|frame|''Figure :Adding standard''|border]] | [[File:DI02.png|center|frame|''Figure :Adding standard''|border]] | ||
{| | {| | ||
|For YES on standard presence[[File:DI03.png|center|''Figure :Details for standard response''| | |For YES on standard presence[[File:DI03.png|center|''Figure :Details for standard response''|frame]] | ||
|For NO on standard presence[[File:DI04.png|center|''Figure : Details for standard response''|frame]] | |For NO on standard presence[[File:DI04.png|center|''Figure : Details for standard response''|frame]] | ||
|} | |} | ||
| Line 63: | Line 63: | ||
Click "Ok" to confirm submitting response for standard. | Click "Ok" to confirm submitting response for standard. | ||
''' | '''b) Checking Test Capabilities''' | ||
User will click on the "Check Test Capabilities" button on the right, as shown on the figure above. | User will click on the "Check Test Capabilities" button on the right, as shown on the figure above. | ||
| Line 105: | Line 105: | ||
==== 1.1.4 Inspection ==== | ==== 1.1.4 Inspection ==== | ||
=== 1.3 | ===== '''i. Initialization (AMI)''' ===== | ||
After issuing initial import permit, AMI will initiate inspection of the products imported. From the list of tabs click "Inspection" as shown on the figure below.[[File:GDI14.png|center|thumb|541x541px|''Figure : Accessing Inspection'']] | |||
Click on "Initialize Inspection" as shown on the figure below. | |||
[[File:GDI15.png|center|thumb|605x605px|''Figure: Initiate Inspection'']] | |||
Click "Ok" to confirm initiating inspection as shown below. | |||
[[File:GDI16.png|center|thumb|590x590px|''Figure :Confirm initiating inspection'']] | |||
Click on "Assign" to assign inspection activity to inspector. | |||
[[File:GDI17.png|center|thumb|493x493px|''Figure :Assign task'']] | |||
Select the inspector to assign, search by name of the inspector, fill in instruction if any and click "Assign User" to save and automatically assign the task. | |||
[[File:GDI18.png|center|thumb|474x474px|''Figure :Assigning task'']] | |||
===== '''ii. Inspection (Inspector''') ===== | |||
[[File:GDI20.png|left|thumb|328x328px|''Figure :Accessing list of task'']] | |||
From the list of menus on the menus click "Task" then "Pool" to access all tasks that are not yet worked on. | |||
From the list of tasks click on the intended one or click on "eye" like symbol to open it. | |||
[[File:GDI21.png|center|thumb|594x594px|''Figure : List of tasks'']] | |||
Upon successfully opening a task, user will be landed on the page where multiple activities of inspection can be initiated. | |||
To begin click on "Process" as shown on the figure below. | |||
[[File:GDI22.png|center|thumb|601x601px|''Figure : Inspection activity processes'']] | |||
Click on "General Goods" to initiate inspection of general good. | |||
[[File:GDI24.png|center|thumb|579x579px|''Figure : General goods inspection stage'']] | |||
Click "" to confirm working on | |||
[[File:GDI25.png|center|thumb|643x643px|''Figure : Confirm working on inspection of general goods'']] | |||
After user initiating inspection of general goods process user will be landed on the new process. Here is where user can intiation batch inspection and . | |||
Click "Process" as shown on the figure below. | |||
[[File:GDI00.png|center|thumb|654x654px|''Figure : Inspection of general goods'']] | |||
'''Batch Inspection''' | |||
Click "" to initiate batch inspection | |||
[[File:GDI001.png|center|thumb|590x590px|''Figure : Initiate batch inspection'']] | |||
Click "Confirm" to confirm initiating batch inspection. | |||
[[File:GDI002.png|center|thumb|618x618px|''Figure :Confirm initiating batch inspection'']] | |||
Click "Go To New Process" to open stages of batch inspection process | |||
[[File:GDI003.png|center|thumb|617x617px|''Figure : Go to new process'']] | |||
User will be directed to the page with the inspection form. Fill in required details and click "save" to save information. | |||
[[File:GDI004.png|center|thumb|1211x1211px|''Figure :Batch inspection checklist'']] | |||
Click "submit" to submit the form or click "Edit Form" to edit and save, then submit. See figure below. | |||
[[File:GDI005.png|center|thumb|654x654px|''Figure : Submit form'']] | |||
Click "Ok" to confirm submitting the form. as shown on the figure below. | |||
[[File:GDI006.png|center|thumb|676x676px|''Figure : Confirm submitting the form'']]After submitting an inspection the inspection report will be automatically generated as shown on the figure below. | |||
[[File:GDI000.png|center|frame|''Figure : Inspection report'']] | |||
===== '''Sample registration''' ===== | |||
Click "Sample Register" to initiate sample registering process. | |||
[[File:GDS1.png|center|thumb|549x549px|''Figure : Sample registration'']]Click "Confirm" to confirm initiating a process of sample register | |||
[[File:GDS2.png|center|thumb|652x652px|''Figure : Confirm working on sample register'']] | |||
Click "Go To New Process" to access sample registration process | |||
[[File:GDS3.png|center|thumb|647x647px|''Figure :Go to new process of sample registration'']] | |||
Fill in the required details regarding the sample collected and click "Save" to submit | |||
[[File:GDS4.png|center|thumb|665x665px|''Figure :Sample registration form'']] | |||
Click "Submit" to submit sample or click "Edit Form" to edit details in the sample registration form, save and then submit. See figure below. | |||
[[File:GDS6.png|center|thumb|695x695px|''Figure : Submit form'']] | |||
Click "Ok" to confirm | |||
[[File:GDS7.png|center|thumb|641x641px|''Figure :Confirm submitting sample register form'']]Upon successfully submitting the form user will see the report on the next stage "Certificate" as shown on the figure below. | |||
[[File:WC34.png|center|frame|''Figure :Sample register report'']] | |||
==== 1.1.5 Inspection report ==== | |||
===== '''i. Initiate testing (AMI)''' ===== | |||
From the list of tabs click on "Request Testing" 1 and then click "Request Testing" 2 as shown on the figure below. | |||
[[File:GDIT1.png|center|thumb|633x633px|''Figure : Request testing'']] | |||
Click "Ok" to confirm working on requesting testing. | |||
[[File:GDIT2.png|center|thumb|615x615px|''Figure :Confirm working on testing'']] | |||
Fill in the required details for test request then click "Save" to submit. See figure below. | |||
[[File:GDIT3.png|border|center|thumb|574x574px|''Figure :Fill in sample registration'']] | |||
Click "" to submit form or "Edit Form" to edit save then submit | |||
[[File:GDIT4.png|border|center|frame|''Figure :Submit request'']] | |||
Click "Ok" to confirm | |||
[[File:GDIT5.png|center|thumb|650x650px|''Figure : Confirm to submit'']]The request will be received at the testing division for testing'''. [[Testing#1. Internal Testing|Click here for testing user guide.]]''' | |||
==== 1.1.6 Permit ==== | |||
===== '''i. Batch certificate.''' ===== | |||
Upon approving the results from lab, AMI will be able to initiate the batch certificate as seen below. | |||
[[File:GDIR40.png|center|frame|''Figure :Initiate batch certificate'']] | |||
1- Click "Batch Certificate" to initiate the process of granting certicifate. | |||
2- Click "Batch Certificate" as shown below. | |||
[[File:BC1.png|center|thumb|256x256px|''Figure :Batch certificate'']] | |||
User will fill in the required details as shown below and click "Save" to initiate batch certificate. | |||
[[File:GDIR41.png|center|frame|''Figure : Initiate batch certificate'']] | |||
Click "Submit Initiate" to submit form or click "Edit Form" to edit details, save and submit. See figure below. | |||
[[File:GDIR42.png|center|frame|''Figure :Submit'' ]] | |||
===== '''ii. Issue Batch certificate''' ===== | |||
Click issue to[[File:GDIR43.png|left|frame|''Figure :Issue certificate'']]click "Confirm" to confirm issuing certificate.[[File:GDIR44.png|center|thumb|513x513px|''Figure :Confirm working on Issuing certificate'']]User will see the certificate and if satisfied can apply a signature by clicking "Apply signature" as shown on the figure below.[[File:GDIR45.png|center|frame|''Figure :Apply signature'']]Upon successfully applied a signature and confirm, the batch certificate will be released as shown on the figure below.[[File:GDIR46.png|center|frame|''Figure : Batch certificate'']] | |||
===== *** ===== | |||
== 3. Wet Cargo == | |||
=== 3.1 Reviewing Application === | |||
From the list of menus user will click on the pool to access all the task that has not been worked on yet. | |||
From the list of task click the intended one or click "eye" like symbol to open the task as shown on the figure below. | |||
[[File:WC1.png|center|frame|''Figure 3.1 (a) :List of figures'']] | |||
Click "Work on Review" to work on the task. | |||
[[File:WC2.png|border|left|thumb|368x368px|''Figure 3.1(b) :Work on the review'']] | |||
Click "Ok" to confirm working on it. | |||
[[File:WC3.png|center|thumb|530x530px|''Figure 3.1(c): Confirm working on review'']] | |||
User will be landed on the page where can view and work on the application | |||
[[File:WC4.png|center|thumb|780x780px|''Figure 3.1 (d) :Review page'']] | |||
1)View application details. | |||
2)Check for test capability by clicking on the button shown on the figure 3.1(d) 2 above. | |||
[[File:WC5.png|center|thumb|645x645px|''Figure 3.1(e):Checking for test capability'']] | |||
3)Return application for improvement. | |||
4)Approve the application by clicking "Approve" as shown on the figure 3.1(d) above. | |||
Then click "Ok" to confirm approving the review. as shown on the figure below. | |||
[[File:WC6.png|center|frame|''Figure 3.1(f) :Confirm approving application'']] | |||
=== 3.2 Inspection === | |||
==== 3.2.1 Initialization ==== | |||
AMI will assign user for inspection by clicking "Assign" | |||
[[File:WC7.png|left|frame|''Figure 3.2 (a):User assignment'']] | |||
Select the user to assign by searching by the username and click "Assign User" as shown on the figure below. | |||
[[File:WC8.png|center|thumb|360x360px|''Figure 3.2(b):User assignment'']] | |||
==== 3.2.2 inspection processes (inspection wet cargo) ==== | |||
From the menu "Task" click on "My Task" to open task assigned. | |||
From the task list click the intended "one" or click on "eye" like symbol to open task. | |||
[[File:WC9.png|center|thumb|602x602px|''Figure 3.3(c): List of tasks'']] | |||
Click "Inspection" to start the process of inspection. | |||
[[File:WC0.png|center|thumb|598x598px|''Figure 3.2(e) :Start inspection'' ]] | |||
User will see list of processes to be done during inspection as shown below. | |||
[[File:WCR1.png|center|thumb|531x531px|''Figure 3.2 (f) :'']] | |||
1)Batch Inspection - Click here to open the process of batch inspection. | |||
Then click "Confirm" to confirm starting the process. | |||
[[File:WC30.png|center|thumb|635x635px|''Figure 3.2 () :Confirm starting a process'']] | |||
Click "Go To New Process" as shown on the figure below. | |||
[[File:WC31.png|center|thumb|660x660px|''Figure 3.2 (): Go to new process'']] | |||
User will be landed on the page with batch inspection form. Fill in the required details and click "Save" as shown on the figure below. | |||
[[File:WC32.png|center|thumb|707x707px|''Figure 3.2 (): Batch inspection form'']] | |||
Click "Submit" to submit or click "Edit form" to edit details, save then submit. See figure below. | |||
[[File:WC33.png|center|thumb|665x665px|''Figure 3.2(): Submit sample register'']] | |||
Upon successful submission of sample register form, user will see | |||
[[File:WC34.png|center|frame|''Figure 3.2 ():'']] | |||
2)Sampling -Click here to register sample collected during inspection (See figure 3.2(f) above. | |||
Then click "Confirm" to start a process | |||
[[File:WCR2.png|center|thumb|678x678px|''Figure 3.2 ():Confirm initiating sampling process'']] | |||
Click "Go To New Process" to open a new process | |||
[[File:WCR3.png|center|thumb|663x663px|''Figure 3.2():'']] | |||
User will be landed on the page with sample register form. Fill in the required details and click "Save" | |||
[[File:WC35.png|center|thumb|788x788px|''Figure 3.2 ():Sample register form'']] | |||
Click "submit" to submit form or click "Edit Form" to edit details, save then submit as shown on the figure below. | |||
3.3 Review Inspection. | |||
From the task list user will click the intended task and open it. | |||
On the stage "Inspection review" click on "Work on Inspection Review" as shown on the figure below. | |||
[[File:WC36.png|border|left|thumb|382x382px|''Figure 3.3 (a): Work on inspection review'']] | |||
Click "Confirm" to confirm working on review. | |||
[[File:WC37.png|center|thumb|568x568px|''Figure 3.3.(b):Confirm working on review'']] | |||
User will be landed on the page as shown below. | |||
[[File:WC38.png|center|thumb|638x638px|''Figure 3.3 (b):Reviewing inspection'']] | |||
Here user can view the sample register report as well as batch inspection report. Also the comment for the inspection. | |||
After that user can return inspection report for improvements or approve it for other proceedings. | |||
=== 3.4 Testing === | |||
==== 3.4.1 Initiate testing ==== | |||
Click on "Work on Testing" | |||
[[File:WC39.png|border|left|thumb|''Figure 3.4 (a): Work on Testing'']] | |||
Click "Ok" to confirm working on testing. | |||
[[File:WC40.png|center|thumb|572x572px|''Figure 3.4(b):Confirm working on testing'']] | |||
User will be landed on the page where can check for test capability and initiate testing. | |||
[[File:WC41.png|border|center|frameless|572x572px|''Figure 3.4(c):'']] | |||
Click "testing" to start the new process of testing as shown on the figure above. | |||
On the popup window "Request Testing" | |||
[[File:WC42.png|center|thumb|520x520px|''Figure 3.4(e):'']] | |||
Click "Go To New Process" to start the testing process. | |||
[[File:WC43.png|center|thumb|632x632px|''Figure 3.4(f):Go to testing process'']] | |||
Fill in the required details and click "Save" to save it. See the figure 3.4(g) below. | |||
[[File:WC44.png|center|frame|''Figure 3.4 (g): Test request form'']] | |||
==== [[Testing#1.2.2 Reviewing Sample (Head of Lab)|3.4.2 Sample Review]] ==== | |||
== 2. | ==== [[Testing#1.2.3 Testing|3.4.3 Testing]] ==== | ||
== 3. | ==== [[Testing#1.2.4 Review Testing (Test Reviwer - analyst/ head of lab/ technical signatory)|3.4.4 Review Testing]] ==== | ||
Latest revision as of 16:35, 20 August 2024
1. Destination Inspection
1.1 Destination Inspection
1.1.1 Reviewing application (Signatory)
From the list of menus on the left user should click "Task" and then click "Pool" to access all task that are new.
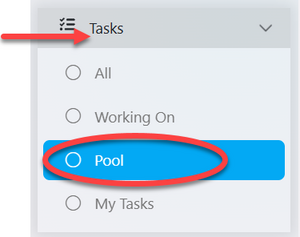
From the list of menus click on the intended application or click on the "eye" like symbol to open the application. See figure below.

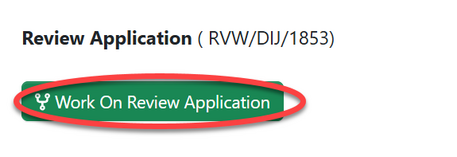
User will click "" to start to work on the application
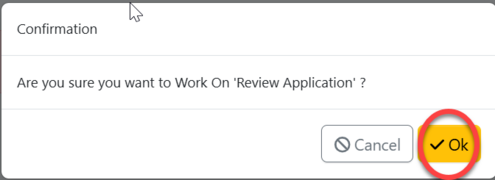
Click "Ok" to confirm working on review application.
Before approval, the user can choose to perform preliminary activities such as verifying testing capabilities and requesting standards based on the nature of the product to be imported

a) Checking Standard & Response
i. Check Standard (Signatory)
User will click on the "Process" button on the right, as shown on the figure above.
Then click on the "Check Standard" as shown on the figure below.
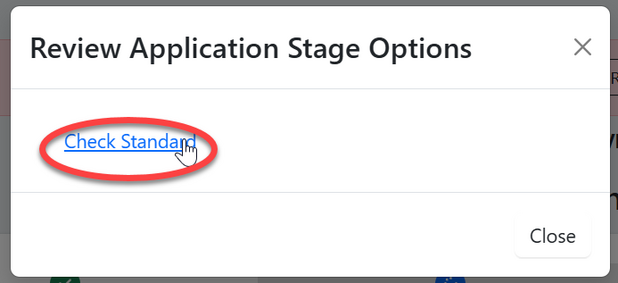
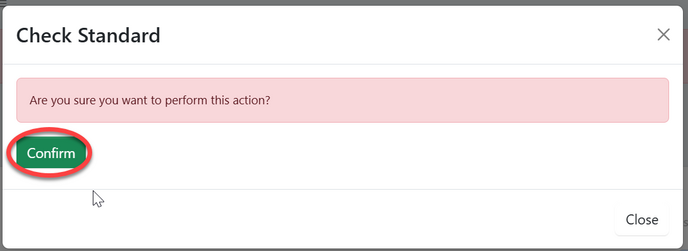
Click "" to confirm checking standard
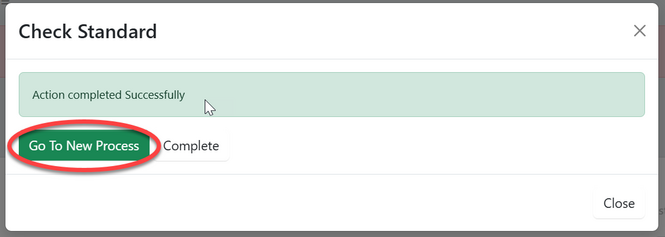
Click "Go To New Process" to open the process of requesting for standard.
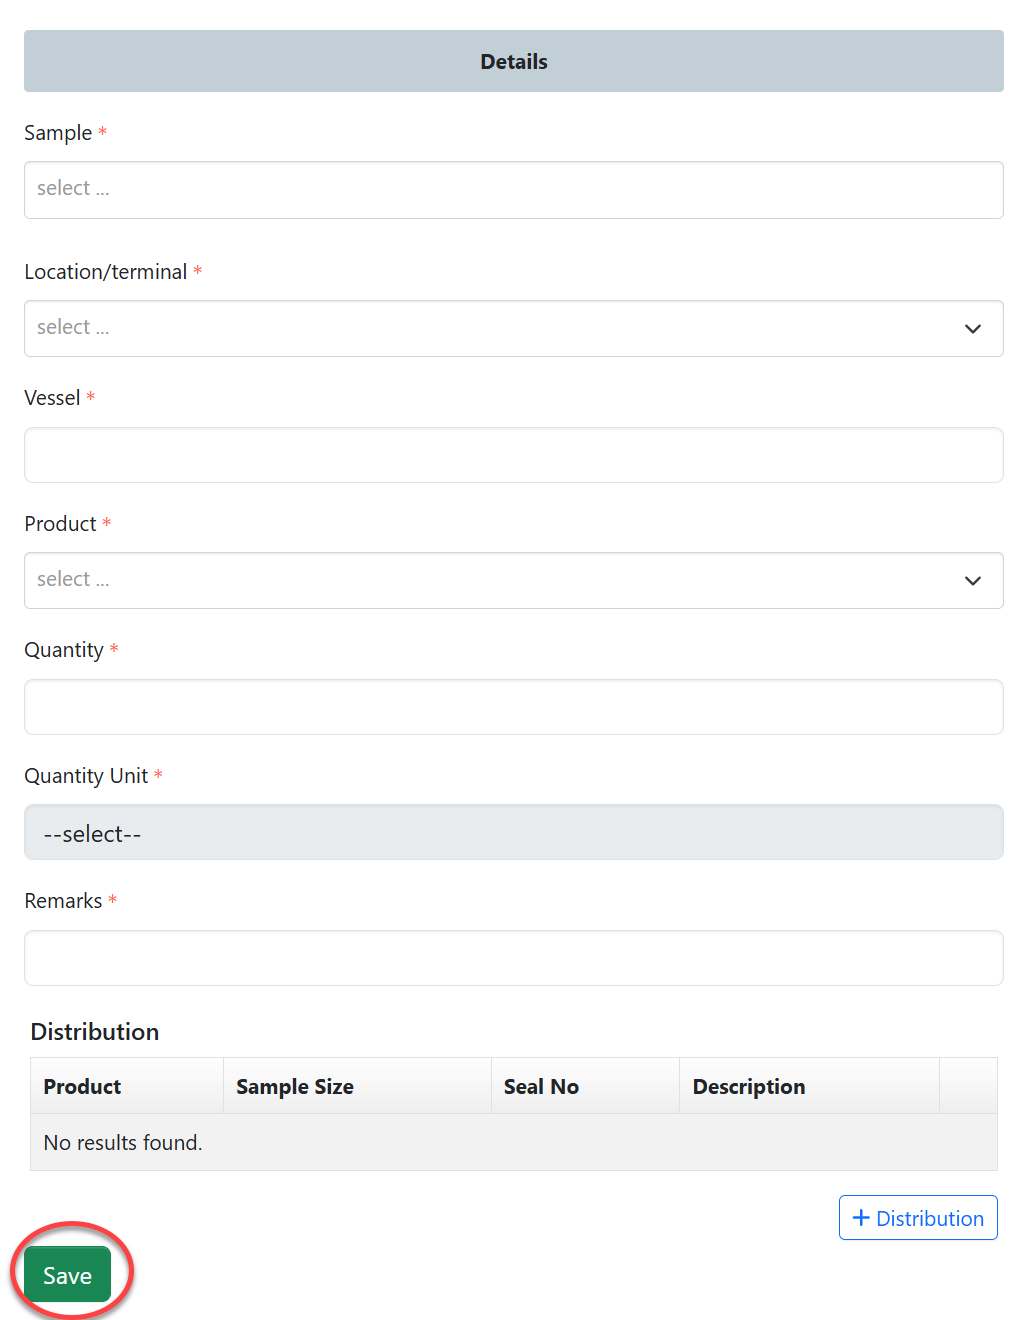
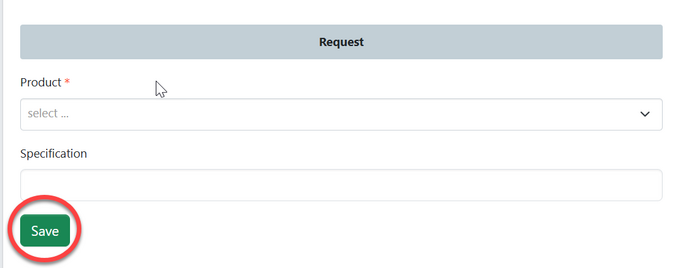
Fill in the required details and click "Save " to save and request
Click on "Submit Request" to submit, or Click on the "Edit Form" to edit details save and submit request. See figure below.

ii. Standard Response - AMSILE
From the list of task user will click on the task with the type "Request Standard"

Click "Work on Response" to fill in the repsonse to the requested standard.

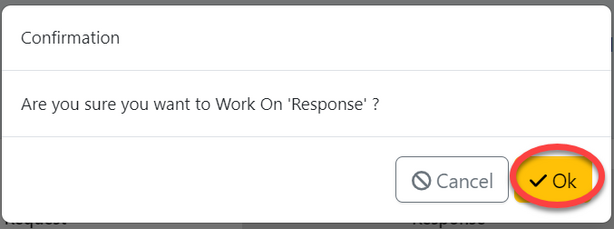
Click "Ok" to confirm as shown on the figure below.
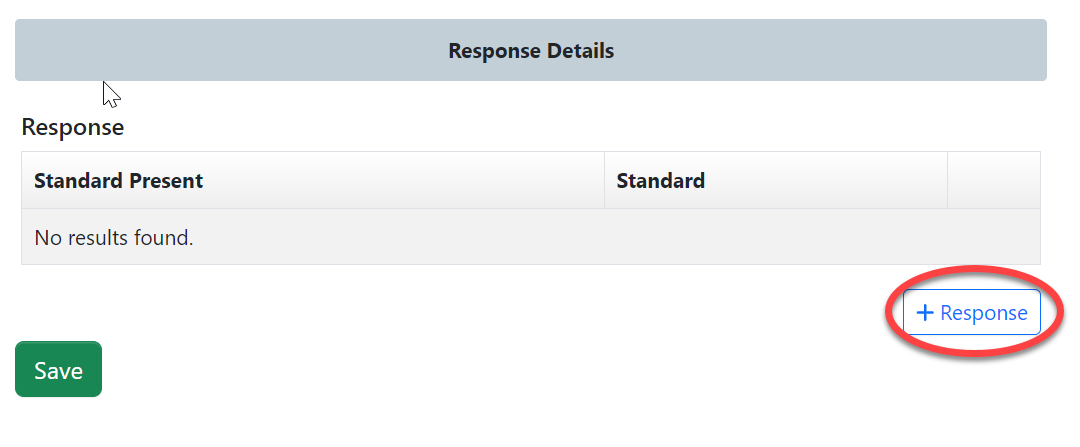
Fill in the required standard as per provided product and click "" to save.
For YES on standard presence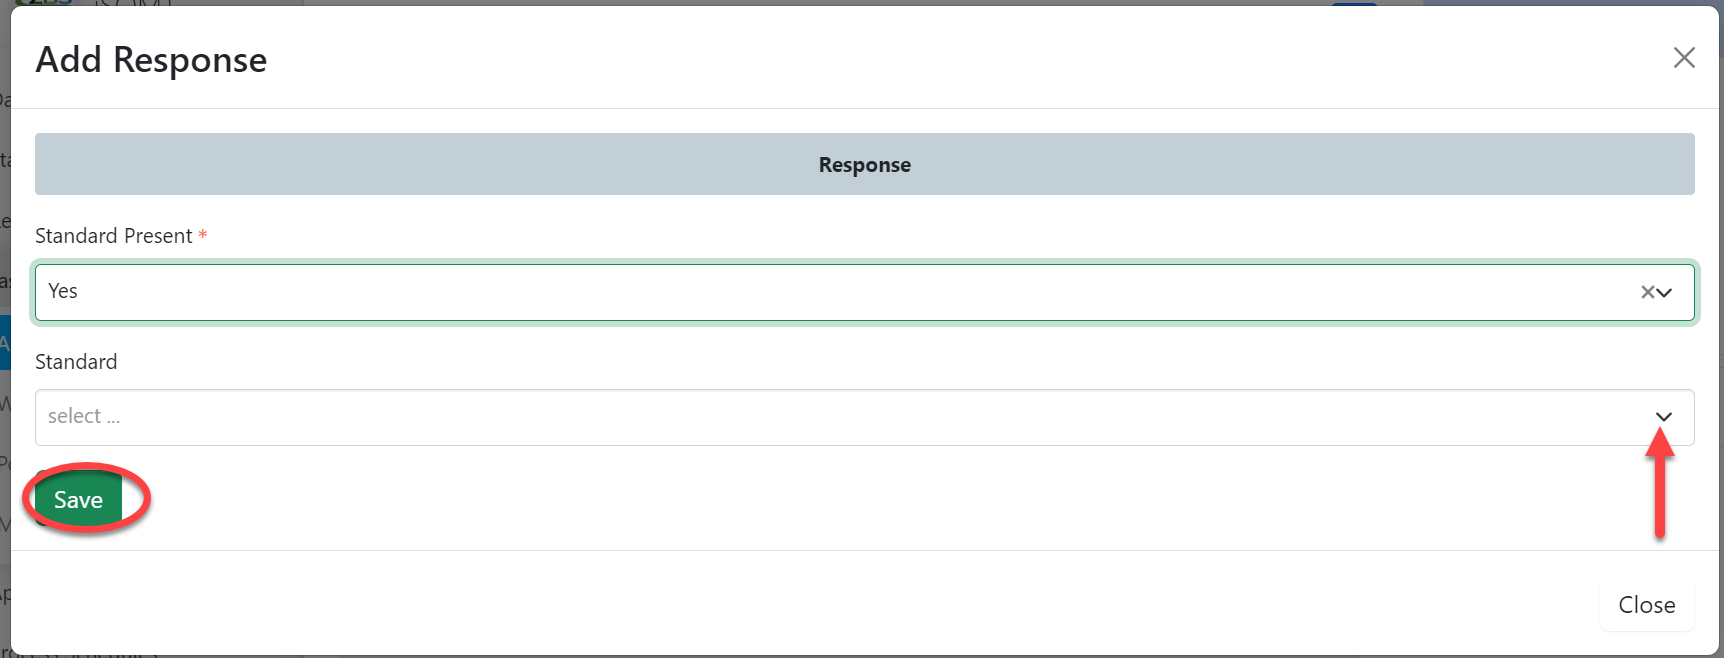 |
For NO on standard presence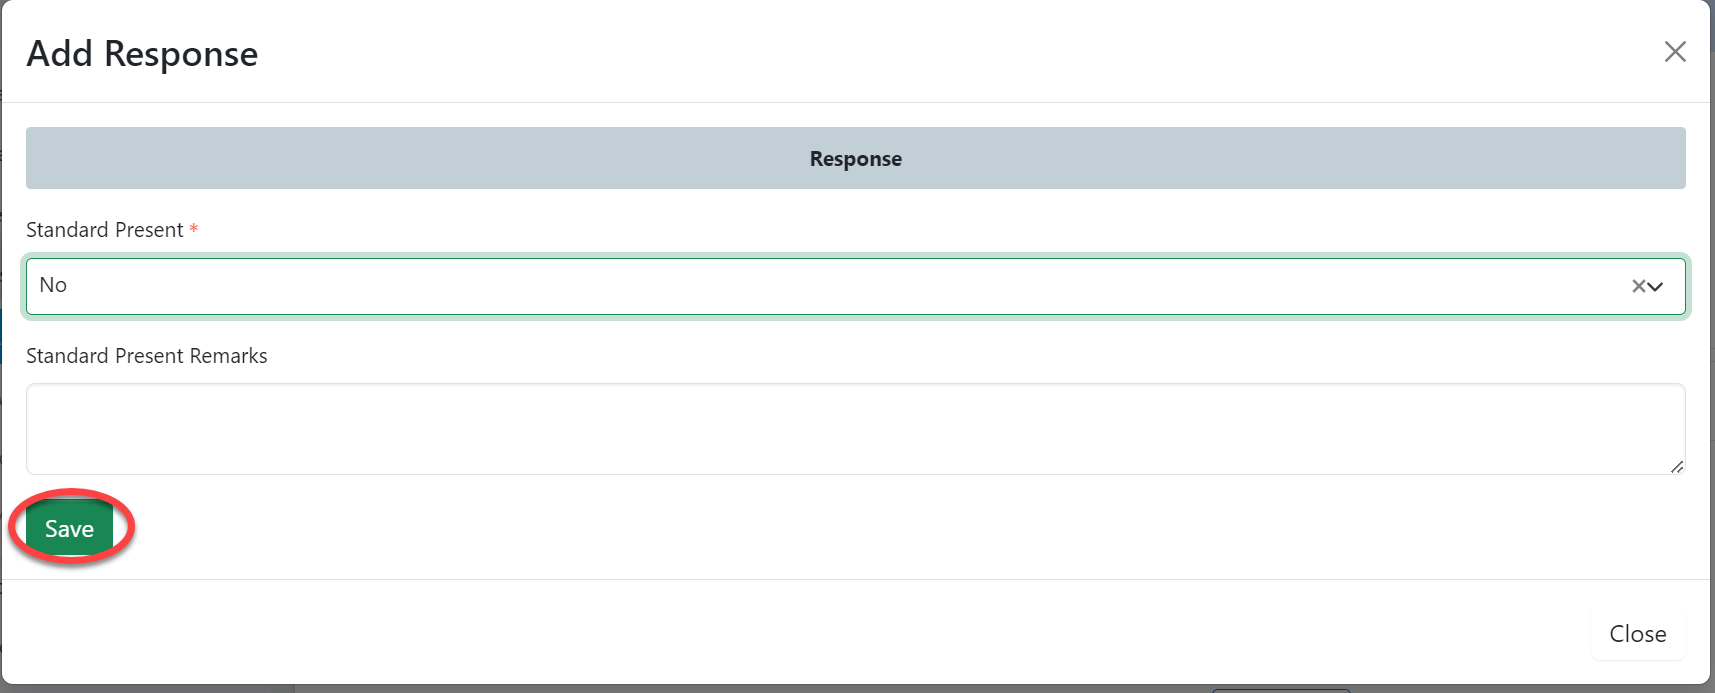 |
User can;
1)Remove response
2) Add response
3)Save response as shown on the figure below.
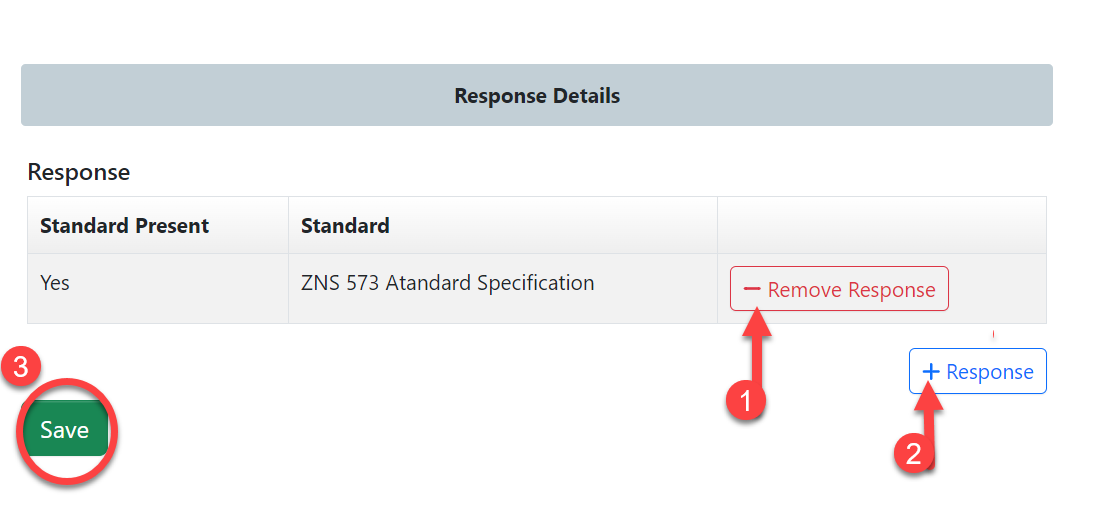
Click "Submit Response" to submit response or click on "Edit Form" to edit response, then save and submit.

Click "Ok" to confirm submitting response for standard.
b) Checking Test Capabilities
User will click on the "Check Test Capabilities" button on the right, as shown on the figure above.
User will be landed on the page where will:
1)Fill in the required parameter
2)Click search
3) Results of searched parameters will be returned with the status as shown on the figure below.
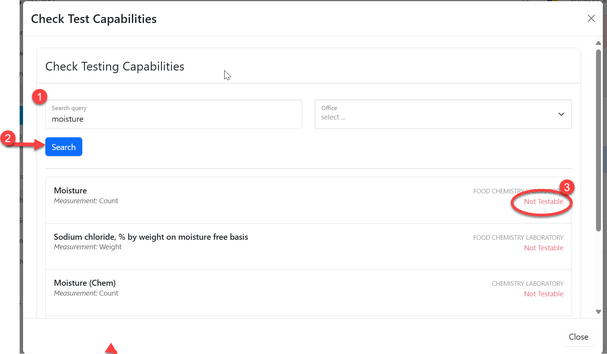
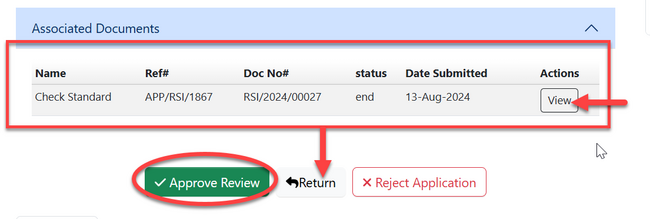
After viewing the results of testing capabilities and standard response, signatory can approve if satisfied or return application for modification. See figure below.

1.1.2 Payment (Accountant)
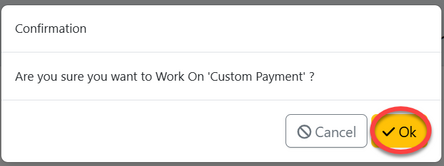
Click on "Work on Payment"

Click "Ok" to confirm working on payment
Accountant will see the debit advice for the
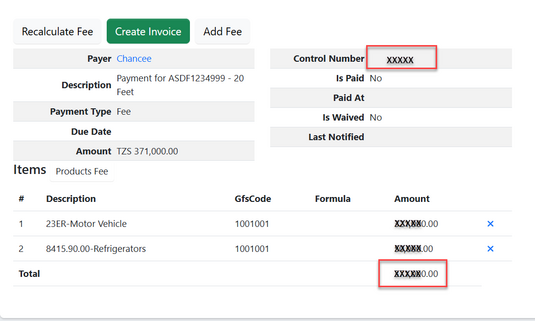
The con
1.1.3 Signature (AMI)
Once payment is completed, the client will receive the initial import permit. The Assistant Manager of Inspection will initiate and sign the permit to make it valid.
On stage signature user will click "" to start working on signature.
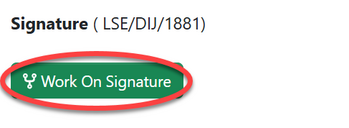
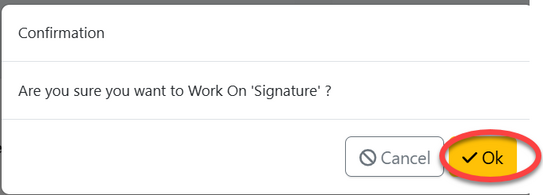
Click "Ok" to confirm working on the stage signature.
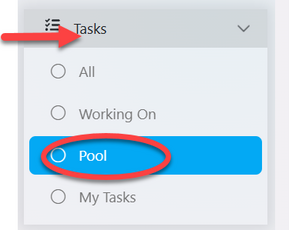
From the list of menus on left click on "Task" and then click "Pool" to access the list of task that are noy yet worked on.
From the list of task click the intended one or click on the "eye" like symbol to open it. See figure below.

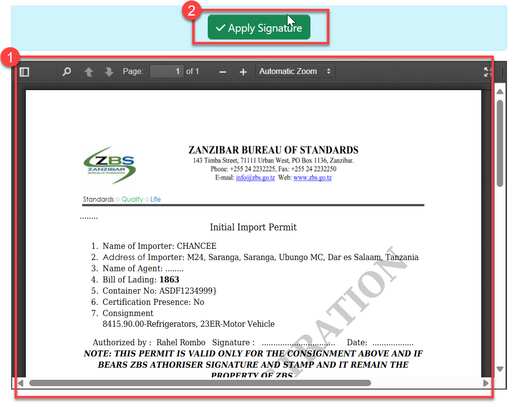
AMI will review the issued document, as shown in Figure (1) below. Once satisfied, they will click 'Apply Signature' to sign.(See figure (2) below.
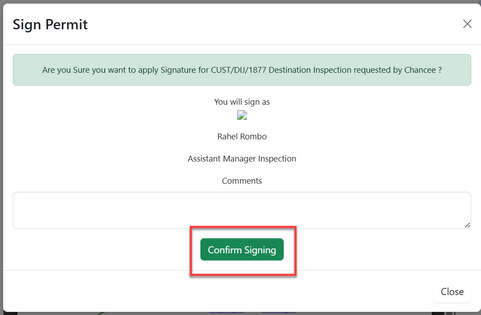
Then, user will click "" to confirm signing the document
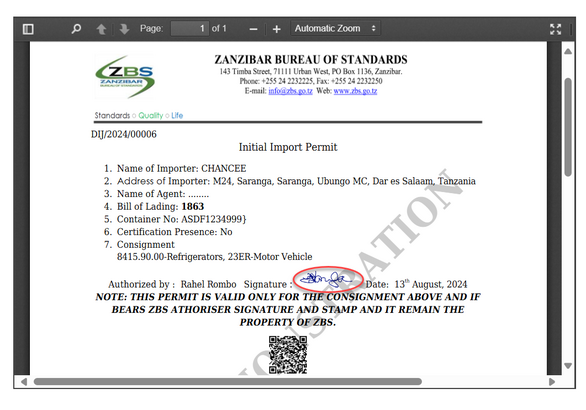
Upon successfully applying signature and confirming the initial import permit will be signed yet valid. See the figure below.
1.1.4 Inspection
i. Initialization (AMI)
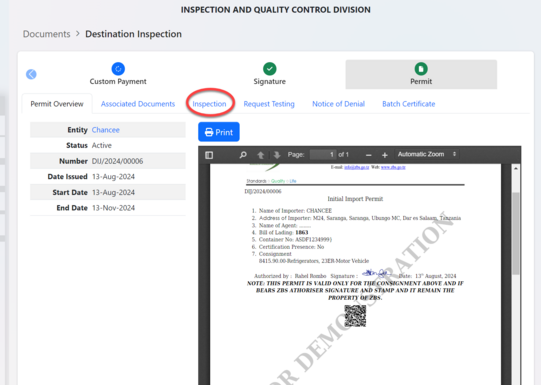
After issuing initial import permit, AMI will initiate inspection of the products imported. From the list of tabs click "Inspection" as shown on the figure below.
Click on "Initialize Inspection" as shown on the figure below.
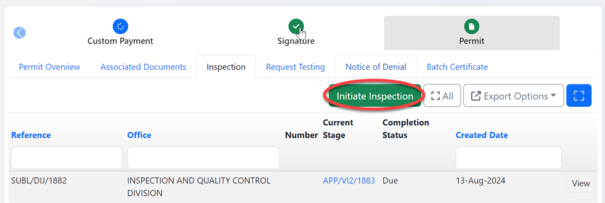
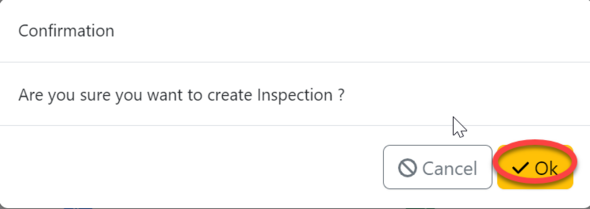
Click "Ok" to confirm initiating inspection as shown below.
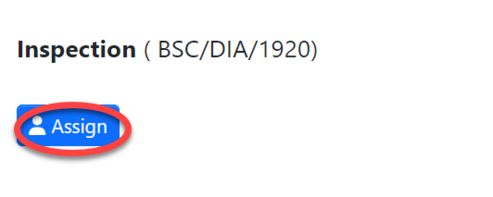
Click on "Assign" to assign inspection activity to inspector.
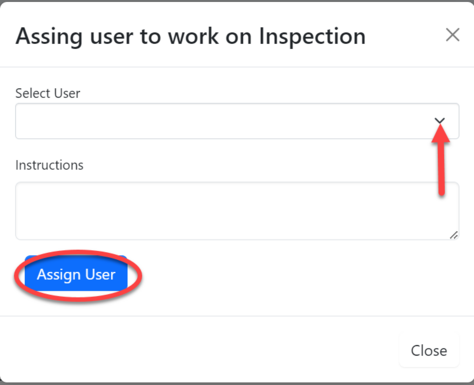
Select the inspector to assign, search by name of the inspector, fill in instruction if any and click "Assign User" to save and automatically assign the task.
ii. Inspection (Inspector)
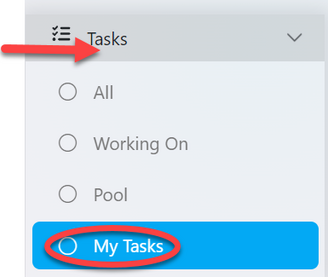
From the list of menus on the menus click "Task" then "Pool" to access all tasks that are not yet worked on.
From the list of tasks click on the intended one or click on "eye" like symbol to open it.

Upon successfully opening a task, user will be landed on the page where multiple activities of inspection can be initiated.
To begin click on "Process" as shown on the figure below.
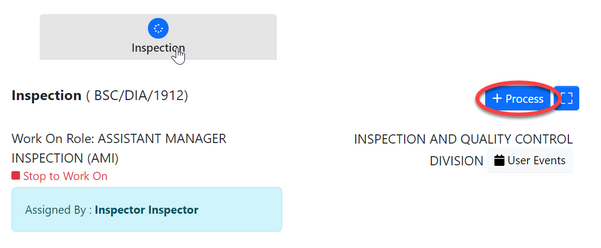
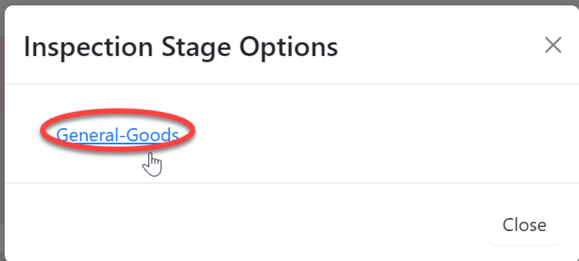
Click on "General Goods" to initiate inspection of general good.
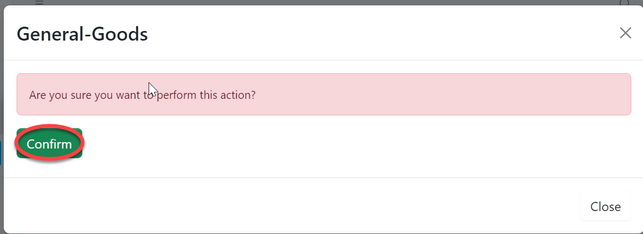
Click "" to confirm working on
After user initiating inspection of general goods process user will be landed on the new process. Here is where user can intiation batch inspection and .
Click "Process" as shown on the figure below.
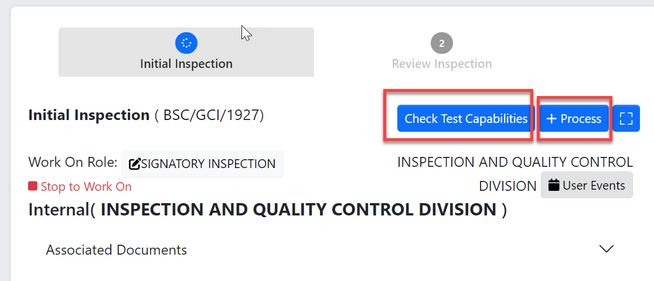
Batch Inspection
Click "" to initiate batch inspection
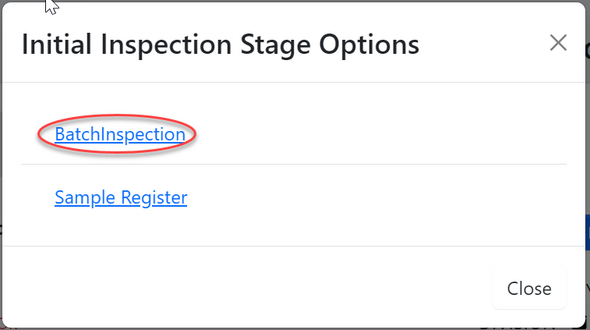
Click "Confirm" to confirm initiating batch inspection.
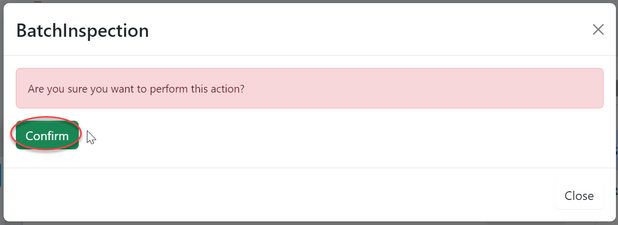
Click "Go To New Process" to open stages of batch inspection process
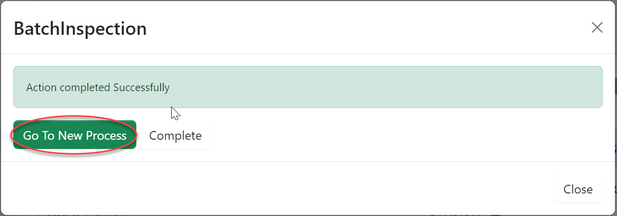
User will be directed to the page with the inspection form. Fill in required details and click "save" to save information.
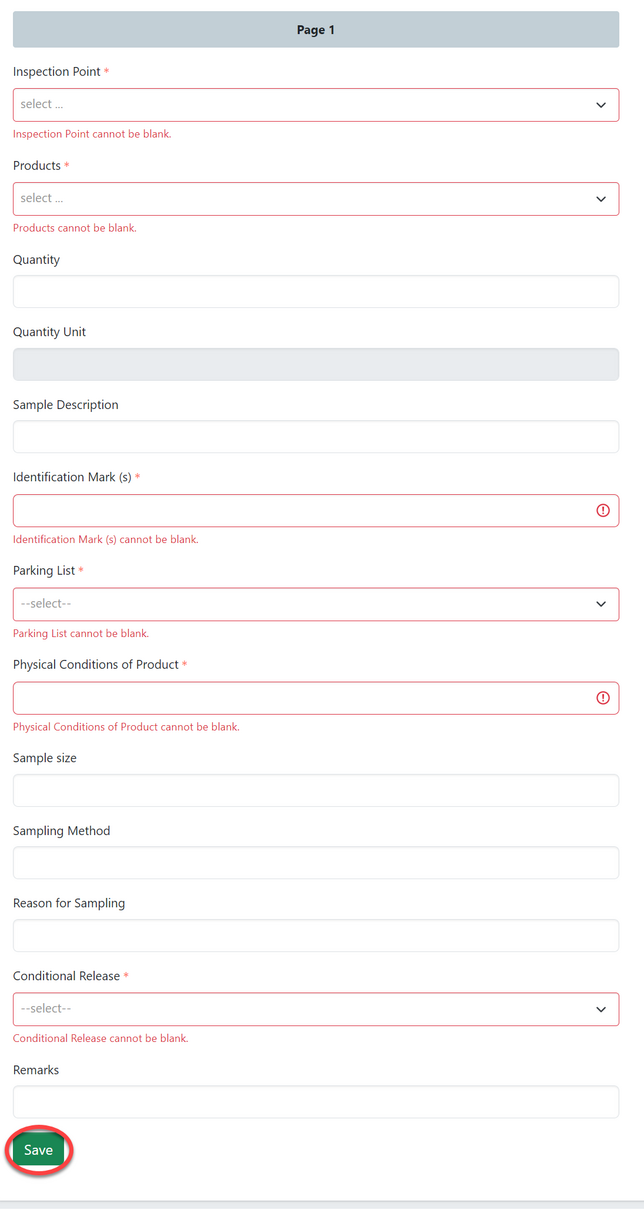
Click "submit" to submit the form or click "Edit Form" to edit and save, then submit. See figure below.

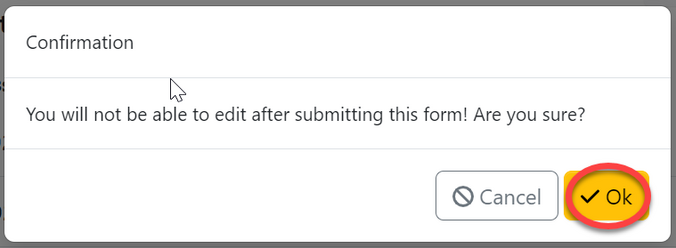
Click "Ok" to confirm submitting the form. as shown on the figure below.
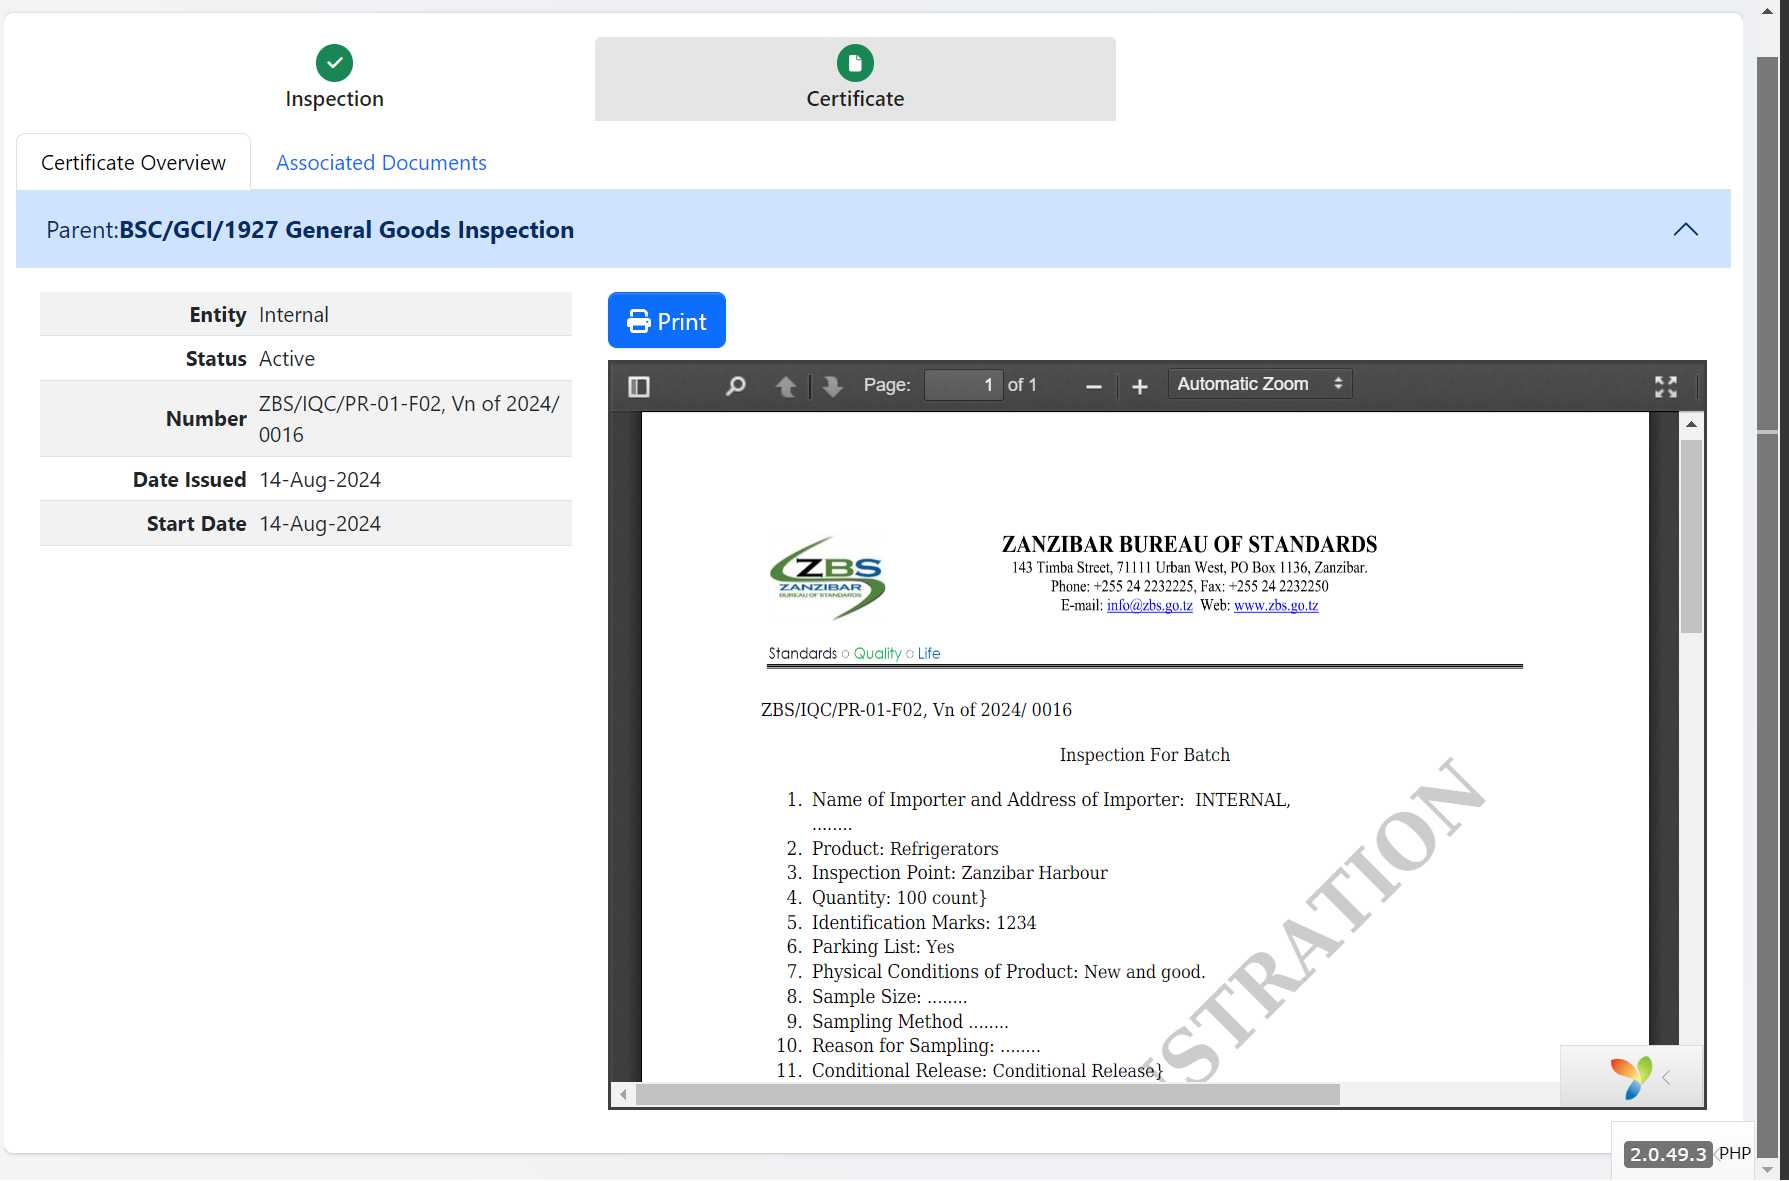
After submitting an inspection the inspection report will be automatically generated as shown on the figure below.
Sample registration
Click "Sample Register" to initiate sample registering process.
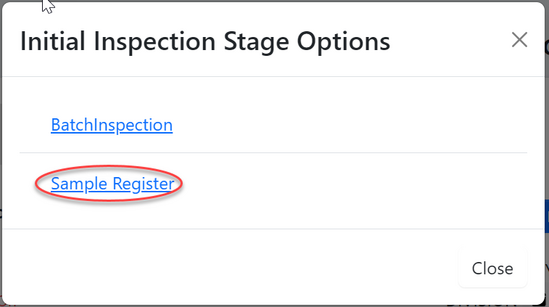
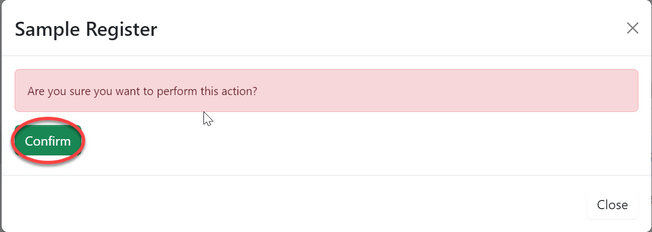
Click "Confirm" to confirm initiating a process of sample register
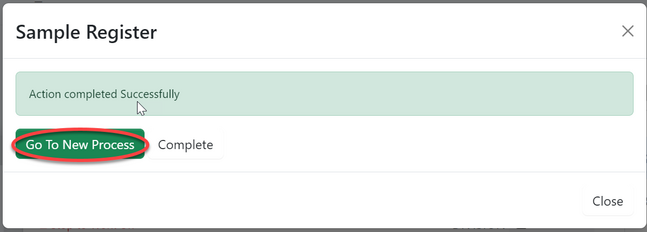
Click "Go To New Process" to access sample registration process
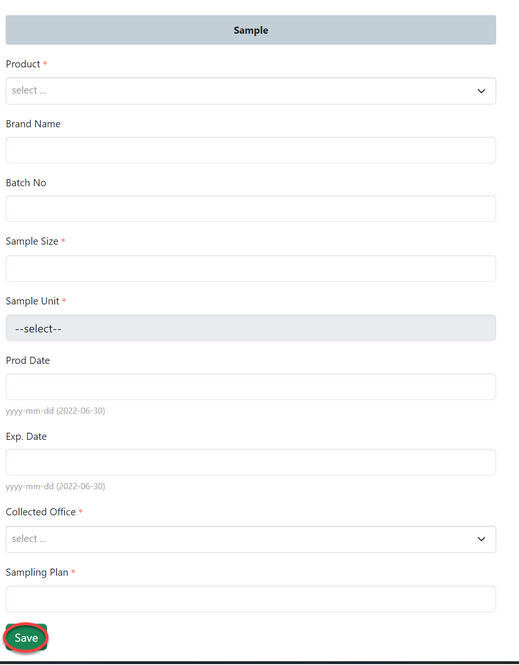
Fill in the required details regarding the sample collected and click "Save" to submit
Click "Submit" to submit sample or click "Edit Form" to edit details in the sample registration form, save and then submit. See figure below.

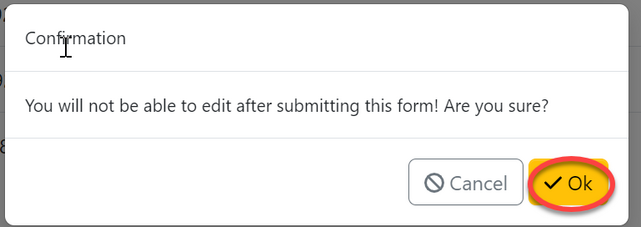
Click "Ok" to confirm
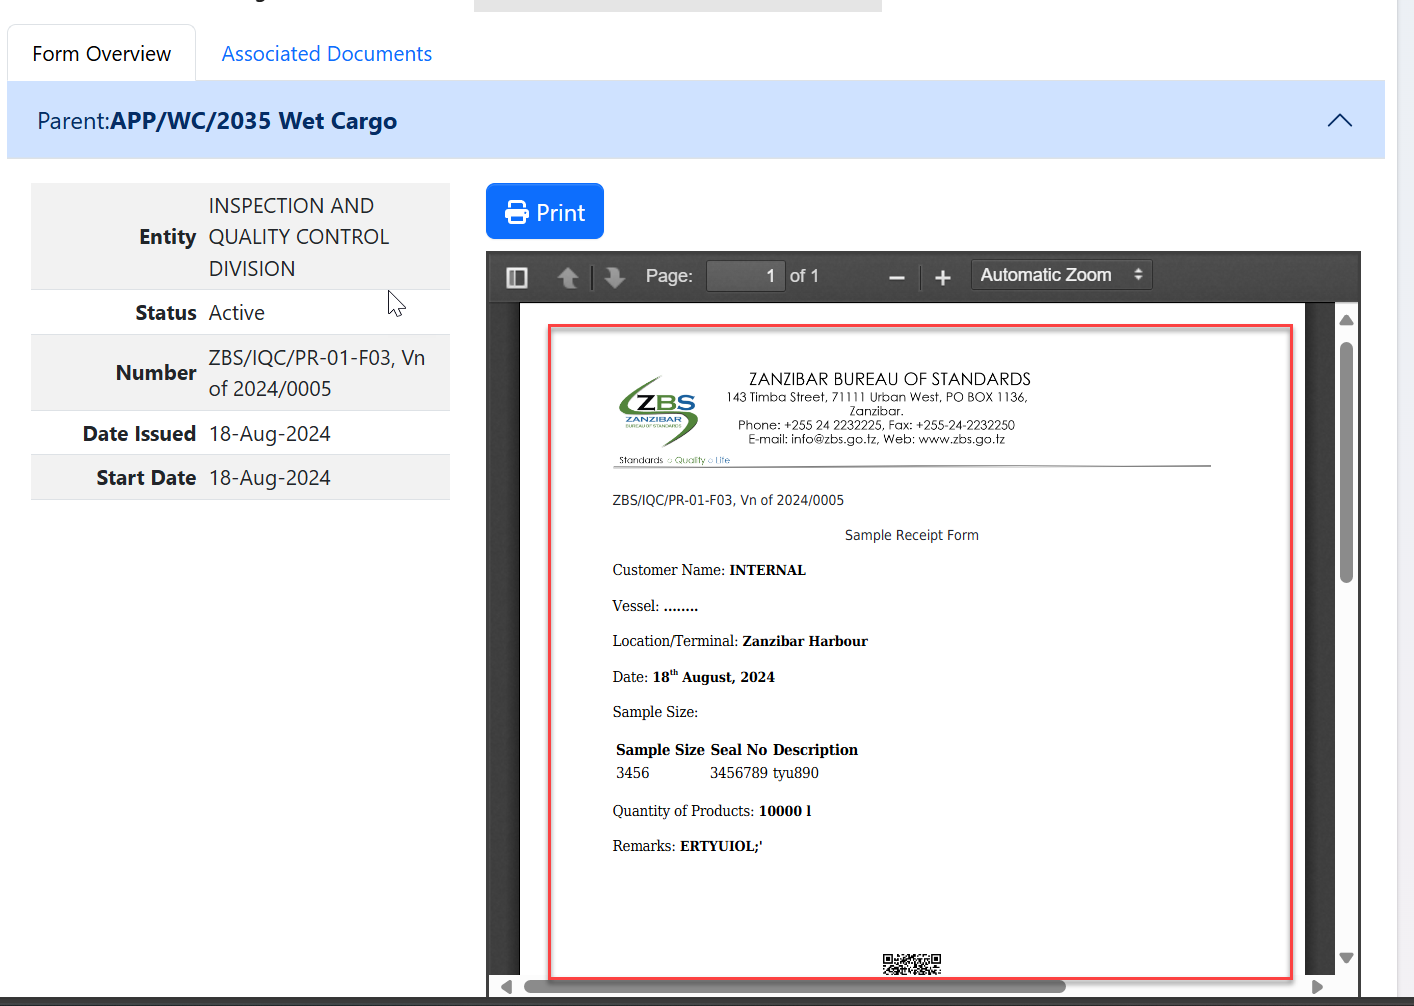
Upon successfully submitting the form user will see the report on the next stage "Certificate" as shown on the figure below.
1.1.5 Inspection report
i. Initiate testing (AMI)
From the list of tabs click on "Request Testing" 1 and then click "Request Testing" 2 as shown on the figure below.

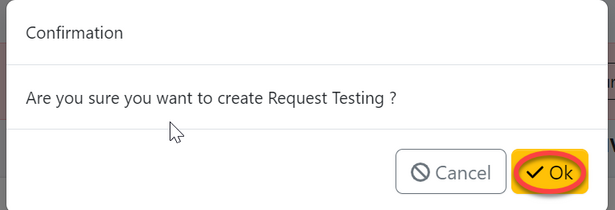
Click "Ok" to confirm working on requesting testing.
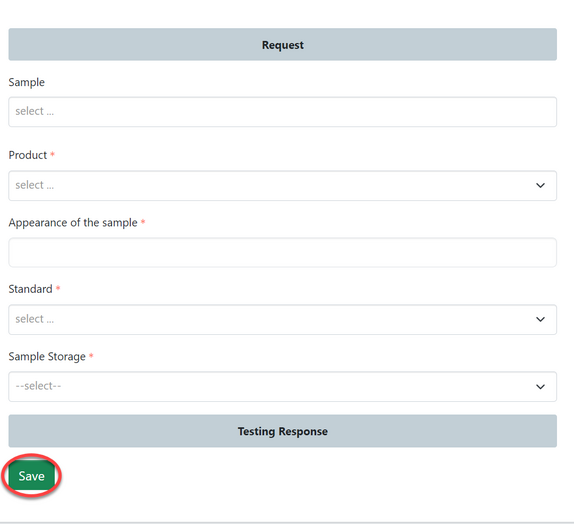
Fill in the required details for test request then click "Save" to submit. See figure below.
Click "" to submit form or "Edit Form" to edit save then submit

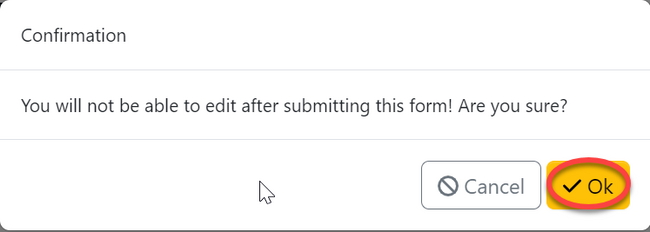
Click "Ok" to confirm
The request will be received at the testing division for testing. Click here for testing user guide.
1.1.6 Permit
i. Batch certificate.
Upon approving the results from lab, AMI will be able to initiate the batch certificate as seen below.
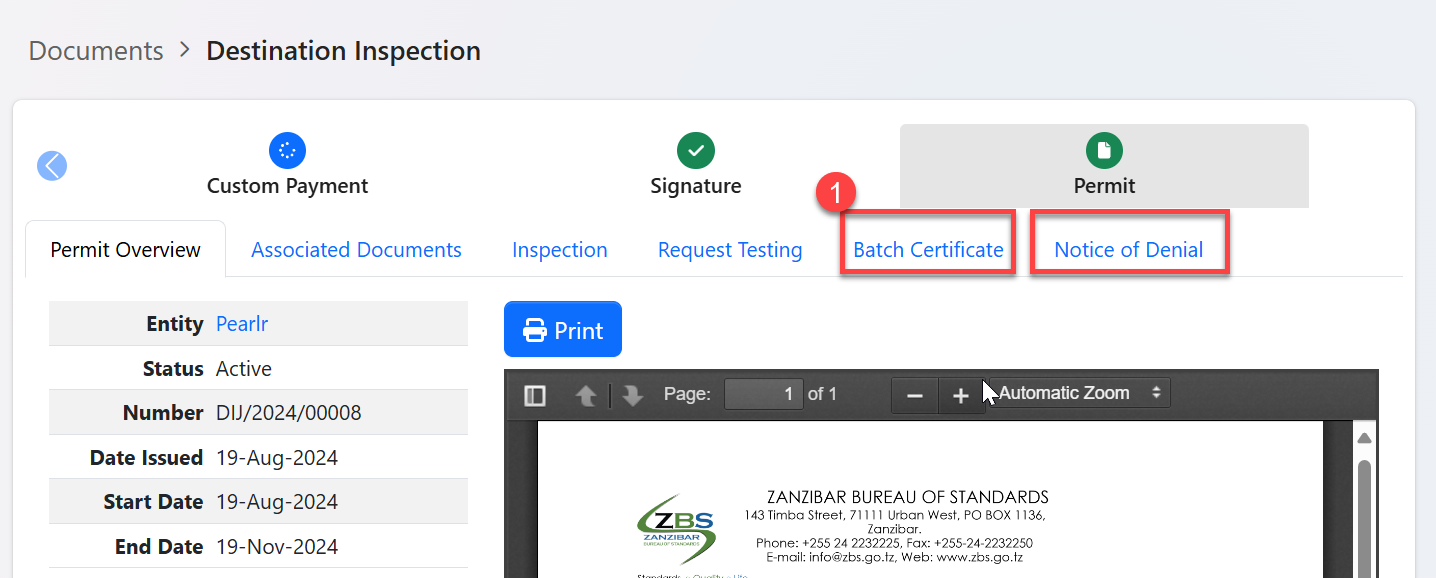
1- Click "Batch Certificate" to initiate the process of granting certicifate.
2- Click "Batch Certificate" as shown below.
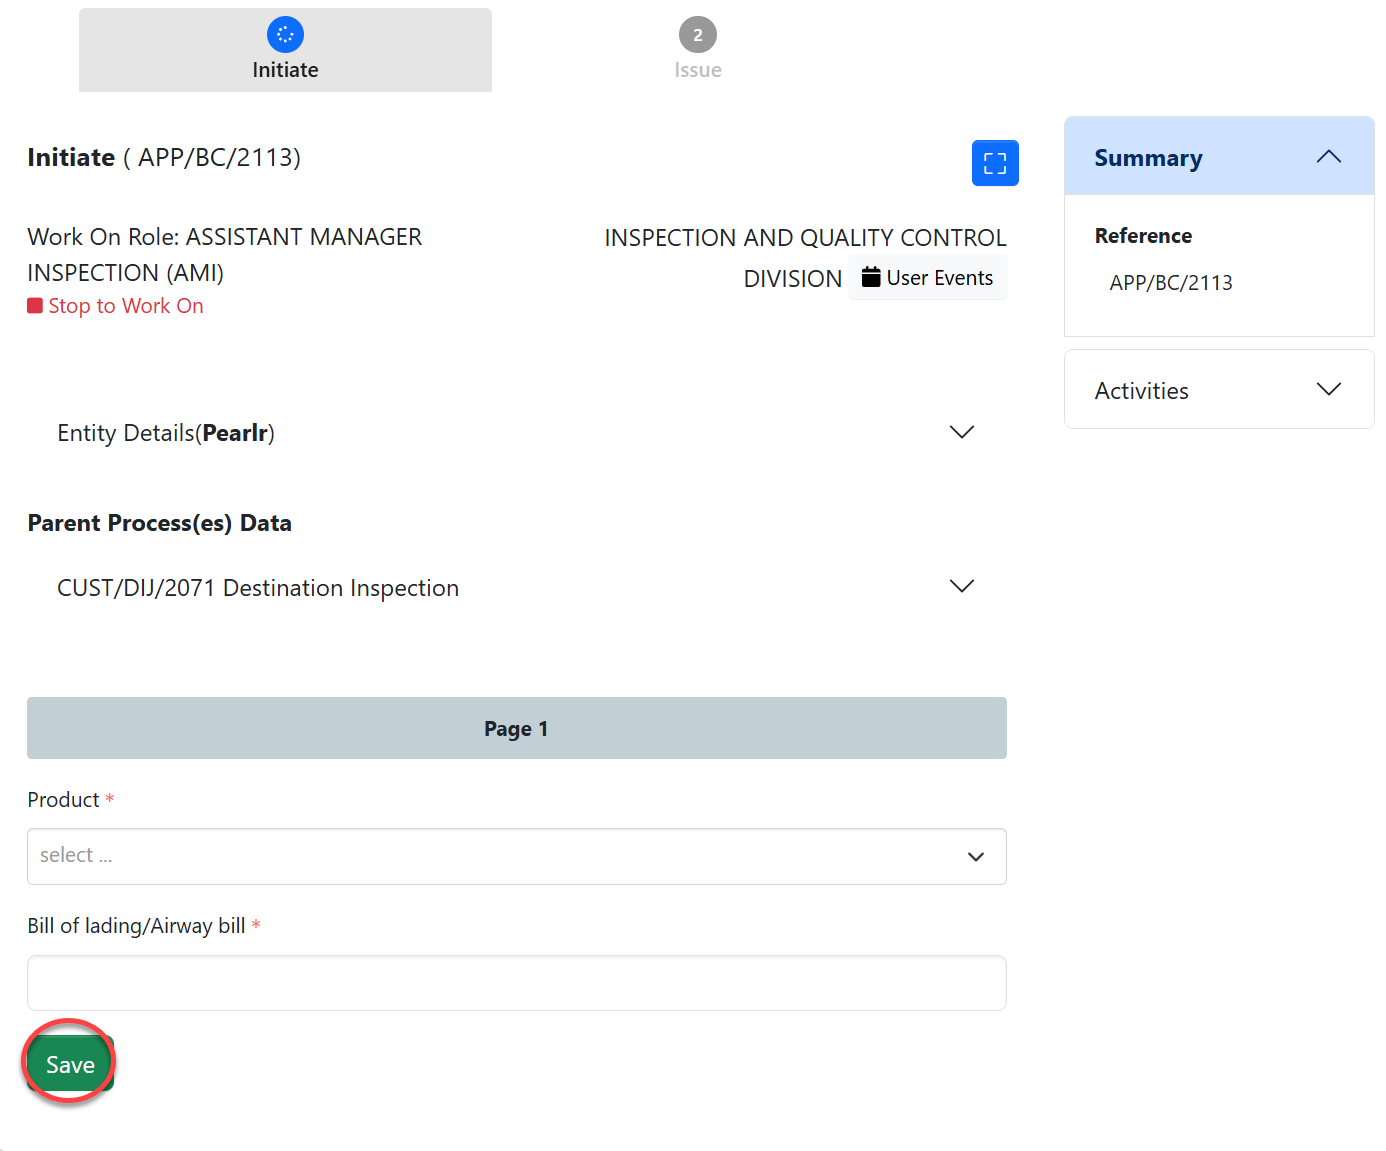
User will fill in the required details as shown below and click "Save" to initiate batch certificate.
Click "Submit Initiate" to submit form or click "Edit Form" to edit details, save and submit. See figure below.

ii. Issue Batch certificate
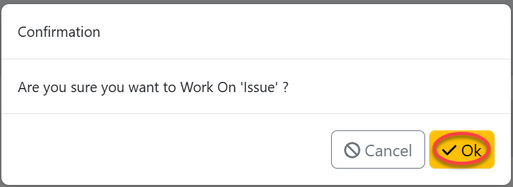
Click issue to
click "Confirm" to confirm issuing certificate.
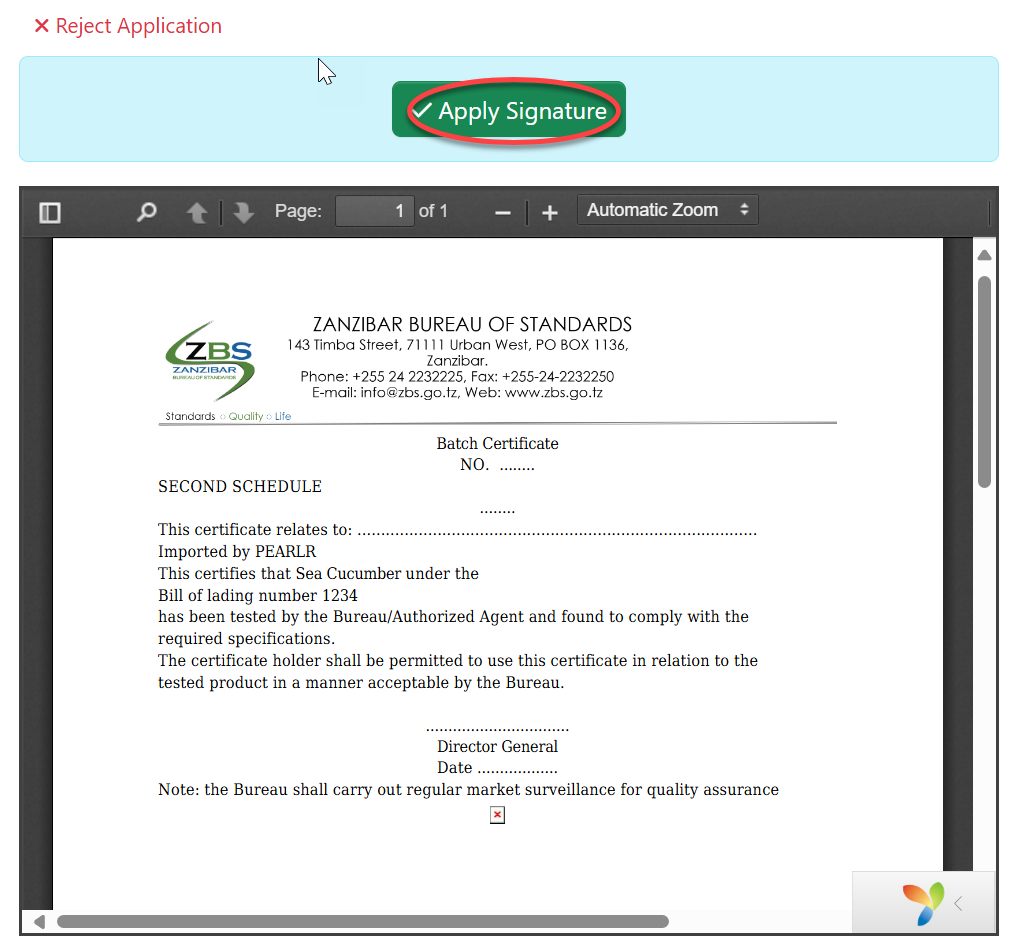
User will see the certificate and if satisfied can apply a signature by clicking "Apply signature" as shown on the figure below.
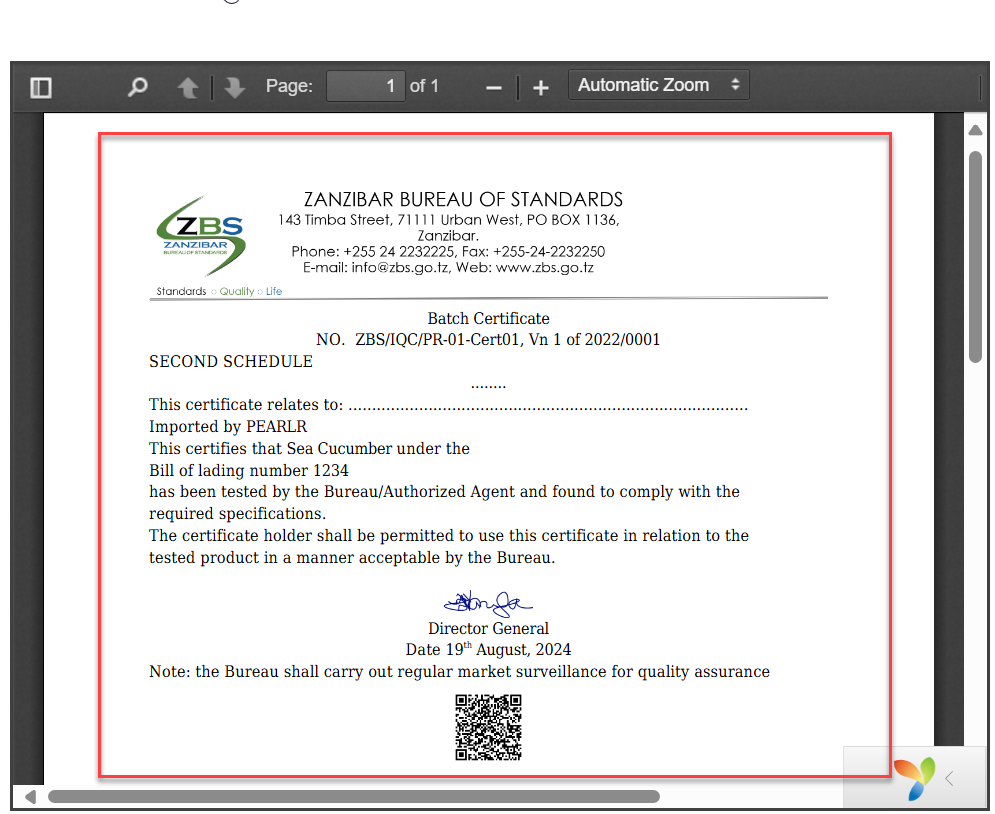
Upon successfully applied a signature and confirm, the batch certificate will be released as shown on the figure below.
***
3. Wet Cargo
3.1 Reviewing Application
From the list of menus user will click on the pool to access all the task that has not been worked on yet.
From the list of task click the intended one or click "eye" like symbol to open the task as shown on the figure below.

Click "Work on Review" to work on the task.
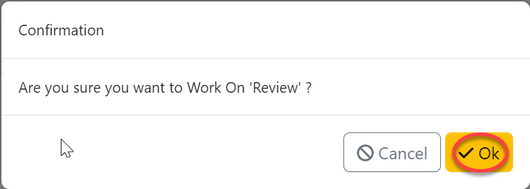
Click "Ok" to confirm working on it.
User will be landed on the page where can view and work on the application
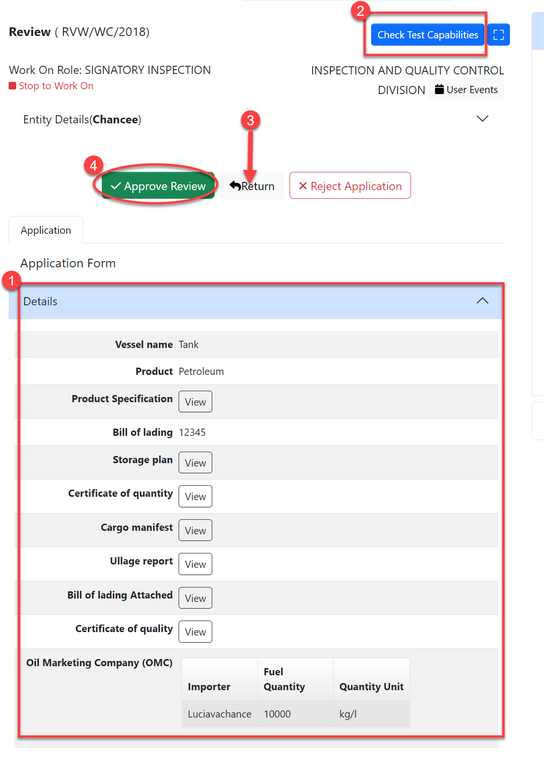
1)View application details.
2)Check for test capability by clicking on the button shown on the figure 3.1(d) 2 above.
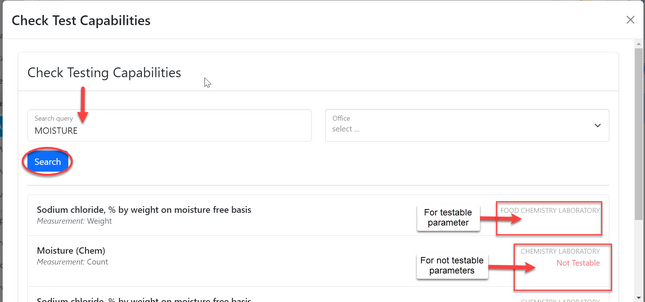
3)Return application for improvement.
4)Approve the application by clicking "Approve" as shown on the figure 3.1(d) above.
Then click "Ok" to confirm approving the review. as shown on the figure below.

3.2 Inspection
3.2.1 Initialization
AMI will assign user for inspection by clicking "Assign"
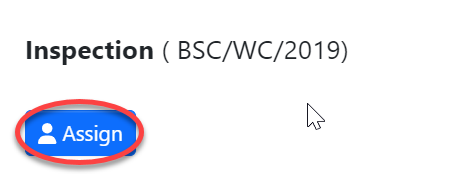
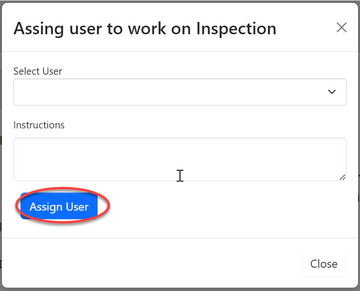
Select the user to assign by searching by the username and click "Assign User" as shown on the figure below.
3.2.2 inspection processes (inspection wet cargo)
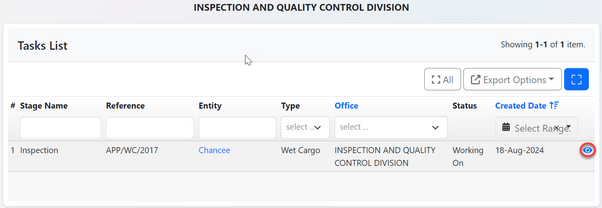
From the menu "Task" click on "My Task" to open task assigned.
From the task list click the intended "one" or click on "eye" like symbol to open task.
Click "Inspection" to start the process of inspection.

User will see list of processes to be done during inspection as shown below.
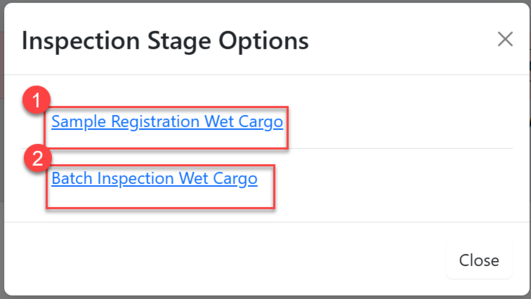
1)Batch Inspection - Click here to open the process of batch inspection.
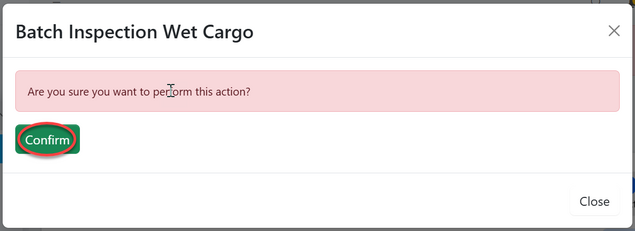
Then click "Confirm" to confirm starting the process.
Click "Go To New Process" as shown on the figure below.
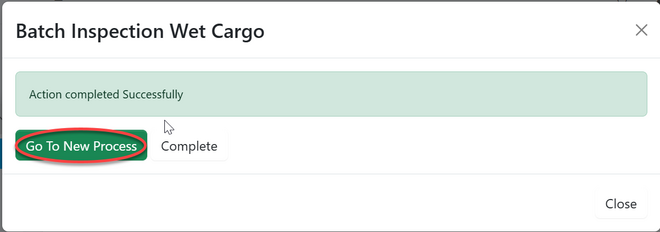
User will be landed on the page with batch inspection form. Fill in the required details and click "Save" as shown on the figure below.
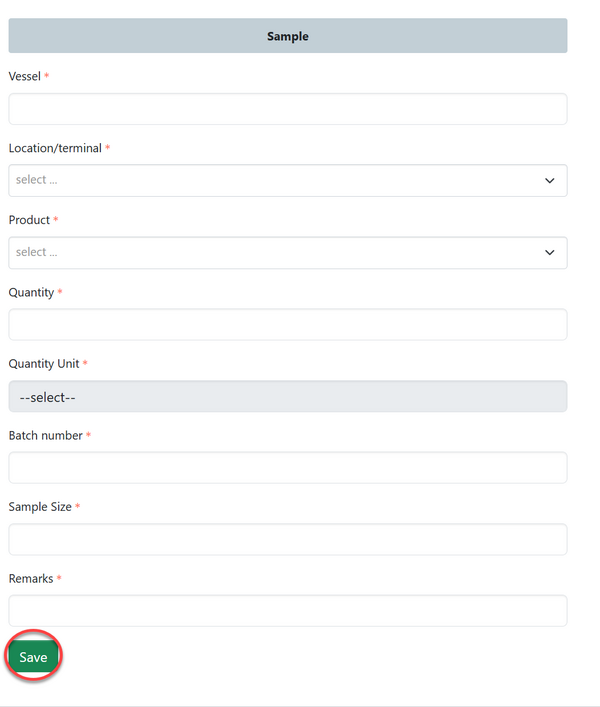
Click "Submit" to submit or click "Edit form" to edit details, save then submit. See figure below.

Upon successful submission of sample register form, user will see

2)Sampling -Click here to register sample collected during inspection (See figure 3.2(f) above.
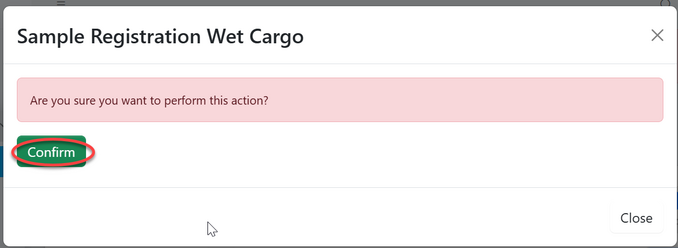
Then click "Confirm" to start a process
Click "Go To New Process" to open a new process
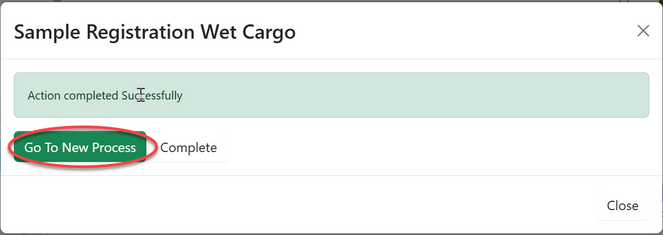
User will be landed on the page with sample register form. Fill in the required details and click "Save"
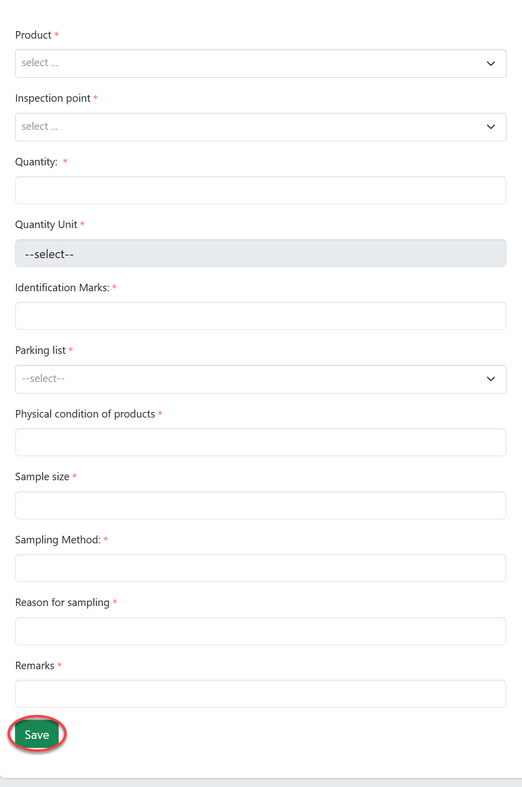
Click "submit" to submit form or click "Edit Form" to edit details, save then submit as shown on the figure below.
3.3 Review Inspection.
From the task list user will click the intended task and open it.
On the stage "Inspection review" click on "Work on Inspection Review" as shown on the figure below.
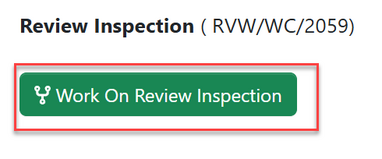
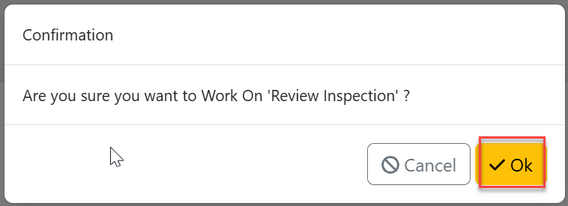
Click "Confirm" to confirm working on review.
User will be landed on the page as shown below.
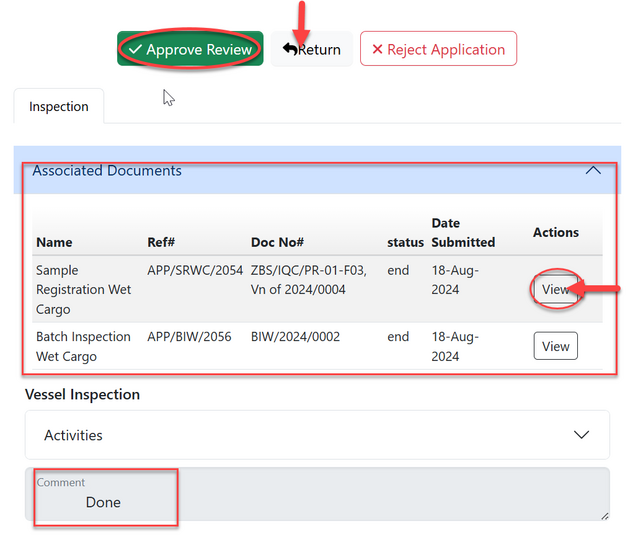
Here user can view the sample register report as well as batch inspection report. Also the comment for the inspection.
After that user can return inspection report for improvements or approve it for other proceedings.
3.4 Testing
3.4.1 Initiate testing
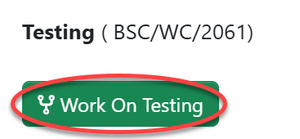
Click on "Work on Testing"
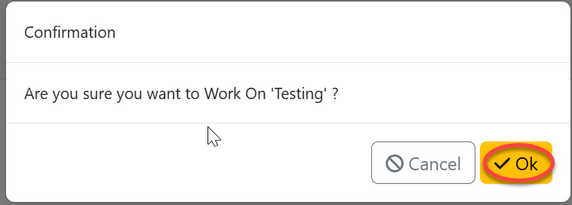
Click "Ok" to confirm working on testing.
User will be landed on the page where can check for test capability and initiate testing.
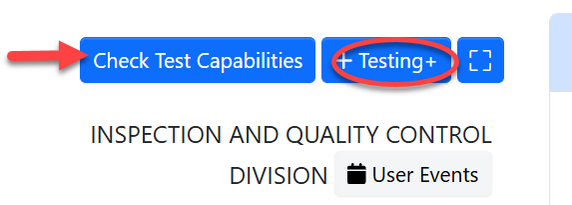
Click "testing" to start the new process of testing as shown on the figure above.
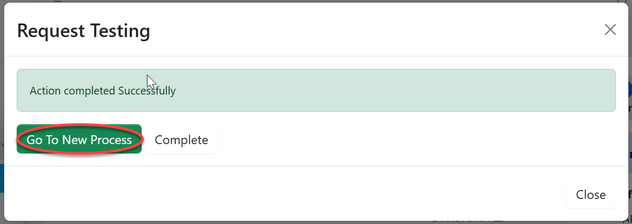
On the popup window "Request Testing"
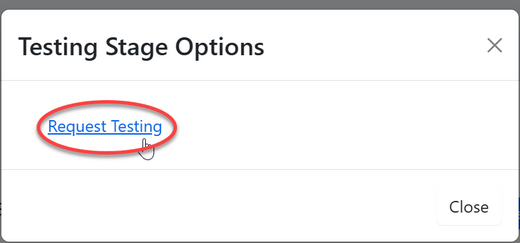
Click "Go To New Process" to start the testing process.
Fill in the required details and click "Save" to save it. See the figure 3.4(g) below.
