Configuring standard: Difference between revisions
Chanceness (talk | contribs) No edit summary |
Chanceness (talk | contribs) |
||
| (4 intermediate revisions by the same user not shown) | |||
| Line 24: | Line 24: | ||
|} | |} | ||
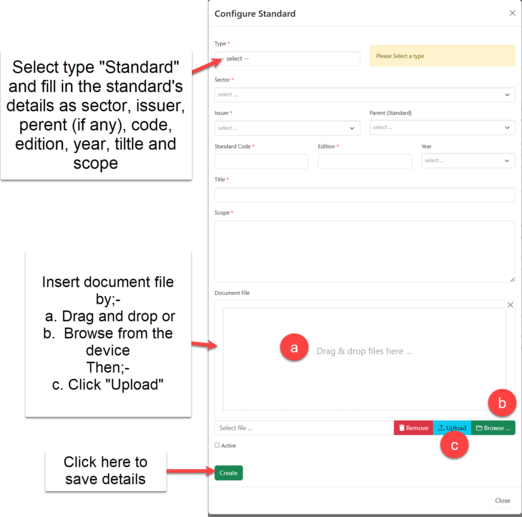
Fill the details of the standard as required, insert or drag and drop the standard document if any and upload, then click "Create" to save and create the standard.( See figure 2.1(c) below) | Fill the details of the standard as required, insert or drag and drop the standard document if any and upload, then click "Create" to save and create the standard.( See figure 2.1(c) below) | ||
[[File: | [[File:Configurating standard.png|center|thumb|522x522px|''Figure 2.1(c): Configuring standard'']] | ||
=== 2.2 Requirements === | === 2.2 Requirements === | ||
| Line 62: | Line 62: | ||
[[File:Test method add.png|center|thumb|634x634px| ''Figure 2.4 (c): Add test method'']] | [[File:Test method add.png|center|thumb|634x634px| ''Figure 2.4 (c): Add test method'']] | ||
=== 2.5. Unit of Measure === | |||
a)From the list of menus on the left click "System" | a)From the list of menus on the left click "System"[[File:Accessing_system.png|link=https://wiki-zbs.ictpack.net//index.php/File:Accessing_system.png|left|thumb|585x585px|''Figure 2.5 (a): Accessing UOM'']] | ||
[[File:Accessing_system.png|link=https://wiki-zbs.ictpack.net//index.php/File:Accessing_system.png|left|thumb|585x585px|''Figure 2.5 (a): Accessing UOM'']] | |||
b) Click "Units of Measure" to access measures | b) Click "Units of Measure" to access measures | ||
[[File:Accessing_UOM_.png|link=https://wiki-zbs.ictpack.net//index.php/File:Accessing_UOM_.png|center|frame|''Figure 2.5 (b) Accessing unit of measure'' ]] | [[File:Accessing_UOM_.png|link=https://wiki-zbs.ictpack.net//index.php/File:Accessing_UOM_.png|center|frame|''Figure 2.5 (b) Accessing unit of measure'' ]] | ||
| Line 71: | Line 70: | ||
d) Fill in the required details and click "Create" to save. | d) Fill in the required details and click "Create" to save. | ||
[[File:Measurement_details.png|link=https://wiki-zbs.ictpack.net//index.php/File:Measurement_details.png|center|frame|''Figure 2.5 (d): Fill in details'']] | [[File:Measurement_details.png|link=https://wiki-zbs.ictpack.net//index.php/File:Measurement_details.png|center|frame|''Figure 2.5 (d): Fill in details'']] | ||
For Updating measures, Open the measure you want to update from the list of measures. Then click "Update". | e)For Updating measures, Open the measure you want to update from the list of measures. Then click "Update". | ||
[[File:Measurement_update.png|link=https://wiki-zbs.ictpack.net//index.php/File:Measurement_update.png|center|frame| ''Figure 2.5 ( | [[File:Measurement_update.png|link=https://wiki-zbs.ictpack.net//index.php/File:Measurement_update.png|center|frame| ''Figure 2.5 (e): Updating UoM'']] | ||
Edit the details as intended and click "Update" to save. | f) Edit the details as intended and click "Update" to save. | ||
[[File:Update_measures.png|link=https://wiki-zbs.ictpack.net//index.php/File:Update_measures.png|center|thumb|617x617px| ''Figure 2.5 (f) :Update measures'']] | [[File:Update_measures.png|link=https://wiki-zbs.ictpack.net//index.php/File:Update_measures.png|center|thumb|617x617px| ''Figure 2.5 (f) :Update measures'']] | ||
=== 2.6 Options ( Requirement's Categories) === | |||
a) Accessing options | a) Accessing options | ||
From the list of menus at left select "System Processes" shown on the figure 2.5 (a) below. | From the list of menus at left select "System Processes" shown on the figure 2.5 (a) below.[[File:Accessing option.png|left|frame| ''2.6 (a) Accessing option'']] | ||
[[File:Accessing option.png|left|frame| ''2.6 (a) Accessing option'']] | |||
b) From the list of options of System processes click "Options" as shown on the figure 2.6 (b) below. | b) From the list of options of System processes click "Options" as shown on the figure 2.6 (b) below. | ||
[[File: | [[File:Accessing options2.png|center|frame|''Figure 2.6 (b) Selecting option'']] | ||
c) User will be landed on the page containing list of options. On option number 4. "Standard Requirement Category" Click on "Values" as pointed on figure 2.6 (c) below. | c) User will be landed on the page containing list of options. On option number 4. "Standard Requirement Category" Click on "Values" as pointed on figure 2.6 (c) below. | ||
[[File:List of Options.png|center|frame| ''2.6 (c): List of Options'']] | [[File:List of Options.png|center|frame| ''2.6 (c): List of Options'']] | ||
d) Click on "Create" as shown on the figure 2.6 (d) below to create values for standard requirement category. | d) Click on "Create" as shown on the figure 2.6 (d) below to create values for standard requirement category. | ||
[[File:Values for option.png|center|thumb|688x688px| ''2.6 (d): Values for option'']] | [[File:Values for option.png|center|thumb|688x688px| ''2.6 (d): Values for option'']] | ||
e)Fill the required details as shown on the figure 2.6 (e) below, then tick the box on "Is Active" to make a value active. | e) Fill the required details as shown on the figure 2.6 (e) below, then tick the box on "Is Active" to make a value active. | ||
[[File:Creating values for option.png|center|thumb|476x476px| ''Figure 2.6 (e): Creating values for option'']] | [[File:Creating values for option.png|center|thumb|476x476px| ''Figure 2.6 (e): Creating values for option'']]f) Maintaining values (see figure 2.6 (f) below. | ||
From the list of values user can;- | |||
1.View - preview the value and its details | |||
2. Edit - Update details of values | |||
3. Delete - Delete value if no longer needed | |||
[[File:Maintaining values.png|center|frame| ''Figure 2.6 (f): Maintaining values'']] | |||
Latest revision as of 11:44, 1 July 2024
1. Accessing the System
1.1 Accessing iSQMT
iSQMT system can be accessed through this link in any browser.
1.2 User Account
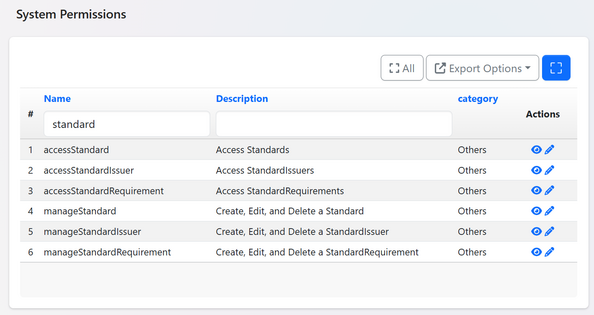
ZBS user suppose to be in an Standard editing, library and Standards information division. Also user account suppose to have the following permissions in the system.
1.3 Login to the System
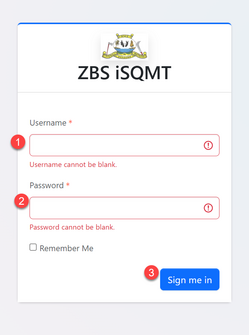
In successfully accessing the provided link, user will be landed to the login page as shown on figure 1.3 (a) where the registered user will fill their username/email and password to login.
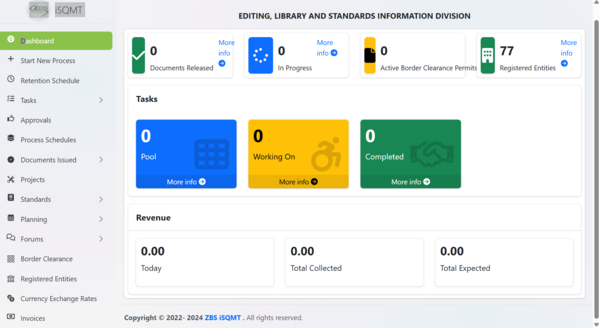
Upon successful login user will be redirected to the home page where management of different activities is being done. Here user can see application requests, tasks, and make different activities.
2. Configuring Standard
2.1 Configure New Standard
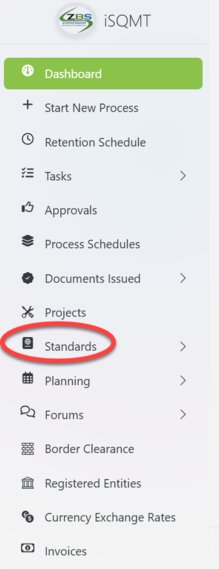
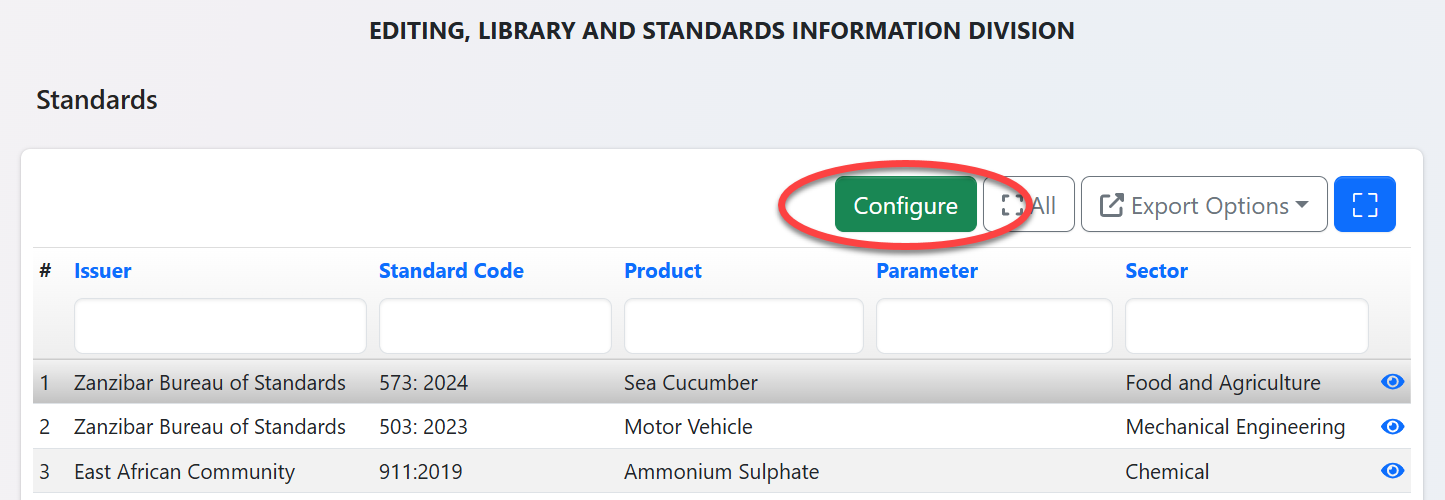
To access standards user should click on "Standards" from the list of menus as shown on the figure 2.1(a) below. Upon clicking "Standards" user will be landed to the page containing list of standards (If any).To create a new standard click "Configure" as shown on the figure 2.1(b).
 |
 |
Fill the details of the standard as required, insert or drag and drop the standard document if any and upload, then click "Create" to save and create the standard.( See figure 2.1(c) below)
2.2 Requirements
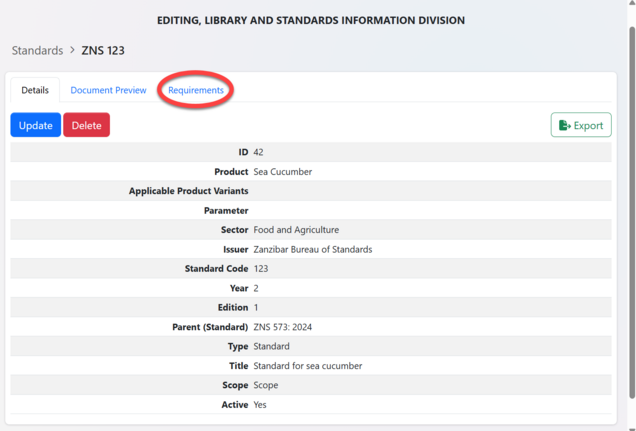
To access requirements of the standard created click "Requirement"
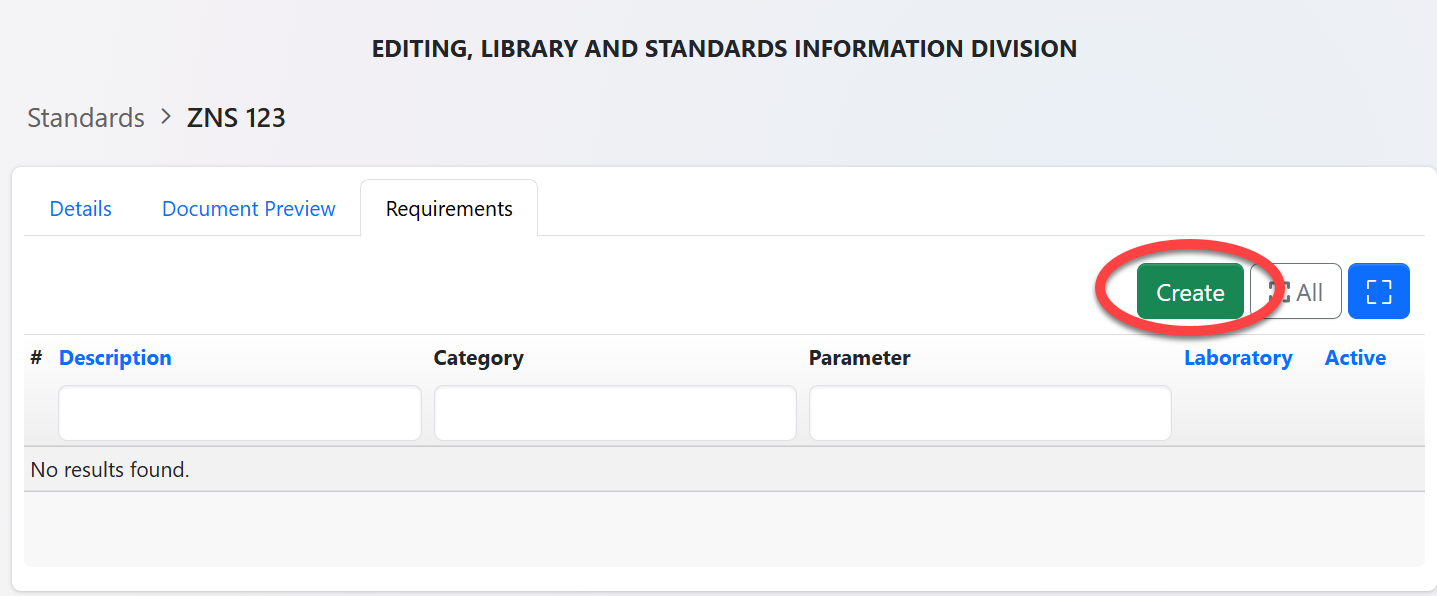
You will be landed on the page of requirements and click "Create" to start adding the requirements.
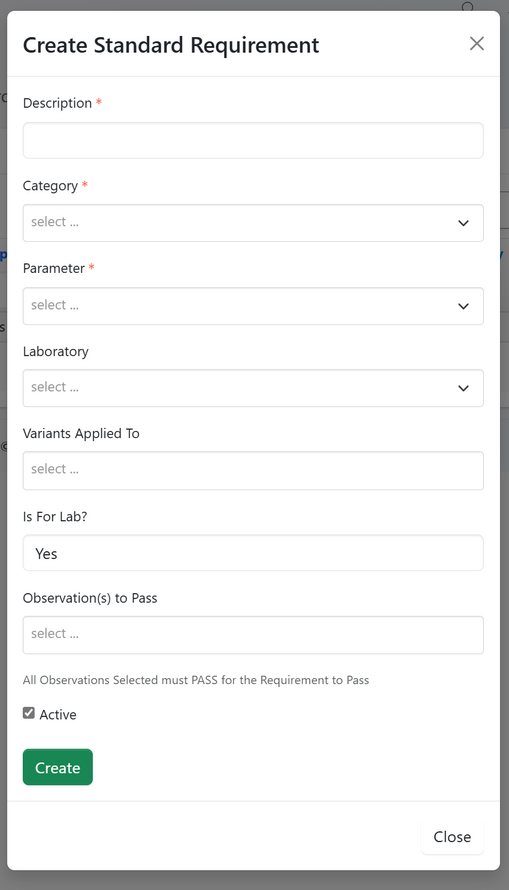
Fill the standard requirement's details accordingly and click "Create" to save details as shown in a figure 2.5 below.
2.3 Observation
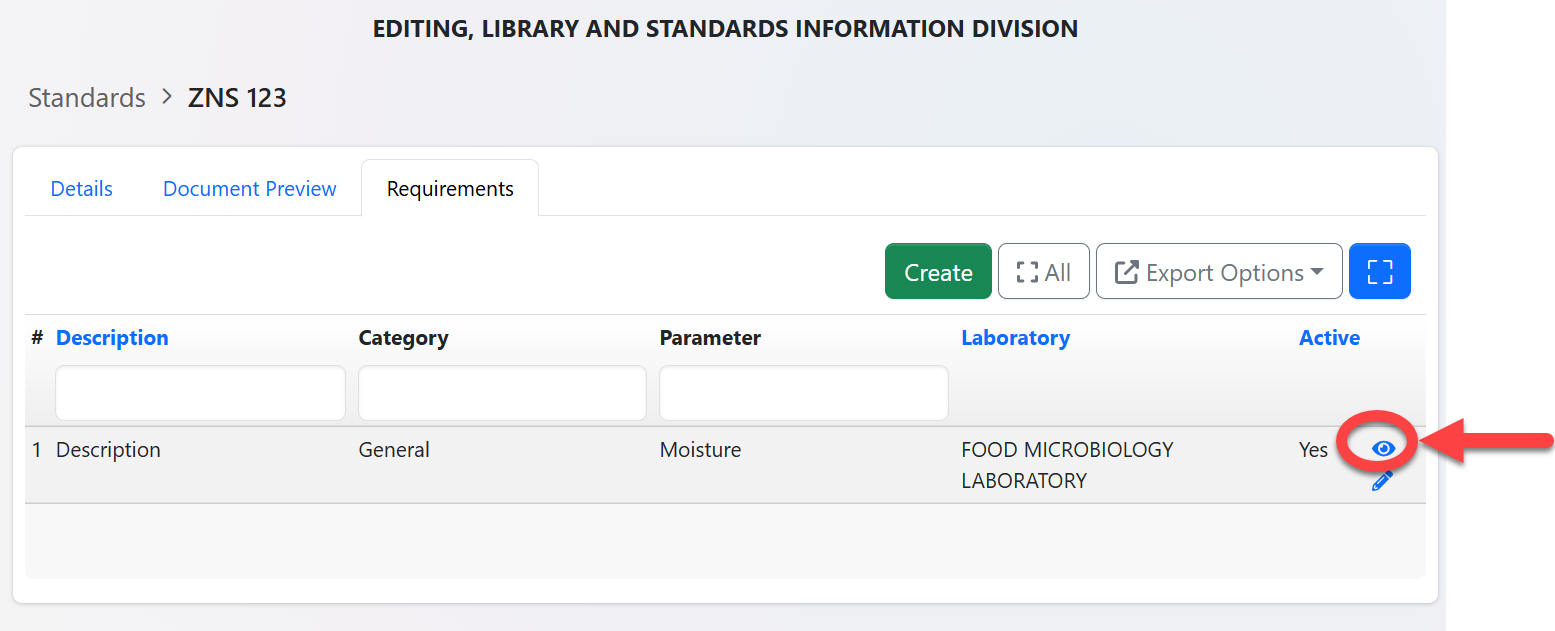
From the list of requirement, click on the intended requirement to which you want to add observation. Also you can access this by clicking on the eye button as shown on figure 2.3 (a) below.
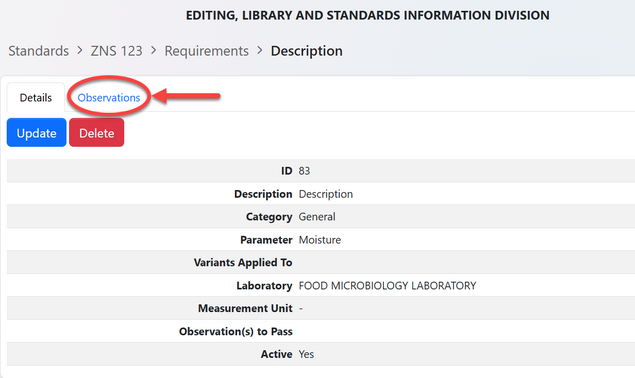
Click on "Observation" to access list of observation as shown on the figure 2.3 (b) below
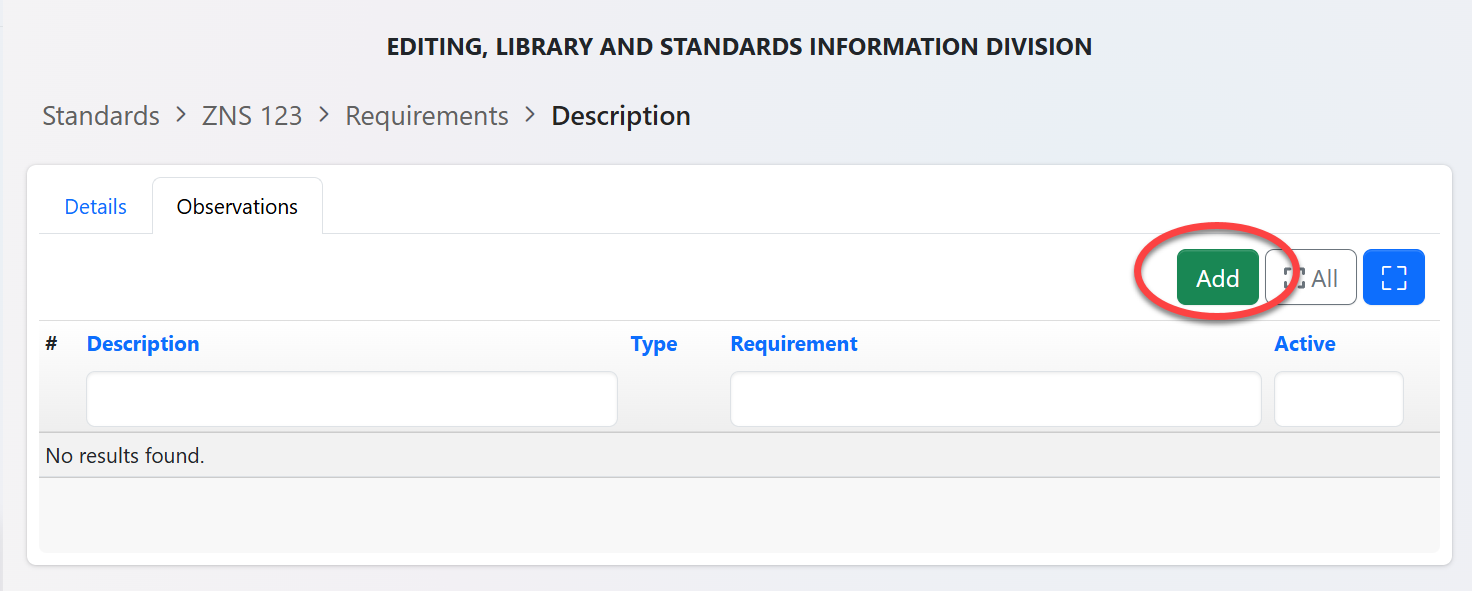
To add observation click on the button "Add"
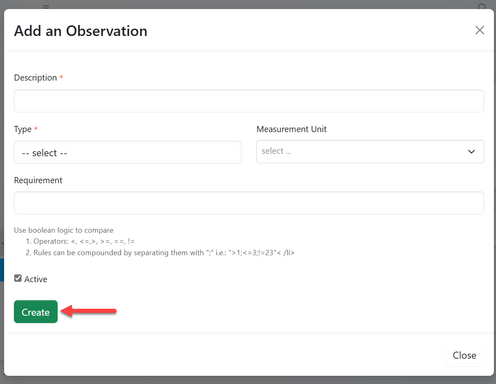
Fill in the required details and click "Create" to save the details.
2.4 Test Method
From the list of observations, you can see the button of "test method" on each observation. Click the button to access test methods belongs to the respective observation.

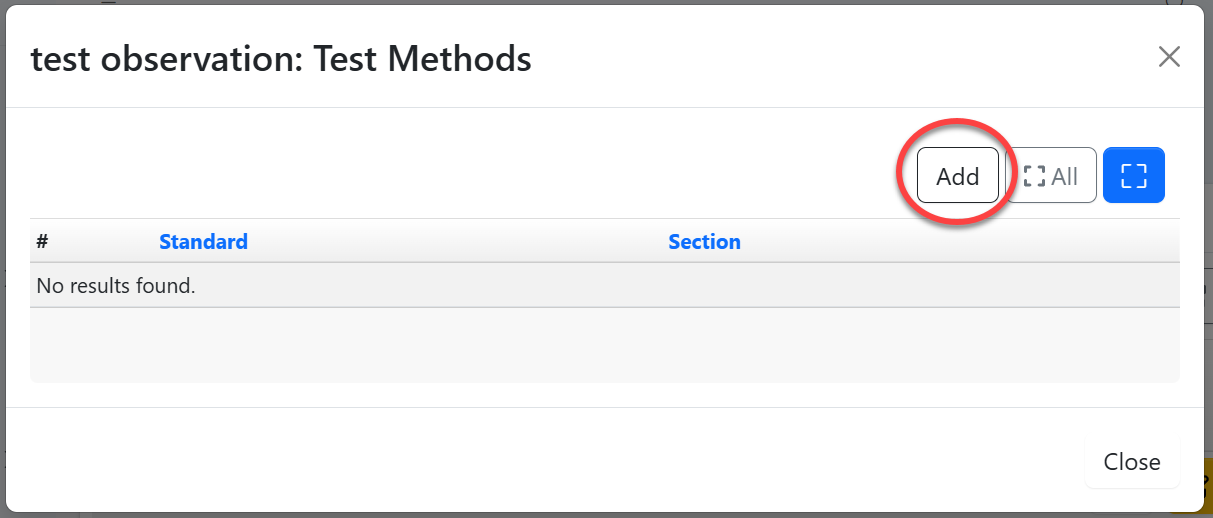
Click on the button "Add" to add a new test method to an observation as shown on figure 2.4(b) below.
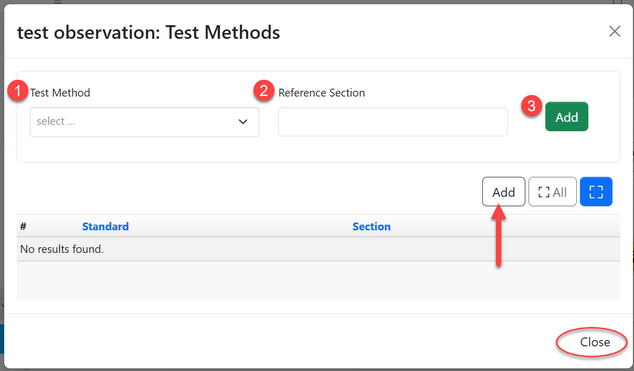
Add Test Method (See figure 2.4 (c) below )
- Select test method from the list
- Fill in the Reference section (if any)
- Click "Add" to save the test method
Also you can click "Add" pointed by arrow to add as many test method as needed. Then close.
2.5. Unit of Measure
a)From the list of menus on the left click "System"

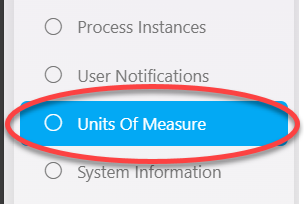
b) Click "Units of Measure" to access measures
c) To create a new measure click "Create Measure"

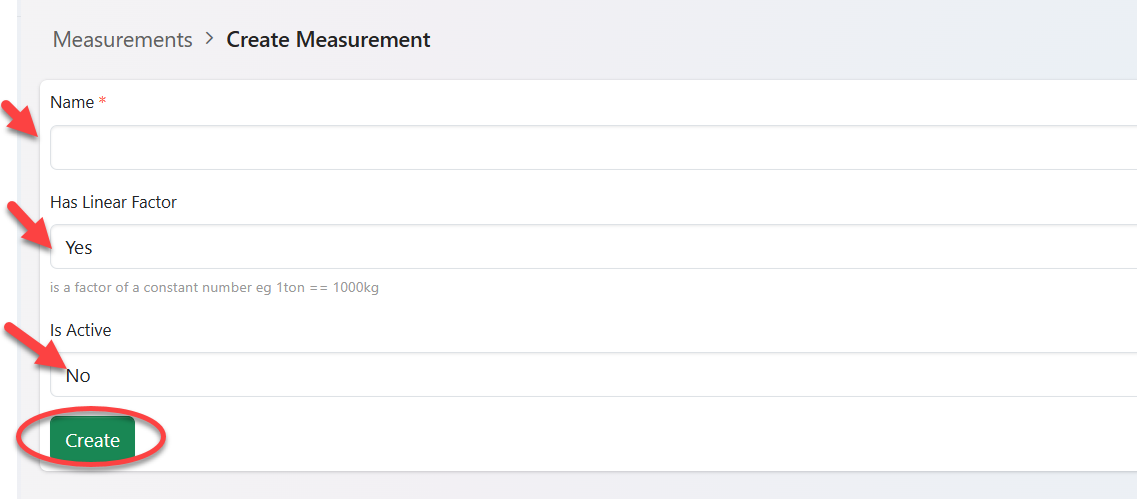
d) Fill in the required details and click "Create" to save.
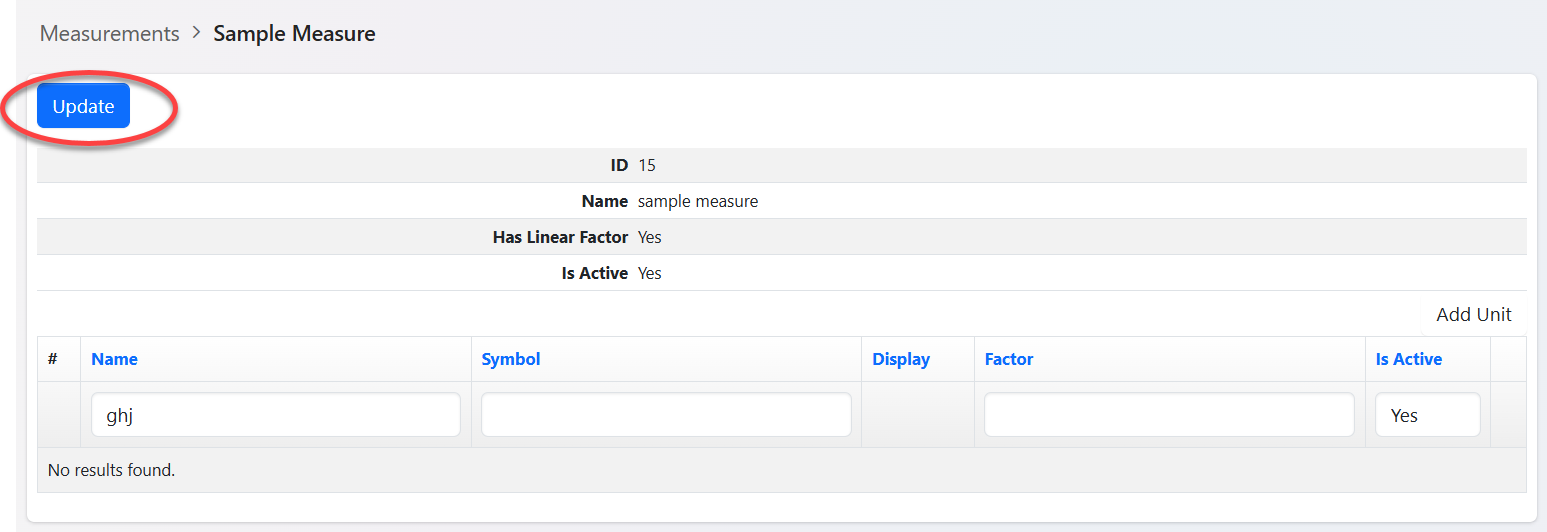
e)For Updating measures, Open the measure you want to update from the list of measures. Then click "Update".
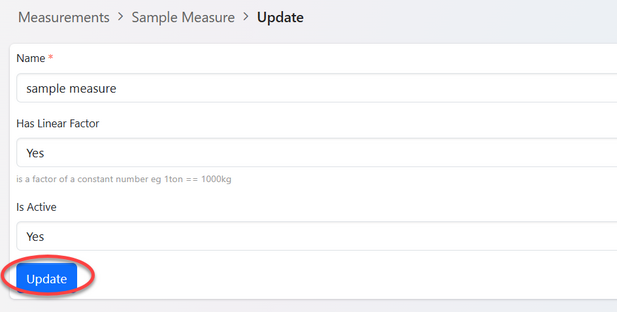
f) Edit the details as intended and click "Update" to save.
2.6 Options ( Requirement's Categories)
a) Accessing options
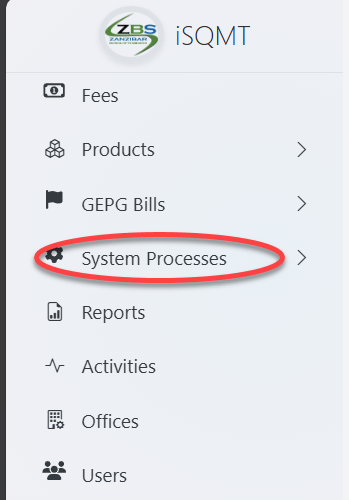
From the list of menus at left select "System Processes" shown on the figure 2.5 (a) below.
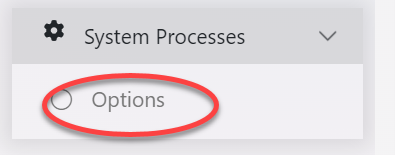
b) From the list of options of System processes click "Options" as shown on the figure 2.6 (b) below.
c) User will be landed on the page containing list of options. On option number 4. "Standard Requirement Category" Click on "Values" as pointed on figure 2.6 (c) below.

d) Click on "Create" as shown on the figure 2.6 (d) below to create values for standard requirement category.

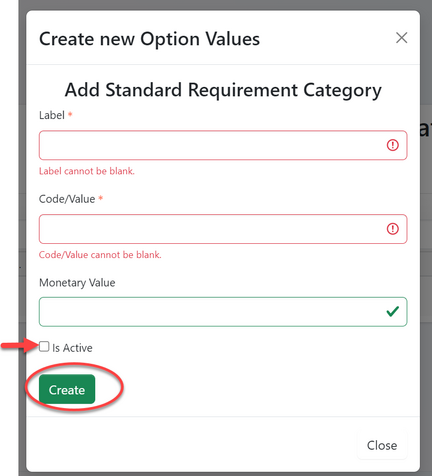
e) Fill the required details as shown on the figure 2.6 (e) below, then tick the box on "Is Active" to make a value active.
f) Maintaining values (see figure 2.6 (f) below.
From the list of values user can;-
1.View - preview the value and its details
2. Edit - Update details of values
3. Delete - Delete value if no longer needed
